User Guide > Scene Setup > Setting Up the Network > Network Navigation and Basic Rules > Composite Layer Properties
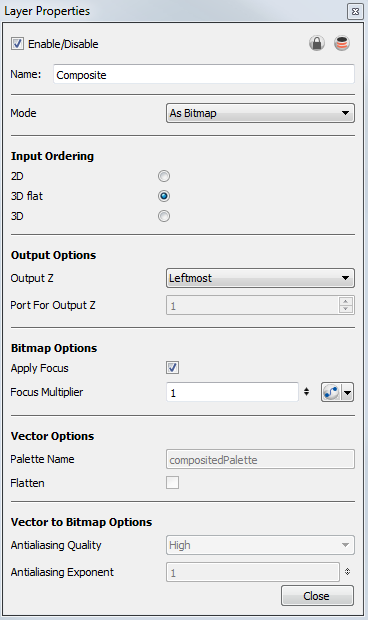
Composite Layer Properties
For more information about the Composite module options in a 3D environment context,
refer to Managing a Network with a 3D Scene Setup.
refer to Managing a Network with a 3D Scene Setup.
Composite Options
| • | As Bitmap: when selected, it composites all of the images into a single, flat bitmap image. The Z value of the final image will be based on the Output Z selection. |
| • | As Vector: when selected, it composites all of the images as a single vector image. The Z value of the final image will be based on the Output Z selection. |
| • |
|
| • | Pass Through: when selected, no compositing operations occur. No image will be merged or flattened. Each individual image will keep its own properties. The compositing operations will happen only in the next Composite module connected below. In this case, the Input Ordering options are ignored. If a Composite set to Pass Through it is the last one in the compositing chain, it will act the same as the As Bitmap option. At that point, the Input Ordering options will be considered. |
Input Ordering Options
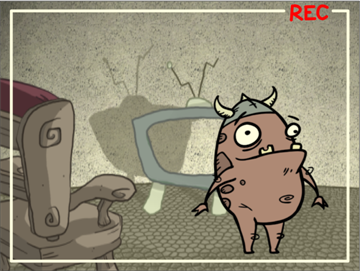
| • | 2D: When selected, elements connected in the module are composited based on their port ordering. The Z-axis (forward-backward) values are ignored. The scaling value will be correct, but the actual position on the Z-axis will be ignored. You can use the 2D composite type to create effects such as a camera recording overlay on your scene. Since you always want this element to be in front regardless of the other elements Z-axis position, you can set the option to 2D. |
| • | 3D Flat: When selected, the Z-axis value of the elements connected in the Composite module are considered, so the visual representation is correct in the Camera view. The output will be a flat image.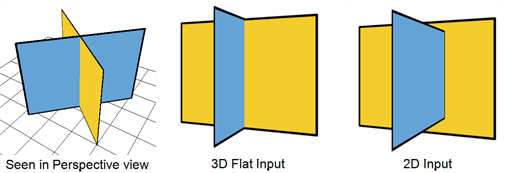 |
| • | 3D: When selected, the Z-axis value of the elements connected in the composite module are considered, so the visual representation is correct in the Camera view. The image will not be flattened. The 3D aspect of the elements will be kept. For example, if you rotated elements on the three axes, the information will be retained and elements composited in lower levels will be able to intersect with the elements coming from a 3D Composite module. The 3D Composite module should only be used in advanced cases. It is better to use a Pass Through composite type than a 3D composite type. This way, all the elements are composited together in the final Composite module. |
Output Options
| • | Output Z: Use this selection to identify which element’s front-back value from the current composition will be applied to the entire composited image in the next operation. If you select Portnumber, identify the appropriate port by its position using the Port For Output Z menu. The port used appears in a bright green the other ports on the Composite module. By default, the leftmost port is displayed in front and the rightmost one is displayed behind. |
Bitmap Options
These options are active when you select the As Bitmap mode.
| • | Apply Focus: Activates the Focus effect for this module in the composite operation. |
| • | Focus Multiplier: The value entered in this field is used as a multiplier for the radius value specified in the Focus or Focus-Multiplier modules. |
Vector Options
These options are active when you select the As Vector mode.
| • | Palette Name: When you render files, you can use this field to set the name of the palette files that Toon Boom Animate Pro will create for them. |
| • | Flatten: When selected, flattens vector drawings into one vector drawing file. Any transparency will be lost in the process. This creates smaller vector files, but might increase the time required to composite the drawings. This can be useful when reusing drawings. Because they will be vector files, you will still be able to apply vector-based transformations and effects. |
Related Topics
| • | Network Navigation and Basic Rules |
| • | Managing a Network with a 3D Scene Setup |