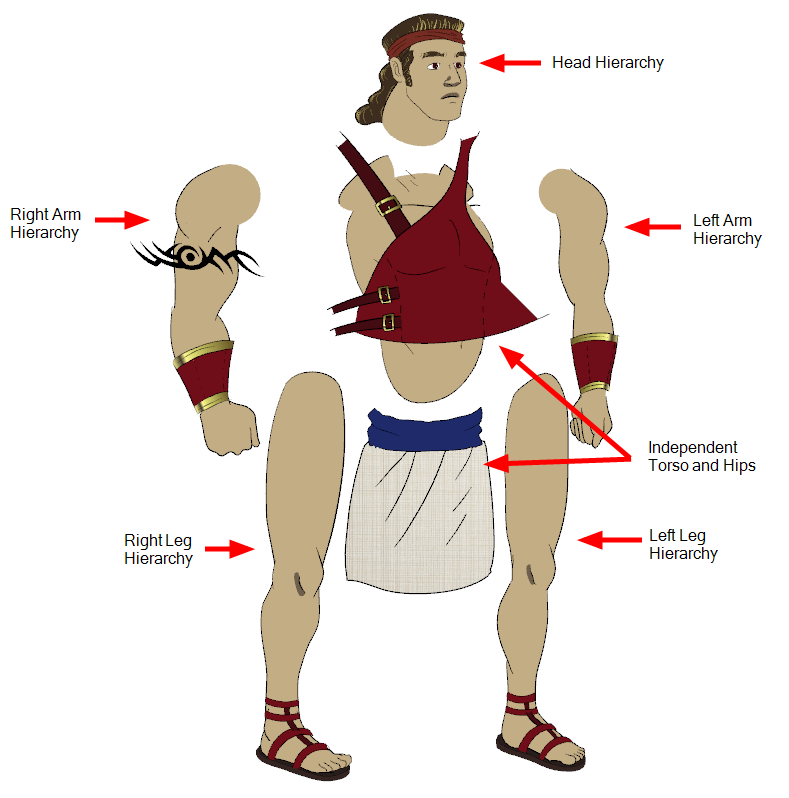
How to Build a Cut-out Character

There are many techniques you can use to break down a puppet. In this section, you will learn about one of the most common and simplest method. For your first character break down, follow these instructions to get an idea of the way Animate Pro works. Once you are used to the software and understand its basic functions and commands, you will be able to create your own techniques to satisfy the needs of your production.
Drawing the Pieces
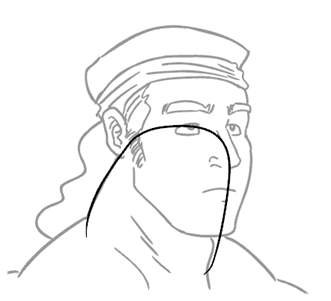
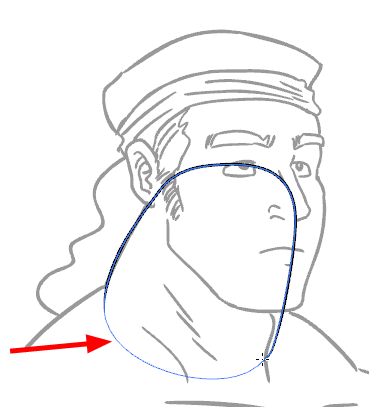
The main break down technique shown here is to trace your model, completing the hidden lines and filling the gaps.
To trace over your model:
| 1. | In the Timeline view, add a new drawing layer for each body part to separate. You can press [Ctrl] + [R] (Windows) or [⌘] + [R] (Mac OS X). |
| 2. | In the Timeline view, select the layer's first cell in which you want to draw the part. |

| 3. | In the Tools toolbar, select the drawing tool needed. |

| 4. | In the Colour view, select the desired colour swatch. |

| 5. | In the Camera or Drawing view, draw the new part. |
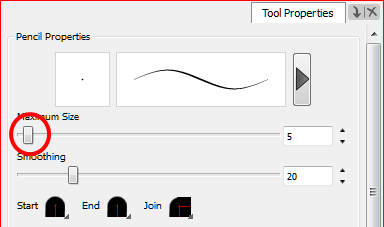
| 6. | In the Tool Properties view, you can set the Pencil tool width to 0 to create an invisible hairline if you want to close a shape without drawing an actual stroke. |
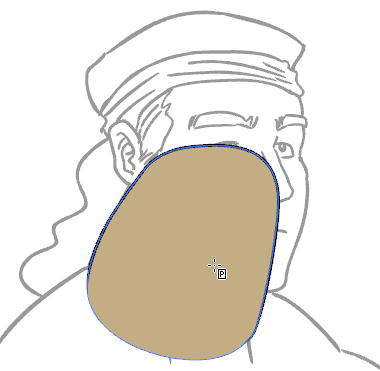
| 7. | In the Tools toolbar, select the Paint or Paint Unpainted tool to colour your drawing. |
| 8. | In the Colour view, select the corresponding colour. |
| 9. | In the Camera or Drawing view, paint your drawing. |
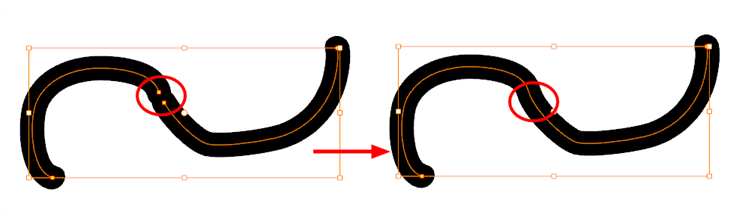
| 10. | Using the Select tool, select your drawing and flatten your lines by clicking on the Flatten |
| 11. | If your lines are composed of several pencil strokes, you might want to combine them into one single smooth pencil line using the Merge Pencil Lines option. Using the Select tool, select the pencil lines to be merged and in the Tool Properties view, click on the Merge Pencil Lines |
| 12. | Repeat the entire process until the breakdown is completed. |
Parenting Layers
Animate Pro lets you extend your rigging techniques beyond normal boundaries and sets new standards. You can create hierarchies without encapsulating pieces inside each other by creating a linked structure between your layers.
You should create a hierarchy on your arms and legs and keep the arms and legs separated from the body. This gives you more animation freedom. This way, when you need to scale or skew the torso, it will not affect the entire body.
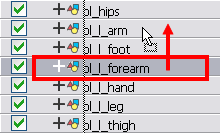
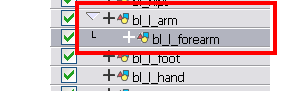
To create a hierarchy in the Timeline view:
| ‣ | Drag the child piece (hand) and drop it ON the parent piece (forearm). Then, you can drag the parent (forearm) piece onto another parent piece (arm). |
| ‣ | See Nudging Parts Backwards and Forwards to reorder parts that should be in front of their parents. |
To create a hierarchy in the Network view:
| ‣ | From the parent part, drag a new cable connection out of the module's output port (bottom) and connect it to the child part module's input port (top). |
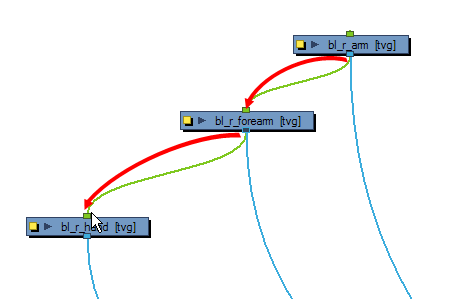
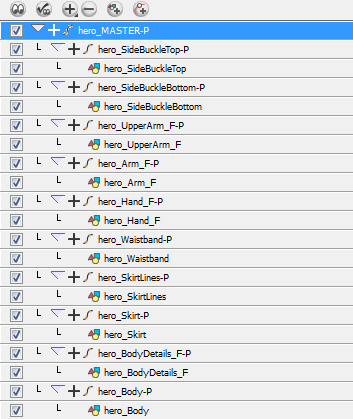
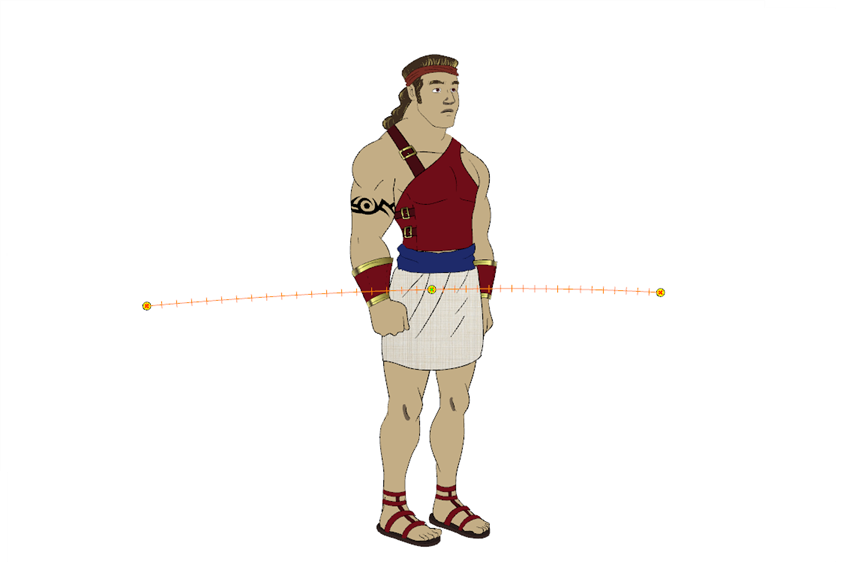
Here is an example of a rig with a simple hierarchy:
Master Peg
When you animate your character, you will probably need to resize and reposition it to fit your scene. When you need to scale down or move your character, it is a good idea to hook (attach) the whole puppet to a trajectory.
Attaching your puppet to a peg will allow you to scale it and reposition it without having to do this to your different parts and pieces. Only one layer will contain the position information, this makes your animation easier to modify and control.
To add a Master peg:
| 1. | In the Timeline view, deselect any selected layers and click on the Add Peg |
| 2. | Name the new peg Master plus the character's name. |
| 3. | In the Timeline view, select all of the layers you want to attach to your new peg. |
| 4. | Drag your selection ON the peg layer to parent all your character's pieces to the peg. |