Camera View
In Toon Boom Animate Pro, you can draw in either the Drawing view or Camera view. Although the two views are similar, when it comes to drawing, there are some differences.
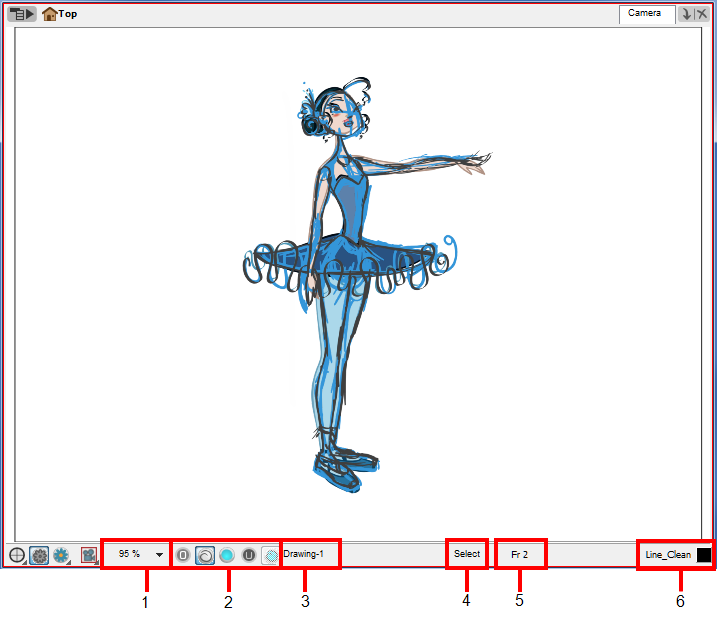
| 1. | Zoom Drop-down Menu |
| 2. | Overlay, Line Art, Colour Art, Underlay and Preview Mode |
| 3. | Drawing Name |
| 4. | Tool Name |
| 5. | Current Frame |
| 6. | Current Colour |
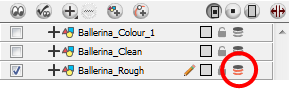
In the Camera view, you can use the Onion Skin feature to display previous and next drawings. By default, all the enabled drawing layers in the selected frame are displayed, letting you edit them together. This way, you can use the Select ![]() tool to select many objects from individual layers at once.
tool to select many objects from individual layers at once.
To enable the onion skin from the Timeline view:
| ‣ | In the Timeline view, click the Onion Skin |
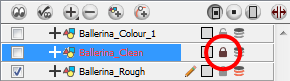
By locking a layer, you can prevent yourself from being able to select it in the Camera view, while keeping the drawing visible as a reference and disabling the layers you don’t want to display in the Camera view.
To lock a drawing layer:
| ‣ | In the Timeline view, click the Lock |
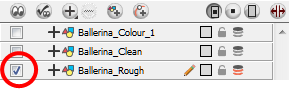
To hide a drawing layer:
| 1. | In the Timeline view, click the check box corresponding to the layer you want to hide. |
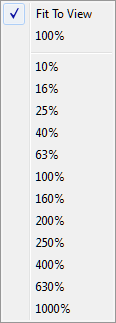
Zoom Drop-down Menu
The Zoom menu lets you enlarge or reduce the Camera or Drawing view display.
Overlay, Line Art, Colour Art, Underlay and Preview Mode
| • |
|
| • |
|
| • |
|
| • |
|
| • |
|
You can display the Preview mode drop-down menu and select the Underlay and Overlay layers if you want to show all four of them at the same time.

To activate the Preview Mode button in the Camera view bottom toolbar, you must enable the Current Drawing on Top option.
To enable the Current Drawing On Top option:
| 1. | In the Camera bottom toolbar, click on the Camera Option button. |
| 2. | In the drop-down menu, enable the Current Drawing on Top option. |
Drawing Name
The Drawing Name field displays the name of the selected drawing, as well as the layer containing it. If the cell does not contain any drawing, an Empty Cell text is shown in the field.
Tool Name
The Tool Name field displays the name of the selected tool. If you override a tool using an overriding keyboard shortcut, the tool’s name will be highlighted in red letters—see Override Tool to learn how to temporarily override a tool.
Current Frame
This field displays the current displayed frame of the animation.
Current Colour
This field displays the current colour name and its colour swatch. You can open the Colour Picker by double-clicking the colour swatch—see Colour.
Related Topics
| • | Show Current Drawing on Top |
| • | Drawing View |