Cleaning Scanned Drawings
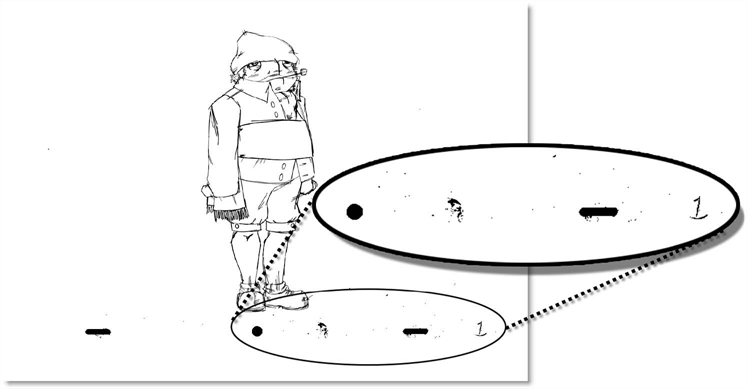
As paper drawings are passed through a scanner they may pick up dirt, hairs or dust. These foreign bodies register as part of the drawing and will appear as unwanted marks on the scanned drawing. These marks need to be cleaned. Toon Boom Animate Pro provides different features to remove them quickly.
Each of the removal features are described in the following sections:
Remove Dirt
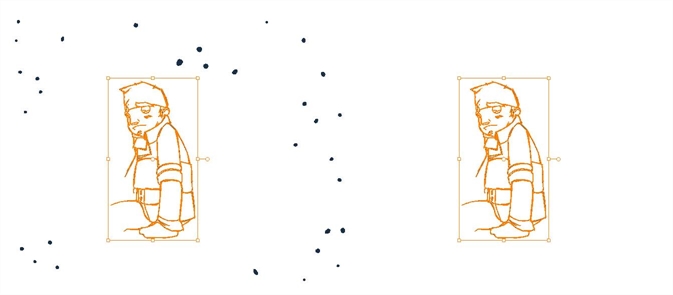
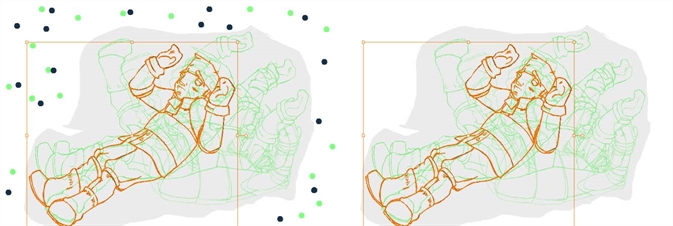
The Remove Dirt tool selects small dots and hairs on the drawing. Increasing the Remove Dirt level selects larger dots for removal, but be careful not to lose small details like pupils and nostrils. Once the removal level is chosen, you can apply it to either the current drawing or to the whole animation sequence.
This is a fast way to get rid of most dirt and dust.
To use the Remove Dirt tool:
|
1.
|
In the Timeline or Xsheet view, select the drawing to clean. |
|
2.
|
In the top menu, select Drawing > Clean Up > Remove Dirt or press [Shift] + [D].
|
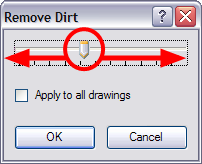
The Remove Dirt dialog box opens.
|
3.
|
Increase the Remove Dirt value by moving the slider to the right. As you increase the tolerance, larger speckles will become highlighted to indicate that they have been included in the selection. |
|
4.
|
Enable the Apply to All Drawings option if you want to apply the operation to all the drawings in the layer. |
|
5.
|
Click on the OK button. |
Remove Art Outside Selection
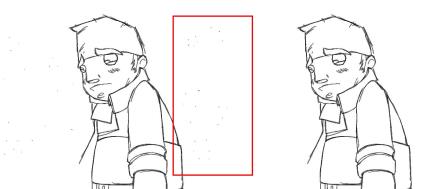
The Remove Art Outside Selection option is used to delete any art existing outside a selection. If you have an accumulation in your Colour Art, it can result in large output files, especially if you work in high definition resolution. Simultaneously apply this operation to all of your drawings in the layer by using the Remove Art Outside Selection On All Drawings command.
To clean dirt with the Remove Art Outside Selection:
|
1.
|
In the Tools toolbar, select the Select  tool or press [Alt] + [S]. tool or press [Alt] + [S]. |
|
2.
|
If you want to apply the action to your entire animation, enable the Permanent Selection  option in the Tool Properties view. option in the Tool Properties view. |
|
3.
|
In the Camera or Drawing view, draw a selection around the animation. (Make the area large enough to include the whole animation sequence). |
|
4.
|
In the top menu, select Drawing > Clean up > Remove Art Outside Selection option to delete artwork outside your selection on one single drawing.
|
|
‣
|
To apply the action to all the drawings contained in the layer, select the Drawing > Clean up > Remove Art Outside Selection on All Drawings option from the top menu.
|
Remove Art Inside Selection
The Remove Art Inside Selection option is used to delete any art inside a selection.
We recommend that you clean your Colour Art level as well. If you have an accumulation of strokes (almost invisible, accidental or leftover marks) in your Colour Art, it can result in large output files, especially if you work in high definition resolutions.
You can simultaneously apply this operation to all of your drawings in the layer by using the Remove Art Inside Selection On All Drawings command.
To clean dirt with Remove Art Inside Selection:
|
1.
|
In the Tools toolbar, select the Select tool or press [Alt] + [S]. |
|
2.
|
If you want to apply the action to your entire animation, in the Tool Properties view, enable the Permanent Selection option in the Tool Properties view. |
|
3.
|
In the Camera or Drawing view, draw a selection around the animation. (Make sure to make the area large enough to include all the zones to be cleaned up on all drawings). |
|
4.
|
In the top menu, select Drawing > Clean up > Remove Art Inside Selection option to delete artwork inside your selection on one single drawing.
|
|
‣
|
To apply the action on all your drawings contained in the layer, in the top menu, select Drawing > Clean up > Remove Art Inside Selection on All Drawings option to delete artwork inside your selection on all the drawings.
|
Remove Hair
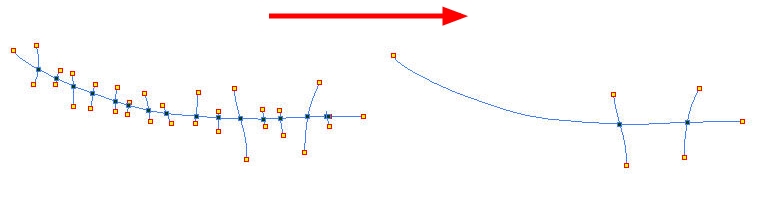
The Remove Hair command is used to remove any small strokes created in the Colour Art from very thick lines or filled zones.
Increasing the Remove Hair level value will select larger strokes for removal from the drawing. You can also select the Apply to All Drawings option to remove them on all drawings.
To use the Remove Hair tool:
|
1.
|
In the Timeline or Xsheet view, select the drawing containing the drawing to clean. |
|
2.
|
In the top menu, select View > Show > Show Strokes to display the invisible lines or press [K]. |
|
3.
|
In the top menu, select Drawing > Clean Up > Remove Hair.
|
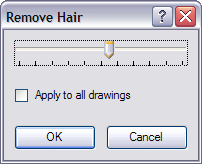
The Remove Hair dialog box opens.
|
4.
|
Move the Hair Selection slider to the right to increase the number and length of hairs to be selected. |
|
5.
|
Enable the Apply to All Drawings option if you want to apply the operation to all the drawings in the layer. |
|
6.
|
Click on the OK button. |
Related Topics