Setting the Pivots
The last step before storing the character in the library is to set the pivots for the different parts.
Animate Pro has three types of pivots:
| • | Peg Pivot
The Peg pivot is a permanent pivot that is applied to the entire drawing layer. If you modify its position, it will be changed for the whole layer and will therefore modify the animation, scale and rotation interpolation. the Peg pivot is set using either the Rotate, Translate or Scale tool. The Transform tool will only move that pivot temporarily for positioning purpose, but the animation interpolation will be done from the original Peg pivot's position. |
| • | Drawing Pivot
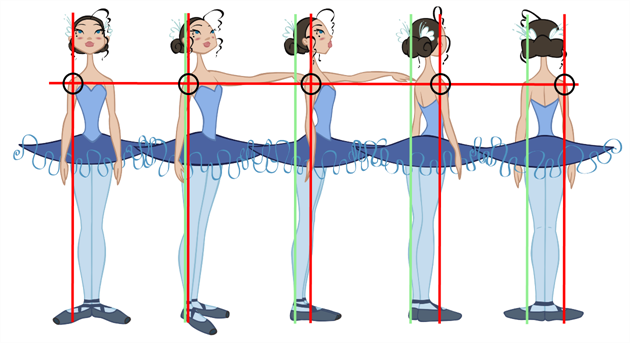
The Drawing pivot is contained within each drawing. In one layer, each drawing can have its own pivot. If you have many different views of a character within one layer, the pivot can be different and the animation will adjust to the pivot. The Drawing pivot can also be referred to as embedded pivot. If you are not mixing different views within the same layers or are using pegs to animate your layers, it is recommended to use the Peg pivot. See Drawing Pivot Tool. |
| • | Symbol Pivot
The Symbol pivot is similar to the Drawing pivot. Each symbol cell can have its own pivot and act the same as the Drawing pivot. The Symbol pivot can also be referred to as embedded pivot. Inside a symbol, each drawing can have its own pivot. If you are not mixing different views within the same layers or are using pegs to animate your layers, it is recommended to use the Peg pivot. See Setting Different Pivots for a Puppet Using Symbols. |
For a simple character rig, it is recommended to set the Peg pivot (even on drawing layers) using the Rotate tool.
You can set a different pivot for each one of your drawings. For example, if you have a series of drawings from different views, they are not likely to rotate from the same location. In that case, you can set a different pivot for these drawings by using the Drawing Pivot tool.
This topics is divided as follows:
| • | Setting the Pivots Using the Rotate Tool |
| • | Setting the Master Peg Pivot |
Setting the Pivots Using the Rotate Tool
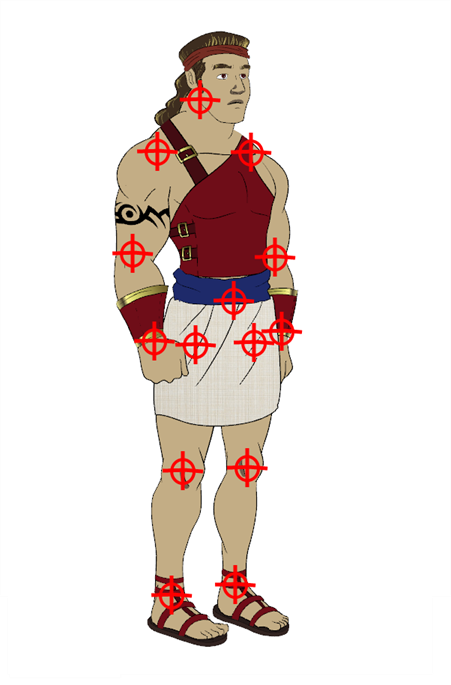
If you want your puppet's pieces to rotate correctly, you need to set the pivot points right in the middle of an articulation such as an elbow or a knee.
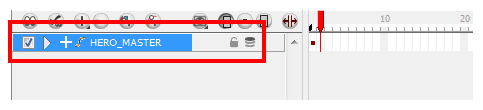
Do the following steps for each layer in the Timeline view.
To set the pivots:
| 1. | In the top menu, select Windows > Toolbars > Advanced Animation to display the Advanced Animation toolbar. |
| 2. | In the Advanced Animation toolbar, select the Rotate |
| 3. | In the Camera or Timeline view, select the layer you want to set the pivot for. In the Camera view, you can also hold down [Ctrl] (Windows) or [⌘] (Mac OS X) and click on the piece you want to set the pivot for. |
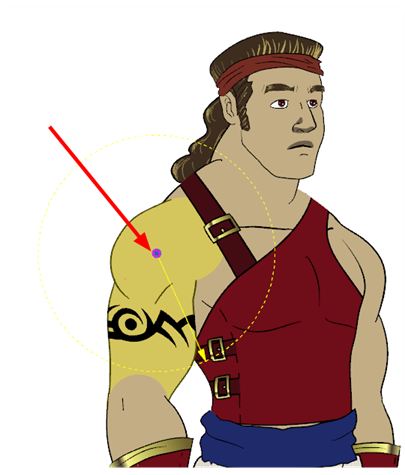
| 4. | In the Camera view, drag the blue pivot where you want to the pivot to be. You can also drag the pivot marker to the desired location. |
| 5. | Repeat the previous steps for all the pieces, including the eyes, mouth and nose. |
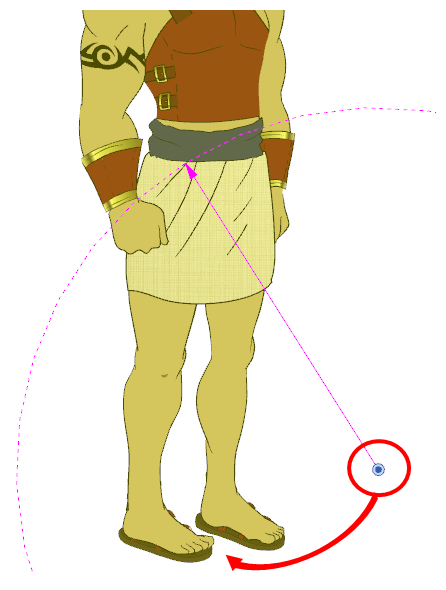
Setting the Master Peg Pivot
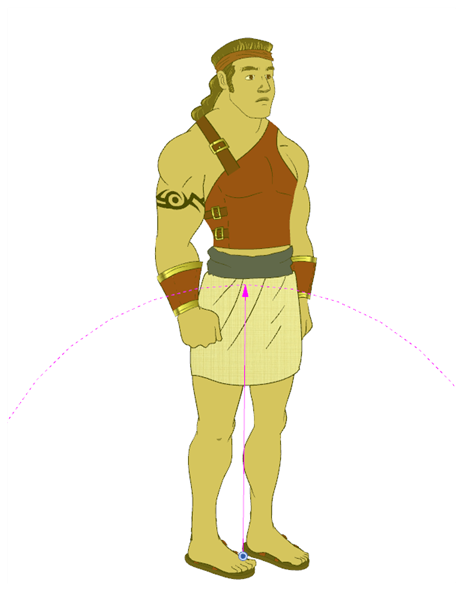
By default, your master peg pivot is placed at the centre of the Camera view, which generally equates to your character's hips. A good way to set your peg's pivot is to move it between your character's feet.
To permanently move a peg pivot, use the Rotate ![]() or Scale
or Scale ![]() tool. While animating, you are easily able to temporarily move this pivot to another location with the Transform tool.
tool. While animating, you are easily able to temporarily move this pivot to another location with the Transform tool.
The Transform tool is designed to move the pivot temporarily during the animation process. It also permits you to select multiple pegs and apply a common temporary pivot.
To set the peg pivot:
| 1. | In the Advanced Animation toolbar, select the Rotate |
| 2. | In the Timeline view, select the master peg layer. |
| 3. | In the Camera view, click on the peg pivot and move it to its new location. |