How to Create a Multiplane
To construct a multiplane, you must imagine what a real environment is like. Take a look at your background picture and imagine a camera moving across the space. You will notice that objects in the picture would move at different speeds depending on where they are in relation to the camera lens.
Building a multiplane requires an understanding of the scene's background as well as the positioning of the elements on different layers.
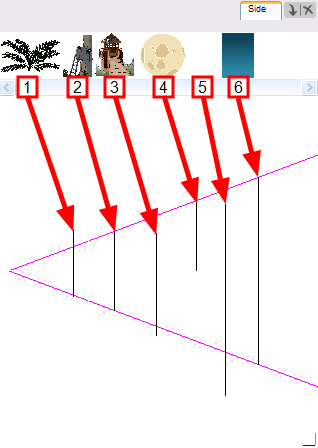
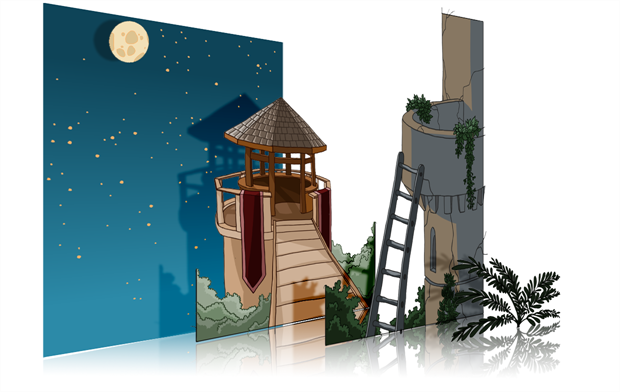
For example, in this background, the main objects to be separated are:
| 1. | Fern |
| 2. | Front tower |
| 3. | Second tower |
| 4. | Moon |
| 5. | Stars |
| 6. | Sky |
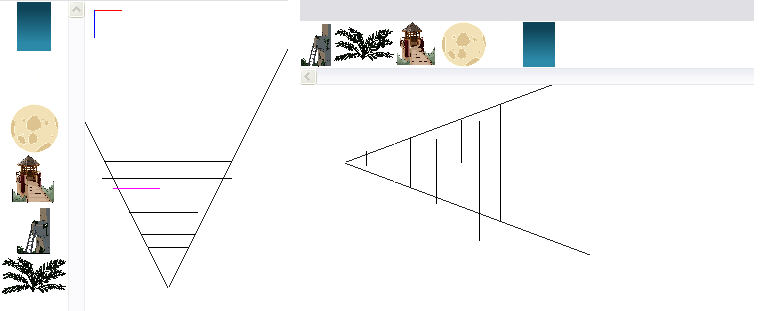
Now is the time to distribute the layers composing your multiplane along the Z-axis, maintaining their distance. You can position your layers on the Z-axis in the Side and Top view.
Positioning your element toward the camera will make your element bigger. Using the Maintain Size![]() tool, you will be able to drag your element toward the camera while keeping the same size aspect in the Camera view. This tool is available in the Advanced Animation toolbar.
tool, you will be able to drag your element toward the camera while keeping the same size aspect in the Camera view. This tool is available in the Advanced Animation toolbar.
Positioning Elements in the Top and Side Views
To position your element in the Top and Side views:
| 1. | In the Advanced Animation toolbar, click the Maintain Size |
| 2. | In the Side view, select one of the layers in the thumbnails section of the Top or Side view. You can also select your layer from the Timeline view. |
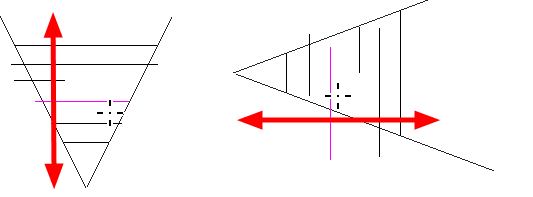
The selected layer will be highlighted in the camera cone.
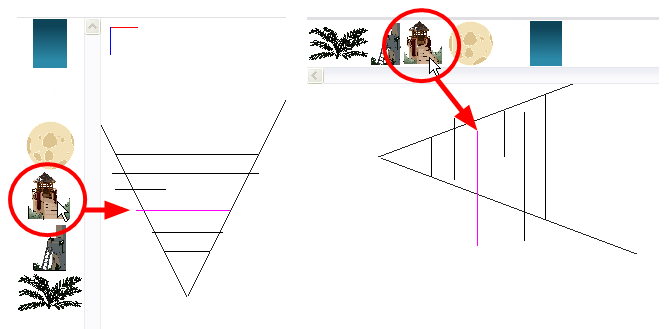
| 3. | Click and drag the layer to the correct depth position in the camera cone. Your element aspect will remain the same in the Camera view. |
| 4. | In the Tools toolbar, click the Transform |
| ‣ | If you choose the Transform |
The selected layer will be highlighted in the camera cone.
| 5. | In the Top view, drag the element sideways to position horizontally. You can press and hold [Shift] while dragging the element to make sure it only moves along the X-axis. |
| 6. | In the Side view, drag the selected element up or down to position it vertically. You can press and hold [Shift] while dragging the element to make sure it only moves along the Y-axis. |