How to Use Bone Deform
This chapter is divided as follows:
Rigging
This topic explains how you can quickly use the Rigging tool to create a basic Bone and Articulation rig. Before you can create a Basic Deformation rig, you must set up the performance preferences which are necessary to allow the system to process the deformation effect efficiently.
To create a basic deformation rig:
|
1.
|
You must set up the Performance Preferences. See note above. After you have done this continue to step 2. |
|
2.
|
In the Preferences panel, under the Deformation tab, disable the Automatically Create New Deformer Structure for each Pose/Drawing. |
Disabling this preference will result in a simpler Network rigging structure.
|
3.
|
From the Deformation toolbar, select the Rigging  tool. tool. |
|
4.
|
In the Network or Timeline view, select the element that you want to add a deformation to. |
|
5.
|
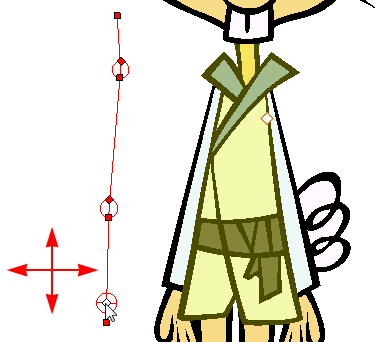
In the Camera view, you can start to create a Bone rig. |
|
‣
|
Place the cursor at the far end of your element, click once and release. For example, on the shoulder. |
|
‣
|
Click again at the location where you want your first bone to finish and your second bone to start. An articulation will automatically be inserted between each bones you create. |

|
‣
|
Repeat this until you are finished creating the Bone chain. |
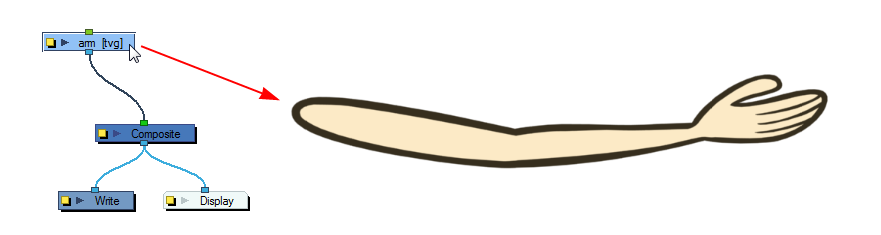
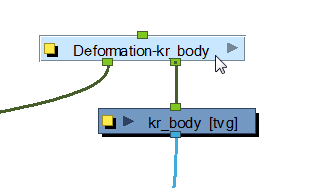
This will automatically create a Deformation Group connected to the top node of the selected element. This group includes all the necessary deformation modules as well as the Bones and Articulations you created.
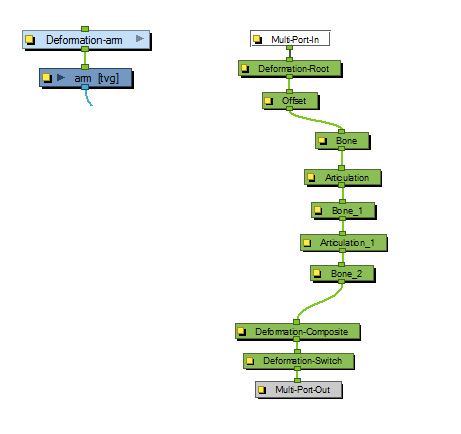
Note that this Network structure is the result of a simple rigging which was a created with the Create Posed Deformer in Create Deformation Above/Under preference disabled.
Optimizing the Deformation Chain
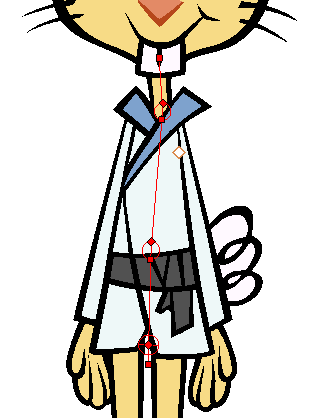
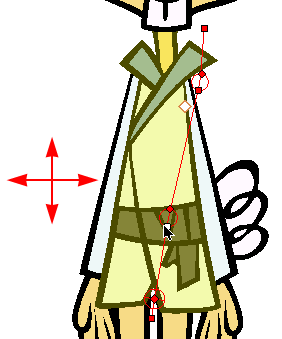
Once you have a deformation chain created, you can optimize its positioning to fit the element it will deform. This task is done in the Setup Mode  . The Setup Mode lets you set the resting position of the deformers to make sure it is at the optimal position.
To setup a bone and articulation deformation chain:
|
1.
|
In the Network view, select the Deformation Group you want to setup. |
|
2.
|
In the Deformation toolbar, click on the Show Selected Deformers and Hide All Others button to display the deformer controls in the Camera view. This also hides all the deformer controls that were displayed. button to display the deformer controls in the Camera view. This also hides all the deformer controls that were displayed. |
|
3.
|
In the Deformation toolbar, enable the Setup Mode . |
The chain will turn from light green to red. If the chain is displayed in green, it means the Setup Mode is disabled. Click the button once more to enable it.
|
4.
|
In the Tools toolbar, select the Transform  tool. tool. |
|
5.
|
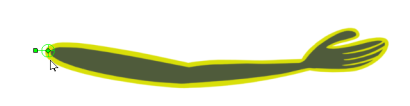
In the Camera view, setup the deformation chain. |
|
•
|
Use the Pivot rotation handle to change the angle of the chain. |
|
•
|
Use the Pivot centre control point to reposition the entire chain. |
|
•
|
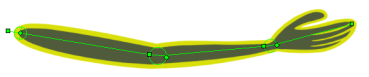
Use the Articulation control point, the square at the bottom, to reposition the articulation. This will elongate, shorten or change the direction of the first bone. |
|
•
|
Use the Articulation, top diamond-shaped, control point to change the size of the articulation. For quality purposes it is recommended to have an articulation which fits the diameter of the part it controls. |

|
•
|
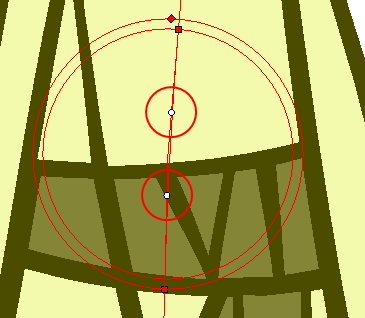
In the Deformation toolbar, if desired, you can disable the Show Simplified Manipulators option to display all the manipulators. You can choose to work with the simplified deformers, but if you need more fine-tune control you can also access the full deformers. You will notice two extra square control points appearing in the middle of the articulation circle. Drag these up and down to modify the steepness (bias) of the articulation. |
|
6.
|
Repeat until all the articulations and bones of the chain are correctly aligned to the element it is linked to. |
|
7.
|
With the Deformation Group still selected, click on the Copy Resting Position to Current  button. This will make sure to set the current resting position as the current frame one. button. This will make sure to set the current resting position as the current frame one. |
|
8.
|
In the Deformation toolbar, disable the Setup Mode and test your modifications using the Transform tool. |
For optimal results, make sure the size of the articulation is about the same size as the drawing.
Display the Deformers' Controls
To be able to manipulate the deformer outside of the Setup Mode, you must enable the Deformation Controls.
If you have just created the bone rig, the controls will still be showing. However, whenever you close your project the deformers are turned off, so when you reopen the project you can show the ones you need while you're animating.
You can also select all the modules from your Network view and select View > Show > Controls from the top menu.
To display the selected deformation controls:
|
1.
|
In the Network view, select the Deformation Group containing the deformation chain you want to display. |
|
2.
|
In the Camera View toolbar, click on the Show Control  button. You can also select View > Show > Control from the top menu or press [Shift] + [F11]. button. You can also select View > Show > Control from the top menu or press [Shift] + [F11]. |
To display the selected deformation controls and hide all the others:
|
1.
|
In the Network view, select the Deformation Group containing the deformation chain you want to display. |
|
2.
|
In the Deformation toolbar, click on the Show Selected Deformers and Hide All Others button. |
The selected deformation controls will appear in the Camera view and all the others will be hidden.
To display all the deformer controls at the same time:
|
1.
|
In the Top level of the Network view,select Edit > Select All from the top menu to select all the modules or press [Ctrl] + [A] (Windows) or [⌘] + [A] (Mac OS X). |
|
2.
|
In the Camera View toolbar, select Show Control or press [Shift] + [F11]. This will display all the deformation controls in your scene. |
To hide the deformer controls:
|
‣
|
In the Camera View toolbar, click on the Hide All Controls  button. You can also select View > Hide All Controls from the top menu or press [Shift] + [C]. button. You can also select View > Hide All Controls from the top menu or press [Shift] + [C]. |
Animation
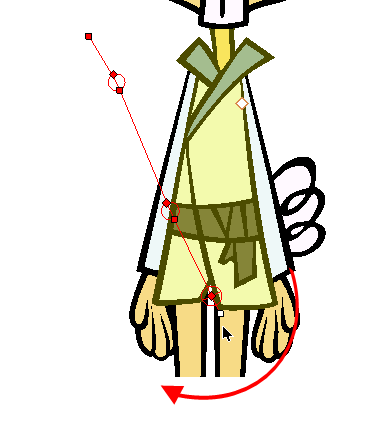
The Bone deformer operates the same as a human limb does and is composed of a pivot, as a starting point, and bones and articulations.
To manipulate a Bone and Articulation deformer:
|
1.
|
In the Deformation toolbar, disable Setup Mode . When Setup Mode is disabled, the default colour of the deformation control is light green. |
If you leave Setup Mode on, you will modify the resting position of the deformer chain, instead of animating it.
If you had made changes to your rig in Setup mode, you can select the deform group and click on Copy Resting Position to Current button. This resets the rig outside Setup mode to match what the rig looks like in Setup mode.
|
2.
|
In the Tools toolbar, if you want to create keyframes, enable the Animate  mode. mode. |
|
3.
|
In the Tools toolbar, select the Transform tool. |
|
4.
|
In the Top level of the Network view, press [Ctrl] + [A] (Windows) or [⌘] + [A] (Mac OS X) to select all the modules, you can also select Edit > Select All from the top menu. |
|
5.
|
In the Camera View toolbar, select Show Control or press [Shift] + [F11]. This will display all the deformation controls in your scene.
Refer to Displaying the Deformation Controls to learn other control display option. |
|
‣
|
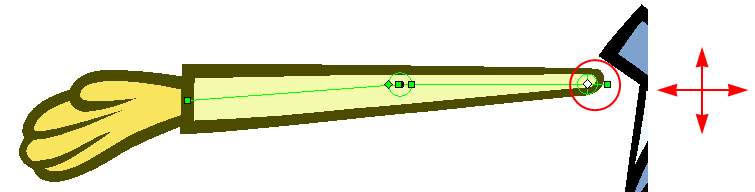
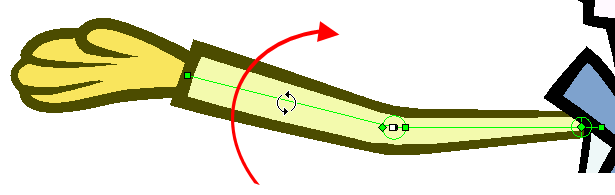
Click on the centre of the Deformation-Root pivot and drag it around to reposition the entire limb. |
|
‣
|
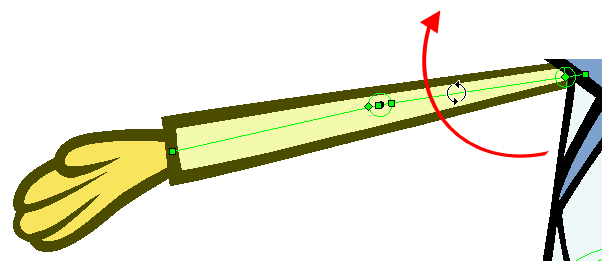
Use the first bone or the pivot square handle to rotate the entire limb. |
|
‣
|
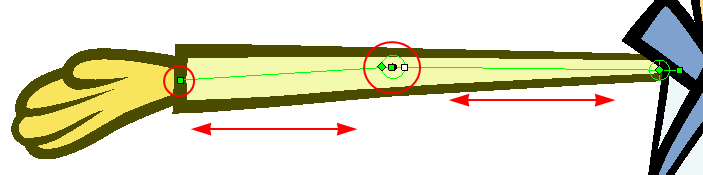
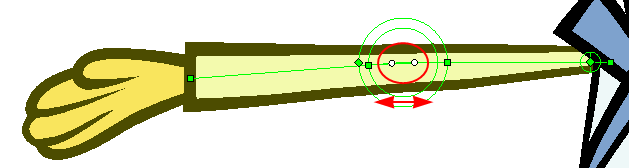
Use the square control point located at the extremity of a bone to stretch or shorten its length. |
|
‣
|
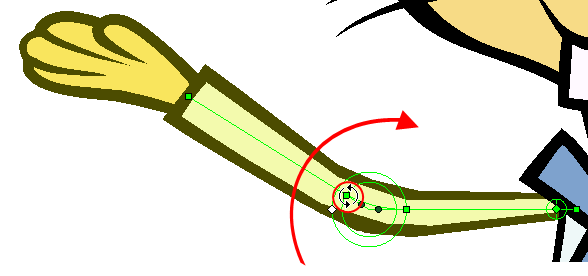
Use a bone next to an articulation to rotate it. You can also hold down the [Alt] key, this will lock all the controls and movement and only allow the rotation of the articulation. |
|
‣
|
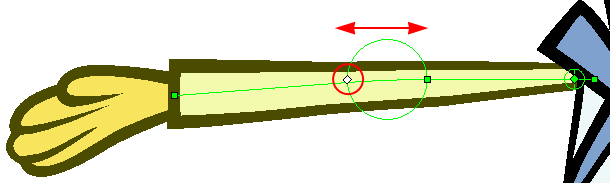
Click and drag the articulation’s diamond-shaped control point to modify its radius. |
|
7.
|
If needed, in the Deformation toolbar, disable the Show Simplified Manipulators option to display the advanced controls. |
|
‣
|
Click and drag the round articulation control points to adjust the steepness (bias) of the articulation. |
|
‣
|
Use the square articulation control point to rotate it. |
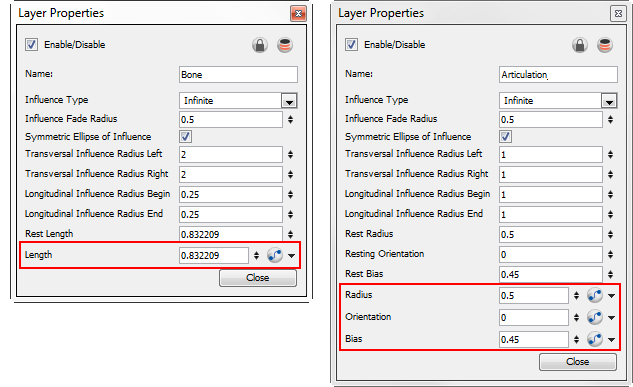
You can also manipulate the deformer by typing values directly in the Layer Properties of the deformation effect modules.