How to Add Effects to your Scene
Once your animation is completed, you can add effects such as blurs and glows to make your project look even better! Animate Pro provides you with a series of essential effects that you can add to your layers.
This chapter is divided as follows:
About Effects
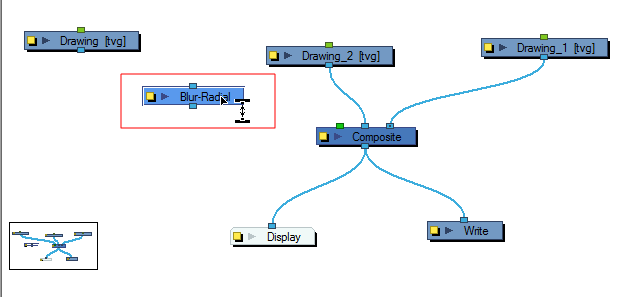
An effect always needs a drawing connection and sometime a matte or shape connection. A matte provides drawing information that will be used to determine the area where the effect will be applied on the drawing. The details and colours within the matte drawing do not matter, as the system will only use the shape and transparencies in it. A matte is also known as mask.
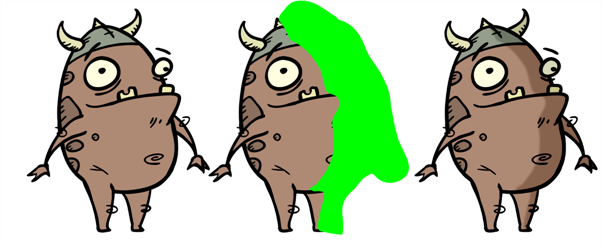
The matte principle can be demonstrated on the Tone effect.
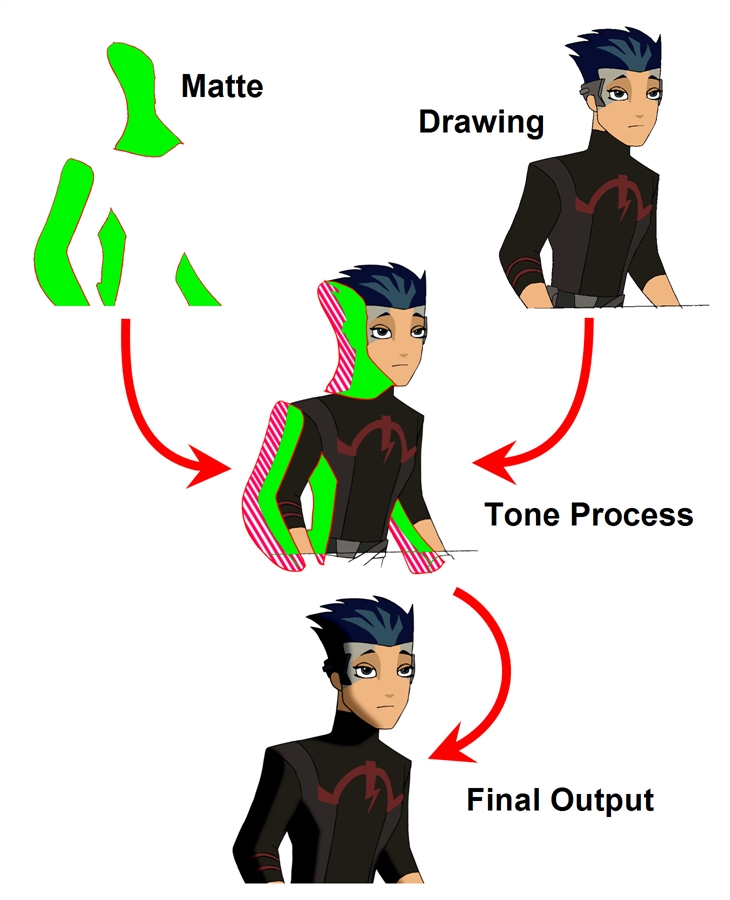
The drawing layer is connected in the right port of the effect and the matte (mask) in the left port. The Tone effect then applies darker colours where the matte overlaps the image, blurs the tone edge, and finally clips out the extra tone zone outside of the drawing before outputting a final drawing with a tone.
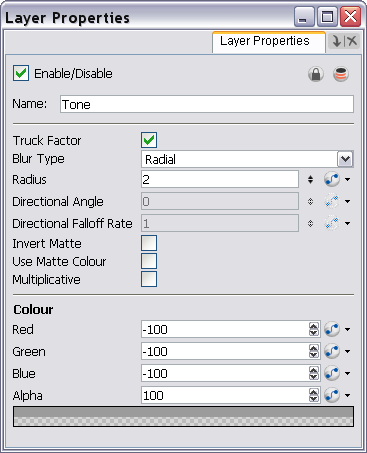
The tone's parameters can be adjusted in the Layer Properties view and any of them can be linked to a function column to be animated over time. This means that all of the effects can be customized.
Adding Effects
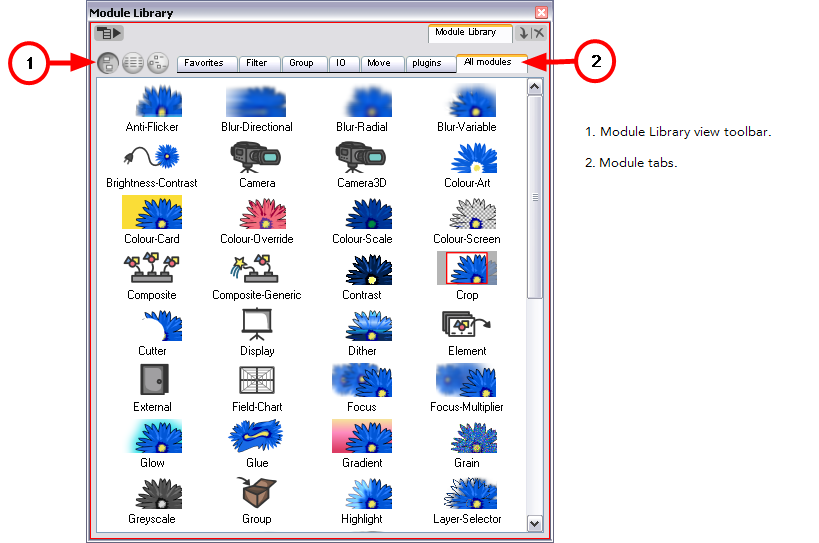
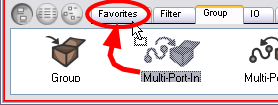
If you need to add new effects and other modules to the Network view, you will need to get them from the Module Library.
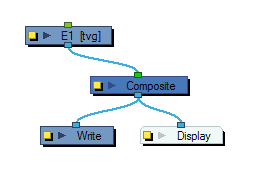
When you create a new project in Animate Pro, the default network that appears in the Network view looks similar to the diagram below.
Module Library View Toolbar
In the Module Library View toolbar, you can switch the display mode of the effect icons:
|
•
|
 View as Icons View as Icons |
|
•
|
 View as List View as List |
|
•
|
 View as Icons with Names View as Icons with Names |
Module Tabs
The Module Library is conveniently broken up into several sections or tabs:
Includes the most common modules.
|
•
|
To add extra modules to the Favorites tab, select any module from any other section and drag it onto the Favorites tab. |
Includes effect modules, such as blurs.
Includes modules used for grouping, like Group modules and Multi-Port modules.
Includes Display, Drawing, Write and Note modules.
Includes modules used to change elements over time, like Peg modules, as well as certain transformations.
Includes plug-in modules.
Lists all of the modules available.
To bring a module into the Network view, drag it from the Module Library and drop it into the Network view. Once in the Network view, you can click on the input or output port of a module and drag out a cable. You can then connect this cable to the output port or input port of another module.
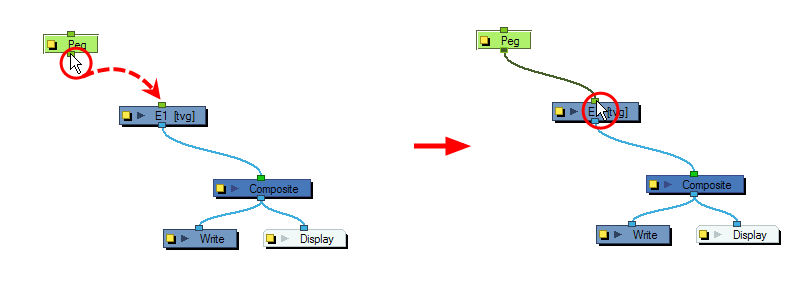
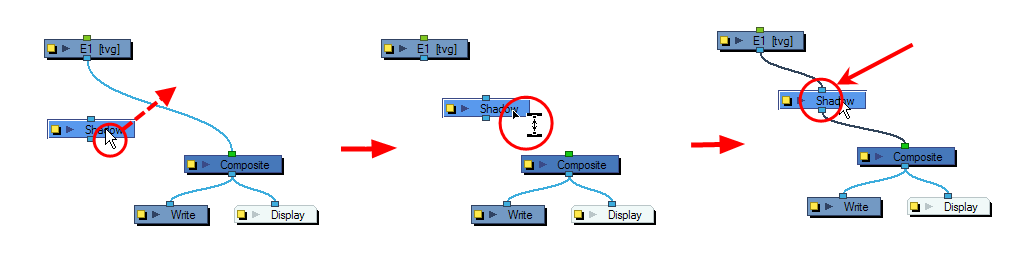
If you want to connect a module between two connected modules, you can use the [Alt] key as you drag the new module over the existing cable connection. Using the same [Alt] key, you can also disconnect a module.
If you want to remove a module, select and press [Delete] to remove it from the Network view.
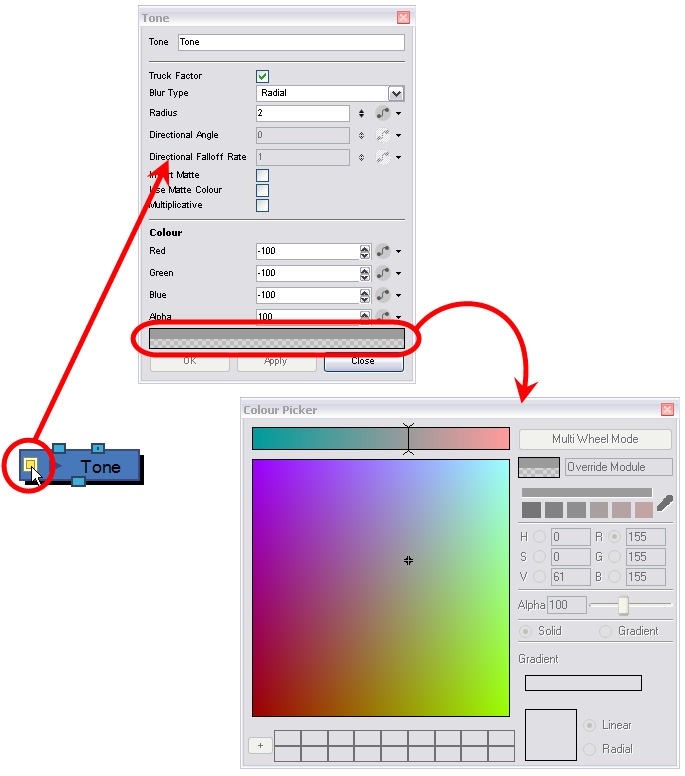
Tone Effect
Use a Tone effect to add a dark-coloured region to your drawing and simulate the shaded area away from a light source. To produce the tone effect, create a drawing to control where the tone will appear. The Tone effect uses a matte to determine the shape and position of the tone on your drawing and can be blurred at the edges to create a softer effect.
For information on all effects, check out the
Online Help. The Tone Effect is shown here as an example.

Use the Tone editor to control the type and amount of blur, as well as the colour of the tone.
|
•
|
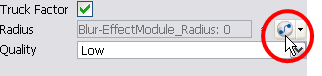
Truck Factor: Activated by default, this option readjusts the blur when the elements undergo a change of depth or scale. When this option is disabled, the effect's values will remain unchanged regardless of depth or scale changes. It is recommended that this option be disabled when multiple drawings are composited and attached this effect. |
|
•
|
Blur Type (Directional or Radial): |
|
•
|
If Directional is selected, Animate Pro will blur the matte in the direction you select. |
|
•
|
If Radial is selected, Animate Pro will blur the edges of the matte evenly around points that make up the edge of the matte. |
|
•
|
Radius: Enter a value for the size of the blur. The larger the value, the greater the blur effect. The blur radius is affected by the drawing scale and camera position. |
|
•
|
Directional Angle: If you select a Directional Blur Type, you can select the direction of the blur by entering a value from 0 to 360 in this field. |
|
•
|
0: Blurs the image to the west. |
|
•
|
90: Blurs the image to the south. |
|
•
|
180: Blurs the image to the east. |
|
•
|
270: Blurs the image to the north. |
|
•
|
Directional Fall-off Rate: The distance where the blur fades from the edge of the image. Select a value between 0 and 1. |
|
•
|
A fall-off rate of 0 causes the blur to fade out slowly, distributing the blur evenly from the edge of the character to the farthest edge of the blur. |
|
•
|
A fall-off rate of 1 causes the blur to fade out quickly so that the blur is heaviest closer to the edge of the image. |
|
•
|
Invert Matte: Activate this option to invert the matte used to create the tone. |
|
•
|
Use Matte Colour: Uses the matte shape colour to create the tone. |
|
•
|
Multiplicative: Multiplies the tone colours with the background. |
|
•
|
Red/Green/Blue/Alpha: In the RGBA fields, you can enter the value you want added to or subtracted from the colour channels in the drawings or you can attach these values to function curves. |
Animating an Effect Over Time
When compositing your scene, it will often happen that you want to animate the parameters of an effect over time. You might want to have an object fading in or out by changing the transparency level over time or increasing the colour contrast on one of your drawings over a certain frame range.
To animate an effect over time, create a function curve by adding keyframes to the parameters you want to animate. To do this, you will use the Layer Properties view, the Network view and the Timeline view. You can fine tune your animation using the Function view.
To animate an effect over time:
|
1.
|
In the Network view, drag an effect module from the Module Library view and drop it into the Network view. |

|
2.
|
Plug the effect element between the drawing element that you would like to apply the effect to and a composite module. You can either do this manually by unplugging and plugging, or by holding down [Alt] as you drag it through a connection. |
The effect should also appear in the Timeline view as well.
|
3.
|
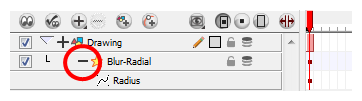
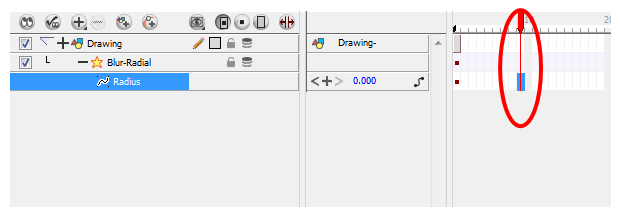
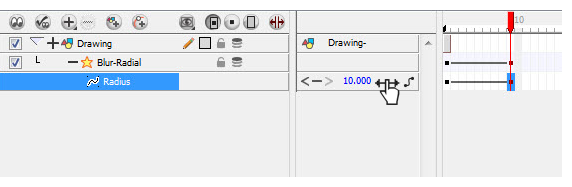
To animate the value of the parameter, you must create a function curve and add keyframes on it. For example, you could get the Blur-Radial effect to have no blur on the first frame and become very blurry by the end of the scene by animating its Radius parameter. To create the function curve: |
|
‣
|
In the Layer Properties view, click on the Function  button you want to animate to create a function curve. button you want to animate to create a function curve. |
|
‣
|
|
OR
|
‣
|
You can also expand the effect layer's parameters in the Timeline view by clicking on the Expand Function button and add a keyframe to the parameter you want to animate or press [F6]. button and add a keyframe to the parameter you want to animate or press [F6]. |
|
‣
|
|
|
4.
|
In the Timeline view, click on the Show Data View  button. button. |
|
5.
|
In the Timeline view, go to the frame where you want to start animating the effect. |
|
6.
|
In the Data view, click on the Add Keyframe button. |

|
7.
|
In the Value field scroll to the keyframe value or type the value in the field. |
|
‣
|
If your keyframes are stop-motion keyframes, in the Timeline view, select the new keyframes. Right-click on the selection and select Set Motion Keyframe. |
|
8.
|
Repeat this process for each keyframe to be added. |