Scanning Images

Toon Boom Animate Pro can receive images from any TWAIN device such as scanners and digital cameras. These images can either be loaded into your scene as bitmaps or converted into vector- based images that can be edited using Toon Boom Animate Pro.
If your operating system does not automatically recognize your device after it has been connected, you must install the correct TWAIN drivers in order to access its contents. You can usually download the drivers from the device manufacturer’s website.
TWAIN drivers are not always created for every model of scanner or digital camera. If TWAIN drivers do not exist for your device, you will not be able to use it with Toon Boom Animate Pro.
You can scan in a single image or multiple images in the same session. Before you begin scanning, you need to select your scanning device.
To scan drawings from a TWAIN device:
|
1.
|
In the top menu, select File > Import > From Scanner. |
The Scan Drawings window opens.

|
2.
|
Select your scanner or other supported TWAIN device from the drop-down menu. If none are available, check your device to ensure that it is properly connected to your computer. If your device still does not appear in the drop-down menu, you may have to shut down and relaunch the software. |
|
3.
|
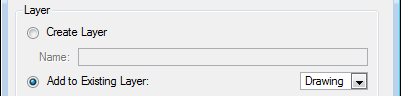
You can import the images to scan into an existing layer or create a new one. |
|
‣
|
To import the image into a new layer, enable the Create Layer option. In the Name field, type a name for the layer. |
|
‣
|
To import the image into an existing layer, select Add to Existing Layer and select the layer from the drop-down list. |
|
4.
|
In the Scanner section, click Scan to open the scanning dialog box for your scanner. |

|
5.
|
Use the settings from your scanner to scan your drawings. |
You must scan in colour if you want to import your images as vectorized textures (mix of vector and bitmap) and in black and white if you want a solid black outline.
You can scan multiple drawings with your scanner before returning to the Scan Drawings dialog box.
|
6.
|
Close the scanner dialog box when you are done. |
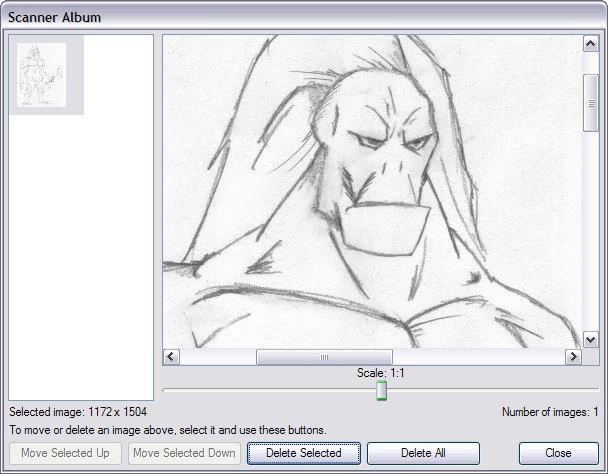
The Scanner Album opens.
|
7.
|
Use the Scanner Album to preview the scanned drawings, remove drawings from the list or change their order. Animate Pro will load the drawings based on their order in the Scanner Album. |
|
8.
|
Click Close to close the Scanner Album when you are done. |
You will return to the Scan Drawings dialog box.
|
9.
|
If you want to vectorize the images you import, select the Vectorize Imported Items option. |
|
10.
|
If you want the imported images to be encapsulated in a Symbol, enable the Create Symbol for Imported Items option. |
|
11.
|
In the File Format drop-down list, select the file format in which you want to scan your drawings.
If you chose to vectorize the images as black and white, SCAN is the best file format to choose. |
|
12.
|
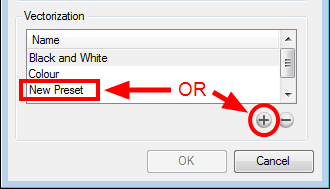
If you chose to vectorize your images, in the Vectorization section, you need to decide whether you would like to import your image in colour, black and white, or if you would like to add a new preset. |
|
‣
|
Black and White: This style vectorizes your drawings as a solid black line. This creates a 100% vector-based drawing. |
|
‣
|
Colour: This style vectorizes your image as a colour bitmap texture within a vector frame. |
|
‣
|
New Preset: The New Preset  option or button allows you to create your own custom vectorization parameters via the Vectorization Parameters interface. option or button allows you to create your own custom vectorization parameters via the Vectorization Parameters interface. |
The Vectorization Parameters dialog box will open automatically once you click on this button.
|
‣
|
Delete Preset: The Delete Preset  button allows you to delete any preset available in the list. button allows you to delete any preset available in the list. |
|
13.
|
If you choose NOT to vectorize your images, then you must decide on the size and placement of your image within the camera frame. Depending on the Scene Settings (the height and width in pixels that you chose for your project), any image that you import may be scaled to the point where all its individual pixels become visible. |
The following three options are available:
|
‣
|
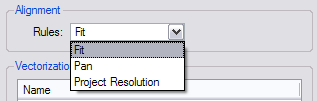
Alignment > Rules > Fit
|
|
•
|
If your image orientation is portrait, this selection will scale up or shrink (but not distort) your image’s height to match the full height of the camera frame. |
|
•
|
If your image orientation is landscape, this selection will scale up or shrink (but not distort) your image’s size so that it’s width matches that of the camera frame. |
|
‣
|
Alignment > Rules > Pan
|
This choice will perform the opposite operation of the Fit command.
|
•
|
If your image orientation is portrait, its width will be made to match the width of the camera frame. As a result, part of the image’s height will extend beyond the height of the frame. |
|
•
|
If your image orientation is landscape, the image will extend beyond the width of the camera frame. |
|
•
|
This can be useful if you want to make your background move up and down, or from left to right to make it appear as if the camera is panning, or to actually perform a camera pan. |
|
‣
|
Alignment > Rules > Project Resolution |
This selection will scale the image up or down in proportion to the scene's resolution. It looks at the resolution of the bitmap image, for example 4000 x 2000, then compares it to the scene's resolution, for example 1920 x 1080, and adjusts the scale factor in proportion. So in this example the bitmap would appear at 208% (4000/1920). If you import a bitmap that is 960 x 540 it will be displayed at 50% (960/1920) of the size of the project resolution.
|
14.
|
The last step is to decide on the image’s transparency. For this, there are four options available. These options deal with the way that the bitmap image has been antialiased; in other words, the edge blending that has been used to transitions between RGBA (red, green, blue, alpha (transparent)) channels. |
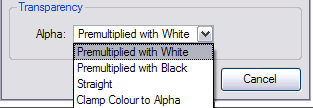
The options are:
|
‣
|
Premultiplied with White |
Individual pixels at the edge of an image are blended with white.
|
‣
|
Premultiplied with Black |
Pixels at the edge of an image are blended with black.
Pixels at the edge of an image are blended with black, white and greys.
Select this option when you want to premultiply the colour value with the alpha value. When the colour is clamped to the alpha, the colour value cannot be higher than the alpha value. It calculates the real colour value faster. When the RGB values are multiplied with the alpha value, that is to say, if you have a pixel of value R=247, G=188, B=29 and the alpha is 50% or the image has a 50% transparency, then the actual RGB values output would be half of the amounts listed above.
|
15.
|
Click OK to import the images into your scene. |
Related Topics