Pegs
A Peg layer is a trajectory that contains no drawings on which you can hook your drawings.
Related Topics
| • | Why Use a Peg Layer? |
| • | The Origin of the Peg |
| • | Adding a Peg to the Timeline |
| • | Pegs |
Why Use a Peg Layer?
A peg is composed of many customizable parameters. These parameters are:
| • | X, Y and Z positions |
| • | Angle (rotation) |
| • | Skew |
| • | X and Y scales |
| • | 3D rotation (when the 3D option is enabled) |
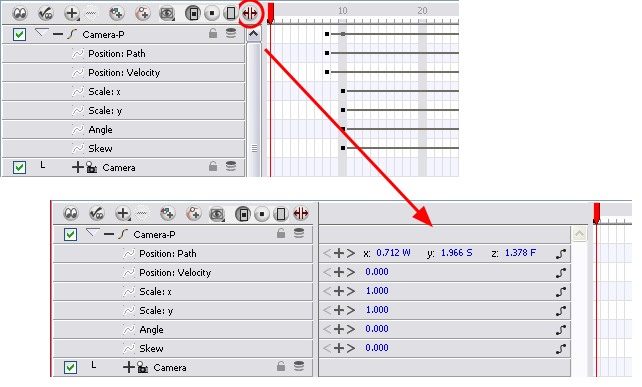
You can control a peg’s trajectory the same way as the animated drawing layer.
A peg layer is mainly used to control a series of drawing layers. If you have several drawing layers, such as clouds or a character split into many parts, you can hook those to a peg layer and have them follow a trajectory as a unit. When building a puppet, most of the time you will add a master peg to control your puppet as one object.
The Origin of the Peg
Pegs have been used for a long time in the traditional animation process, mainly for registration purposes. Peg holes at the bottom (or top) of animation paper are used to keep all of the sheets even and at the same registration.
There are three peg holes in regular animation paper. The centre peg hole is circular while the left and right ones are rectangular. These rectangular peg holes are located on each side of the page, and four inches away from the centre peg hole.
To keep the drawings together, the animator uses a peg bar. This peg bar has three pins that correspond to the shape and location of the peg holes. Peg bars are normally found at the bottom and top of animation discs.
Before digital compositing, the peg bars were also used to move levels under the camera stand. They were the equivalent of digital trajectories. Animate makes use of these concepts to create animation and camera moves.
Adding a Peg to the Timeline
To add a peg:
| 1. | Select the layer on which you want to attach a peg. |
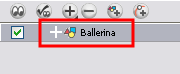
| 2. | Do one of the following: |
| ‣ | From the Timeline View layers toolbar, click the Add Peg |
| ‣ | From the top menu, select Insert > Peg. |
| ‣ | Right-click (Windows) or [Ctrl]+Click (Mac OS X) on the layer and select Add > Peg. |
| ‣ | In Animate, select a Peg module from the Module Library and drag it to the Network view. |
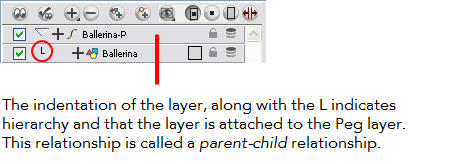
The layer that was originally selected becomes a child of the new parent Peg layer. The new Peg layer automatically takes the name of its child layer, with the addition of the suffix -P.
| 3. | If you intend to add multiple pegs or if the layer name that was added to the peg does not accurately represent the content of the Peg layer, you can rename it. Clicking the layer name and type in a new name. Or double-click the layer and type a new name into the dialog box. |

| 4. | If you did not create your peg layer directly above the layer you intended on parenting it to, then drag the layer you want to attach to the peg and drop it directly below the Peg layer. The indentation of the layer below the Peg layer indicates whether it was correctly attached or not. |

Related Topics
| • | Layer Parameters |