Managing the Workspace
Toon Boom Animate’s user interface is composed of several views. You can customize your workspace to suit your working preferences, save it as a new workspace, and load it from the Workspace toolbar.
Loading a Workspace
The first time you open Toon Boom Animate, the default workspace is loaded. Other workspaces are available such as the Hand-Drawn Animation and the Compositing workspaces, these display different views and toolbars. You can access these workspaces and any you create, from the Windows menu and the Workspace toolbar.
To load a workspace:
|
1.
|
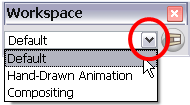
In the top menu, select Windows > Workspace > Workspace or click on the drop-down arrow in the Workspace toolbar and select a workspace from the list. |
Workspace Manager

To open the Workspace Manager:
|
‣
|
In the Workspace toolbar, click on the  button. button. |
|
‣
|
In the top menu select Windows > Workspace > Workspace Manager. |
The Workspace Manager allows you to modify, create, delete, rename and reorder you workspaces.
Creating a New Workspace
To create a new workspace:
|
1.
|
Open the Workspace Manager. |
|
2.
|
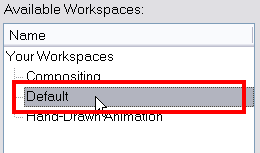
In the Available Workspaces list, select an existing workspace. |
|
3.
|
At the bottom of the Available Workspaces list, click on the Add  button to add a workspace. button to add a workspace. |
|
4.
|
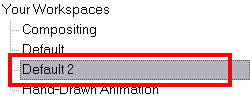
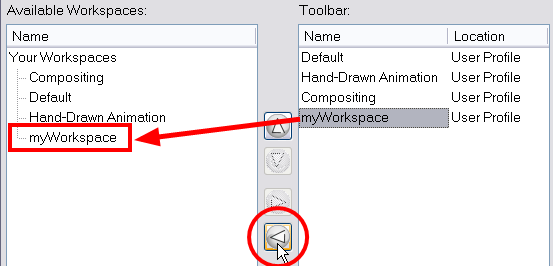
Select the new workspace option, then click on the Rename button and give it a new name. |

|
5.
|
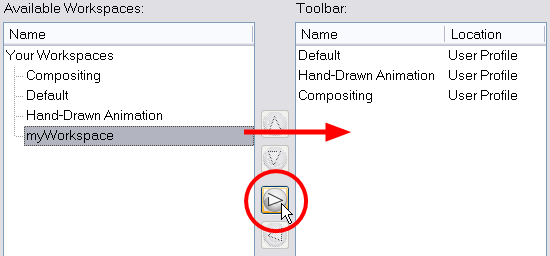
Select the new workspace and click on the Right Arrow  button to send it to the Workspace toolbar. button to send it to the Workspace toolbar. |
|
6.
|
Click on the OK button. |
Renaming a Workspace
To rename a workspace:
|
1.
|
Open the Workspace Manager. |
|
2.
|
Choose the workspace to be renamed from the list. |
|
3.
|
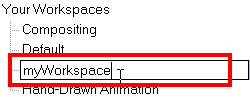
Double-click on the workspace to be renamed or click on the Rename button. This allows you to edit the name. |
|
4.
|
Type in the new name of the workspace. |
|
5.
|
Press the [Enter/Return] key to validate the name. |
|
6.
|
Click on the OK button. |
Saving a Workspace
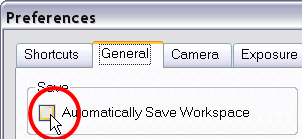
By default, when you modify the look of a workspace, it is automatically saved. If you prefer to keep your workspaces as they are and only save the modifications when you really want to, you have to disable the Automatically Save Workspace preference.
To disable the Automatically Save Workspace preference:
|
1.
|
In the top menu, select Edit > Preferences (Windows) or > Preferences (Mac OS X) to open the Preferences panel. |
|
2.
|
Go to the General tab. |
|
3.
|
In the Save section, disable the Automatically Save Workspace preference. |
The Save Workspace  button appears in the Workspace toolbar.
To save a workspace manually:
|
1.
|
In the Workspace toolbar, click on the Save Workspace button.
You can also select Windows > Workspace > Save Workspace. |
You can save your workspace as a new version to avoid over-writing the current one.
To save your workspace as a new version:
|
1.
|
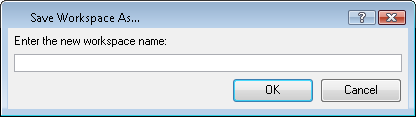
Select Windows > Workspace > Save Workspace As. |
The Save Workspace As dialog box opens.
|
2.
|
In the text field, enter the new workspace name. |
|
3.
|
Click on the OK button to validate. |
Deleting a Workspace
To delete a workspace:
|
1.
|
Open the Workspace Manager. |
|
2.
|
In the Workspace Manager, select the workspace to be deleted and click on the Left Arrow  button to send it to the Available Workspaces list. button to send it to the Available Workspaces list. |
|
3.
|
Select the workspace in the Available Workspaces list then click on the Delete  button to delete the workspace. button to delete the workspace. |
|
4.
|
Click on the OK button. |
Showing and Hiding a Workspace
To show a workspace:
|
1.
|
Open the Workspace Manager. |
|
2.
|
In the Available Workspaces list, select the workspace to be displayed and click on the Right Arrow button to send it to the Workspace toolbar. |
|
3.
|
Click on the OK button. |
To hide a workspace:
|
1.
|
Open the Workspace Manager. |
|
2.
|
In the Workspace Manager, select the workspace to be hidden and click on the Left Arrow button to send it to the Available Workspaces list. |
|
3.
|
Click on the OK button. |
If you do not want to modify the current workspace, use the Workspace Manager to create another one and then modify that one.
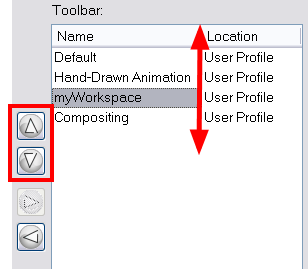
Reordering the Workspace List
To reorder workspaces:
|
1.
|
Open the Workspace Manager. |
|
2.
|
In the Workspace toolbar, select the workspace to be reordered and click on the Up  or Down or Down  buttons to move it up or down. buttons to move it up or down. |
|
3.
|
Click on the OK button. |
Restoring the Default Workspaces
You can restore modified workspaces to their original default layout.
To restore the default workspaces:
|
‣
|
In the top menu select Windows > Restore Default Workspace. |
Related Topics