Add Empty Sound Layer
When performing sound editing tasks, it can be useful to chop up a sound sample into different layers. For example, when performing a lip-sync, only a single view of the various mouth positions for a character can exist on one layer. Therefore, if you would like to have your character turn its head from a profile view to a three-quarter view and have mouth position changes to fit with the sound sample from these two different views, you would need to cut-up the sound samples needed for the profile view mouth positions on one layer and the sound samples needed for the three-quarter view on another.
For this task, you will need an empty sound layer.
To add an empty sound layer:
|
1.
|
In the top menu, select Windows > Toolbars > Timeline View. |
The Timeline view toolbar appears at the top of the Timeline view.

|
2.
|
Right-click on the Timeline View toolbar and choose Customize. |
|
3.
|
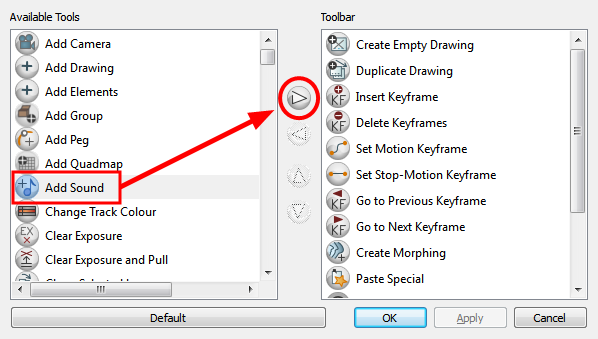
Choose the Add Sound  button from the Available Tools column on the left and add it to the Toolbar column on the right. Click Ok to accept the change. button from the Available Tools column on the left and add it to the Toolbar column on the right. Click Ok to accept the change. |
|
4.
|
Click on the Add Sound button. |
An empty (silent) sound layer should appear in both your Timeline and Xsheetviews.

|
5.
|
Rename your layers accordingly. |
|
6.
|
Click the cell where you wish to start the cut and [Shift] + click on the final cell of the cut. The sample to be cut becomes highlighted. |

|
7.
|
Drag the selection into the empty sound layer below. |

|
8.
|
You can now continue to cut-up and distribute the sound sample between the two layers or carry on to the lip-synching process for each layer and its corresponding facial view. |
If you need to duplicate your sound layer to keep an unedited copy for safety, you can click on the Duplicate Selected Layers button, located in the Timeline View toolbar.
Related Topics