Switching between Motion and Stop-motion Keyframes
You can switch a keyframe from stop-motion to motion at any time in the Timeline view and Function Editor.
To switch between Motion and Stop-Motion in Timeline View:
|
1.
|
On the right side of the Timeline, select one or more keyframes to be modified. |

|
2.
|
To switch between motion and stop-motion, do one of the following: |
|
‣
|
Right-click (Windows) or [Ctrl]+Click (Mac OS X)) on the selected keyframes and select Set Motion Keyframes or Set Stop-Motion Keyframes. |
|
‣
|
Press [Ctrl] + [K] (Windows) or [⌘] + [K] (Mac OS X) or [Ctrl] + [L] (Windows) or [⌘] + [L] (Mac OS X). |
|
‣
|
In the Timeline View toolbar, click the Motion Keyframe  or Stop-Motion Keyframe or Stop-Motion Keyframe  button. button. |
|
‣
|
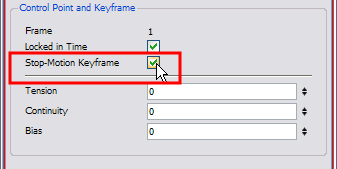
In the Camera view, select the keyframe to convert. In the Coordinates and Control Point view, select/deselect the Stop-Motion Keyframe option. |
To swtich between motion and stop-motion keyframes in the Function Editor:
|
1.
|
Open the Function Editor. |
|
2.
|
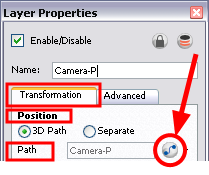
In the Timeline view, double-on the layer that contains the keyframes that you want to convert. |
The Layer Properties dialog box opens.
|
3.
|
In the Transformation tab, click the Function Editor  button to display the Editor Window. button to display the Editor Window. |
OR
|
1.
|
In the Timeline view, click the Expand Function  button and double-click on the function to edit. Or press [Alt] + [F]. button and double-click on the function to edit. Or press [Alt] + [F]. |
|
2.
|
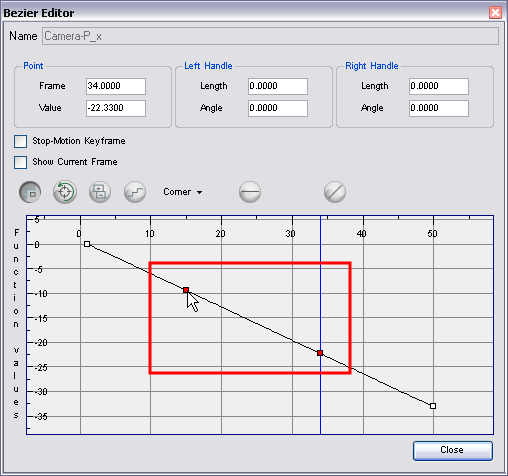
Select one or more keyframes to modify on the Function Curve. |
|
3.
|
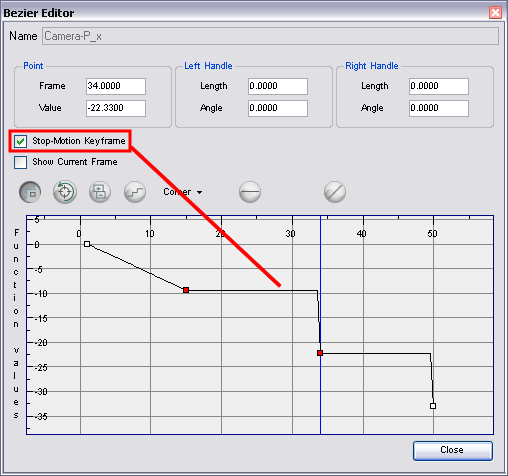
Select or deselect the Stop-Motion Keyframe option to set a stop-motion or motion keyframe. |
Related Topics