Working with Tool Presets
Tools presets let you saving a variety of settings and are very handy and efficient for accessing the tools you use most often. That way, the tool is already set with the desired properties, such as colour, line thickness, whether to enable Draw Behind or Auto Flatten mode, and so on. You can create presets for these tools and many more: Brush, Pencil, Eraser, Rectangle, Ellipse, and Line. First, select a tool, adjust the properties, and then create a tool preset for it. Once you have created a tool preset, you can always make adjustments to fine-tune it, as well as create a keyboard shortcut for it.
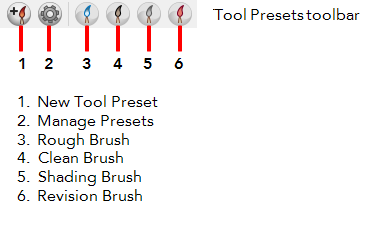
The Tool Presets Toolbar
The Tool Presets toolbar lets you create new tool presets and manage them. There are four default brush presets to get you started—Rough Brush, Clean Pencil, Fill Paint, and Inking Brush. Be default, this toolbar is not displayed.
To display the Tool Presets toolbar:
|
‣
|
Select Windows > Toolbars > Tool Presets. |
|
‣
|
Right-click an empty area below the top menu and select Tool Presets. |
To create a tool preset:
|
1.
|
In the Tools toolbar, select a tool. |
|
2.
|
Use the Tool Properties view to customize the tool.
|
|
3.
|
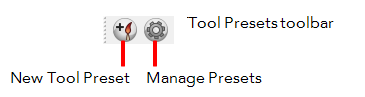
In the Tool Presets toolbar, click the New Tool Preset  button. button. |
|
4.
|
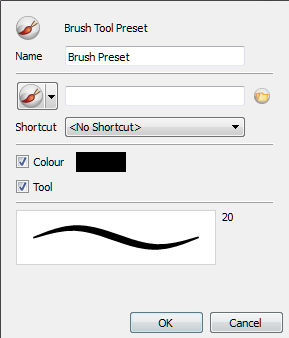
In the New Tool Preset dialog box, type a new name for your tool. |
|
5.
|
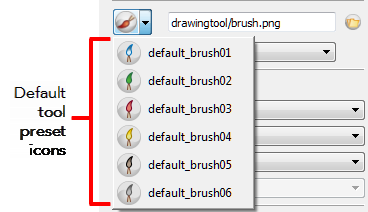
From the Brush list, select an icon to quickly identify your preset or upload your own by clicking the File  button. button. |
|
6.
|
(Optional) Set a keyboard shortcut to quickly access your preset. |
|
7.
|
When you select any of the following options, they will take effect when you use the tool preset. If an option is deselected, then using a tool preset will not override your current settings. |
|
‣
|
Colour: Saves the current colour into the Tool Preset. |
To delete a tool preset:
|
1.
|
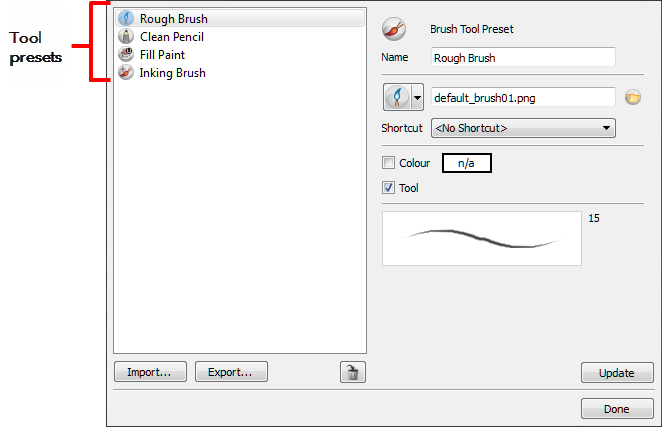
In the Tool Presets toolbar, click the Manage Tool Presets  button. button. |
|
2.
|
From the list of tool presets on the left, select a preset to delete and click the Trash  icon. icon. |
To import a tool preset:
|
1.
|
In the Tool Presets toolbar, click the Manage Tool Presets button. |
|
2.
|
In the Manage Tool Presets dialog box that opens, click Import. |
|
3.
|
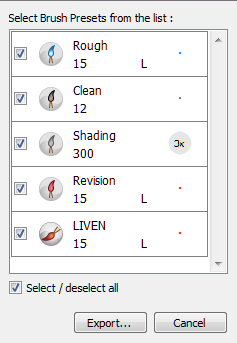
In the Import Brush Presets window that opens, locate and select the preset(s) to import and click Open.
In the Select Folder window that opens, locate and select the preset(s) to import and click Select Folder.
|
To export a tool preset:
|
1.
|
In the Tool Presets toolbar, click the Manage Tool Presets button. |
|
2.
|
In the Manage Tool Presets dialog box that opens, click Export. |
|
3.
|
In the Export Brush Presets window that opens, click Export. |
|
4.
|
Select a folder and click Select Folder.
|
To update a tool preset:
|
1.
|
In the Tool Presets toolbar, click the Manage Tool Presets button. |
|
2.
|
In the Manage Tool Presets dialog box that opens, select the tool preset from the left side of the dialog box. |
|
3.
|
Make any changes you would like to the preset. |