How to Setup a Scene
This chapter is divided as follows:
| • | Positioning the Camera |
| • | Positioning Objects |
| • | Repositioning the Pivot |
Positioning the Camera
To set the camera frame, you need to add a Camera layer to your scene so you can edit the default camera frame.
To add a Camera layer in the Timeline view, do one of the following:
| ‣ | In the Timeline view, click the Add Layer |
| ‣ | From the top menu, select Insert > Camera. |
A new camera layer is added to your scene and appears in the Timeline view.

You cannot add a camera inside a symbol. If you try to do so, a warning message will pop-up and inform you that this operation is not possible.
You can reposition your camera frame directly in the Camera view, using the Translate ![]() and Rotate
and Rotate ![]() tools.
tools.
To reposition the camera frame directly in the Camera view:
| 1. | Select Animation > Tools > Translate or press [Alt] + [2]. |
| 2. | In the Camera view, click on the camera frame to select it. You can also select the camera layer from the Timeline view. |
The selected camera frame is highlighted in purple.

| 3. | Drag the camera frame to a new position. |
| 4. | To tilt the camera frame, select Animation > Tools > Rotate or press [Alt] + [3]. |
| 5. | In the Camera view, click on the camera frame to select it and rotate the camera frame until it reaches the desired rotation angle. |
Positioning Objects
![]()
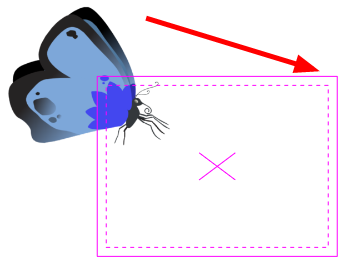
To pan a layer using the Transform tool:
| 1. | In the Tools toolbar, select the Transform |
| 2. | In the Transform tool Tool Properties view, make sure the Peg Selection Mode |
| 3. | In the Camera view, select a drawing layer and drag the selection to a new area. You can select multiple layers to reposition them at once. |
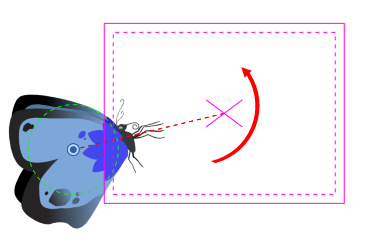
To rotate a layer using the Transform tool:
| 1. | In the Tools toolbar, select the Transform |
| 2. | In the Transform tool Tool Properties view, make sure the Peg Selection Mode |
| 3. | In the Camera view, select a drawing layer and rotate the transform bonding box handle. |
![]()
To scale a layer using the Transform tool:
| 1. | In the Tools toolbar, select the Transform |
| 2. | In the Transform tool Tool Properties view, make sure the Peg Selection Mode |
| 3. | In the Camera view, select a drawing layer and pull or push on the size, top, or corner control point. Hold down [Shift] to lock the selection’s ratio. |
![]()
To skew a layer using the Transform tool:
| 1. | In the Tools toolbar, select the Transform |
| 2. | In the Transform tool Tool Properties view, make sure the Peg Selection Mode |
| 3. | In the Camera view, select a drawing layer and drag sideway or up and down the sides or top and bottom segments, between the control points. |
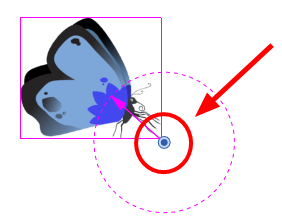
Repositioning the Pivot
Some transformations, such as the rotation, scale, skew and flip, are made relative to the pivot point position. You can reposition this pivot point anywhere using the advanced animation tools.
To permanently reposition the pivot point:
| 1. | In the Advanced Animation toolbar, select the Rotate |
| 2. | In the Camera view, [Ctrl] + click (Windows) or [⌘] + click (Mac OS X) to select your element. |
The pivot point appears in the Camera view.
| 3. | Drag the pivot point to a new position. |
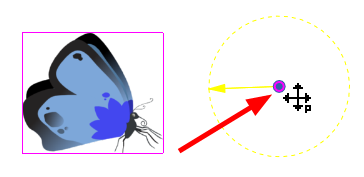
This is the new position of the pivot point for future transformations until you reposition it.