Managing the Toolbars
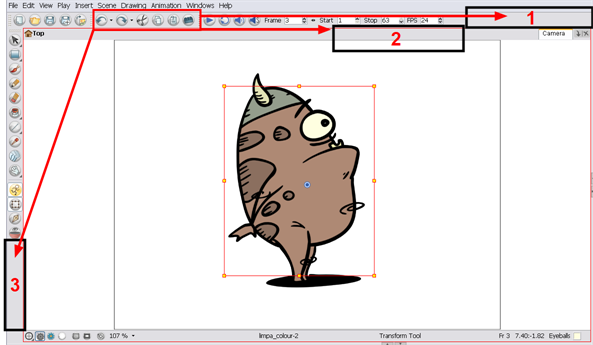
The Toon Boom Animate user interface contains toolbars which, by default, are located at the top of the interface. Some of the workspace’s views also have their own toolbars. These toolbars can be moved around. You can reposition the toolbars to suit your work style or hide unused ones.
| • | Showing or Hiding Toolbars |
| • | Moving Toolbars |
| • | Flat Tool Toolbar Preference |
| • | Toolbar Manager |
Showing or Hiding Toolbars
To show or hide a toolbar:
| ‣ | Select Windows > Toolbars > the desired toolbar. |
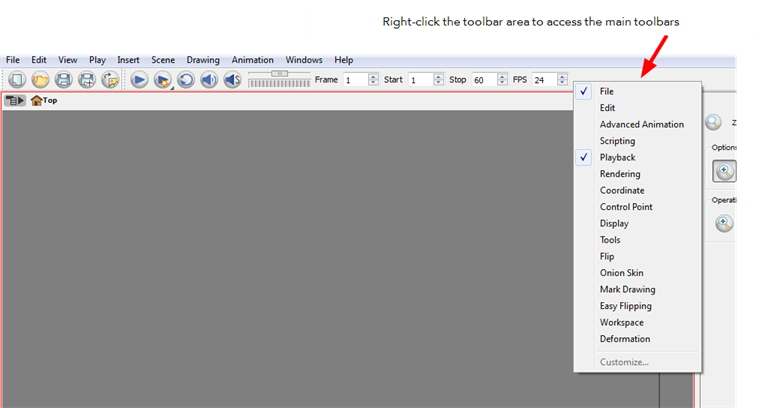
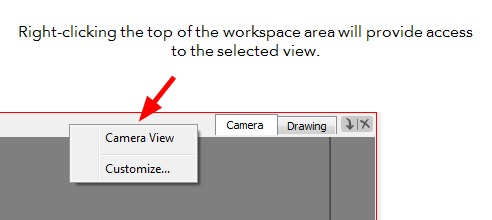
You may right-click anywhere in the toolbar area to access Toon Boom Animate toolbars. View toolbars, however, are not available by right-clicking the toolbar area. You can access the toolbar of any open and active view by right-clicking in the workspace area.
You may also hide a portion of a toolbar by dragging another open toolbar over its tail-end.

Moving Toolbars
To move a toolbar:
| 1. | Select the toolbar you want to move by clicking on its anchor point  and dragging it into a view toolbar area or another position in the top or side interface toolbar area. and dragging it into a view toolbar area or another position in the top or side interface toolbar area. |
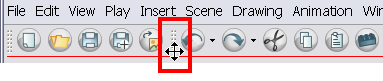
| 2. | When a rectangle outline appears showing an available location for the toolbar, release the mouse button and drop the toolbar into position. |
| ‣ | 1. Dock to the top toolbar area. |
| ‣ | 2. Move a toolbar down a row. |
| ‣ | 3. Dock to the left toolbar area. |
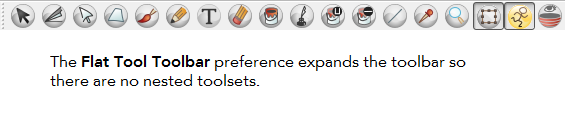
Flat Tool Toolbar Preference
By checking on this option you can expand the toolbar so that there are no nested toolsets in the toolbar. When you check this option you will need to close Animate and relaunch it for the new interface to be displayed. A default set of tools will appear in the toolbar. However, you can customize which tool icons appear in the toolbar to fit your own work pattern.

To use the Flat Tool Toolbar:
| 1. | Open the Preferences window, Edit > Preferences (Windows) or Animate > Preferences (Mac OS X) and click on the General tab. |
| 2. | Enable the Flat Tool Toolbar preference by clicking on its checkbox. |
| 3. | Click on the OK button to apply the change. |
| 4. | Save your work and close Toon Boom Animate. |
| 5. | Relaunch Toon Boom Animate. You will notice that the Tools toolbar has changed and no longer contains nested tools. |
If the default toolbar does not contain the tools you require, you can custom-build the toolbar.
Once you have enabled the Flat Tool Toolbar preference, you can customize the tools which appear in the toolbar. This means that you can change the default set of tools and replace the tools which you use less frequently with ones which are used more often. This customizing is done through the Toolbar Manager.
Toolbar Manager
The View toolbars can be customized to contain your favourite tools and options. Use the Toolbar Manager window to organize your different toolbars to suit your working preferences.
To customize your toolbars:
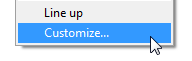
| 1. | In the chosen view,right-click on any button in the toolbar where you wish to add or subtract a new button. |
| 2. | From the pop-up menu, select Customize. |
The Toolbar Manager window opens.
| 3. | To add a new icon to your toolbar, select the tool or command from the Available Tools list and click on the Right Arrow |
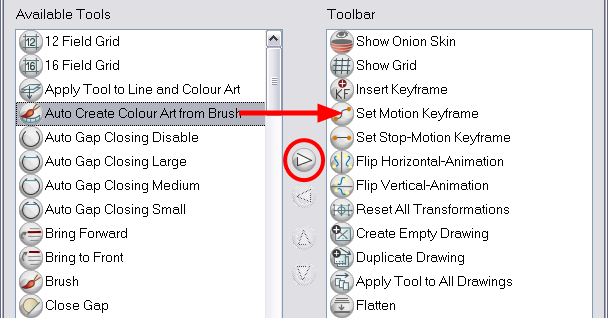
| 4. | To remove an icon from your toolbar, select the tool or command in the Toolbar list and click on the Left Arrow |

| 5. | To reorder your icons in your toolbar, select the command to be moved in the Toolbar list and click on the Up |
| 6. | Click on the OK button when you are finished. |
Related Topics
| • | Managing the Workspace |
| • | Managing the Views |