Harmony Synchronization
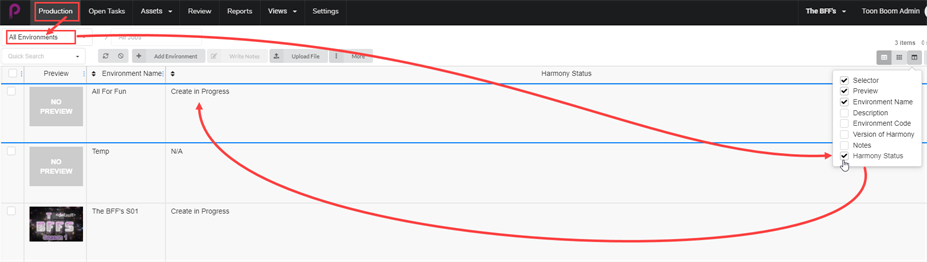
In the Table view, go to the Column Selector  and check the Harmony Status box.
This activates the Harmony Status column in the table.
-
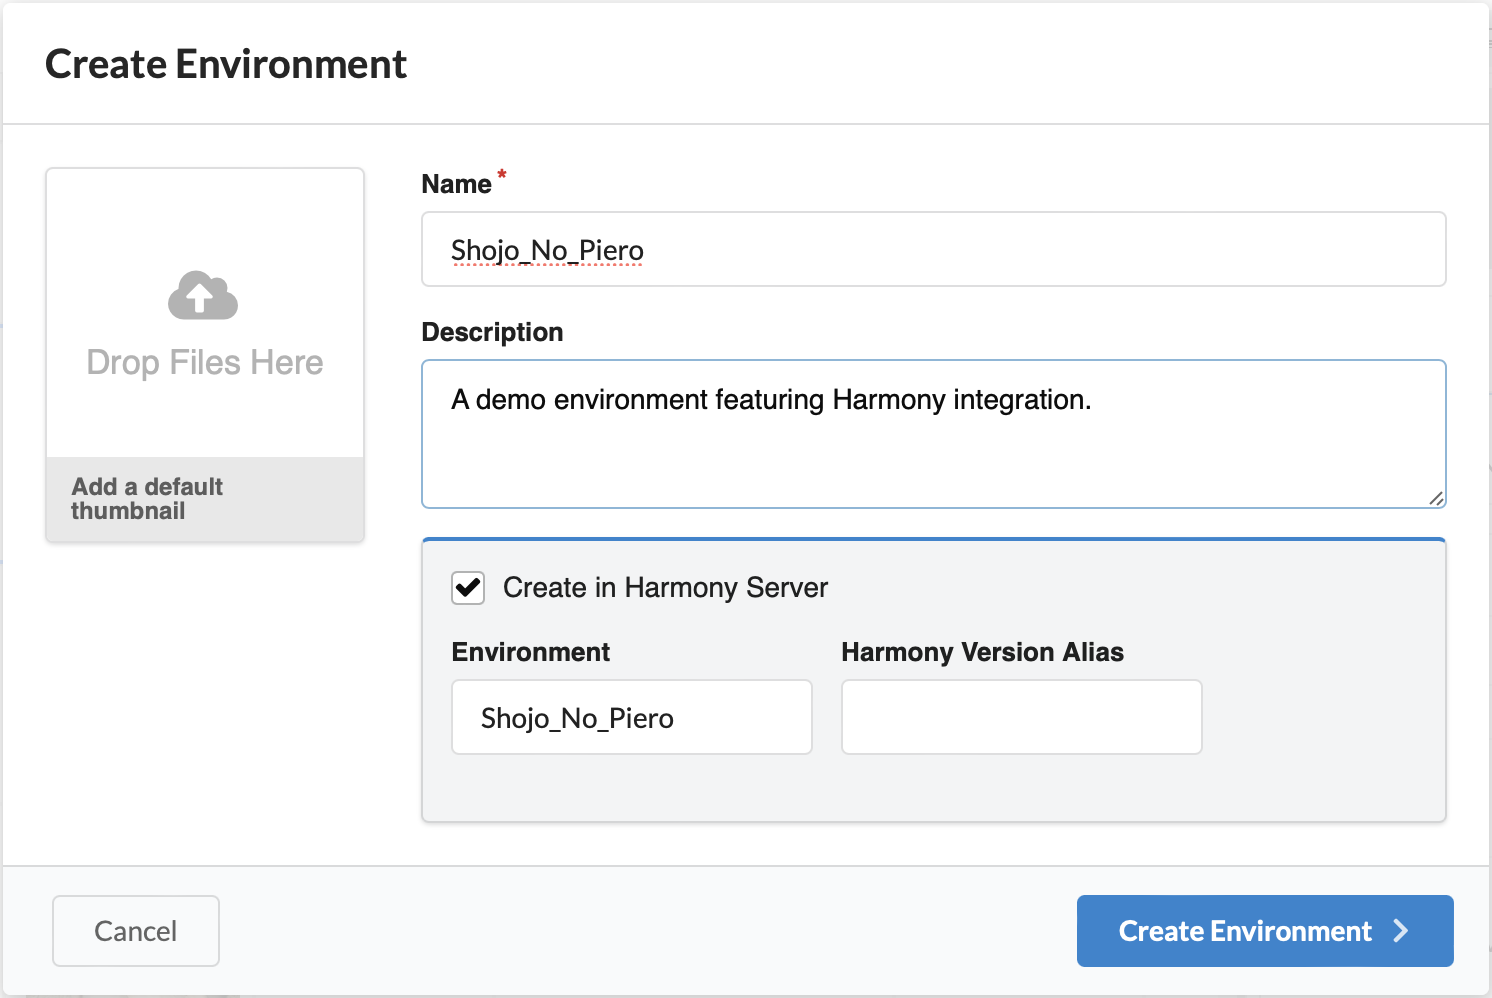
Follow the instructions in Production > Creating Environments, and select the “Create in Harmony Server” checkbox:
-
The Harmony Environment is automatically generated from the Name field but can be overridden. If there are spaces in the name, they will automatically be replaced by underscores. Harmony doesn’t allow spaces in names.
-
Harmony Version Alias: You can optionally enter a label identifying a version of Harmony (See Producer Link Settings page).
-
-
Click on the Create Environment button.
The new environment will be sent to the WebCC queue for creation.
-
Go back to the Production > All Environments.
-
The Harmony Status indicates “Create in Progress”.
-
Hit the Refresh button or wait for the status to update on its own.
After a while the Harmony Status is updated to VALID. Clicking on the link will display information regarding the operation. The new environment now appears in the Harmony Server or will remain in the queue until there is a proper connection to the Harmony Server.

-
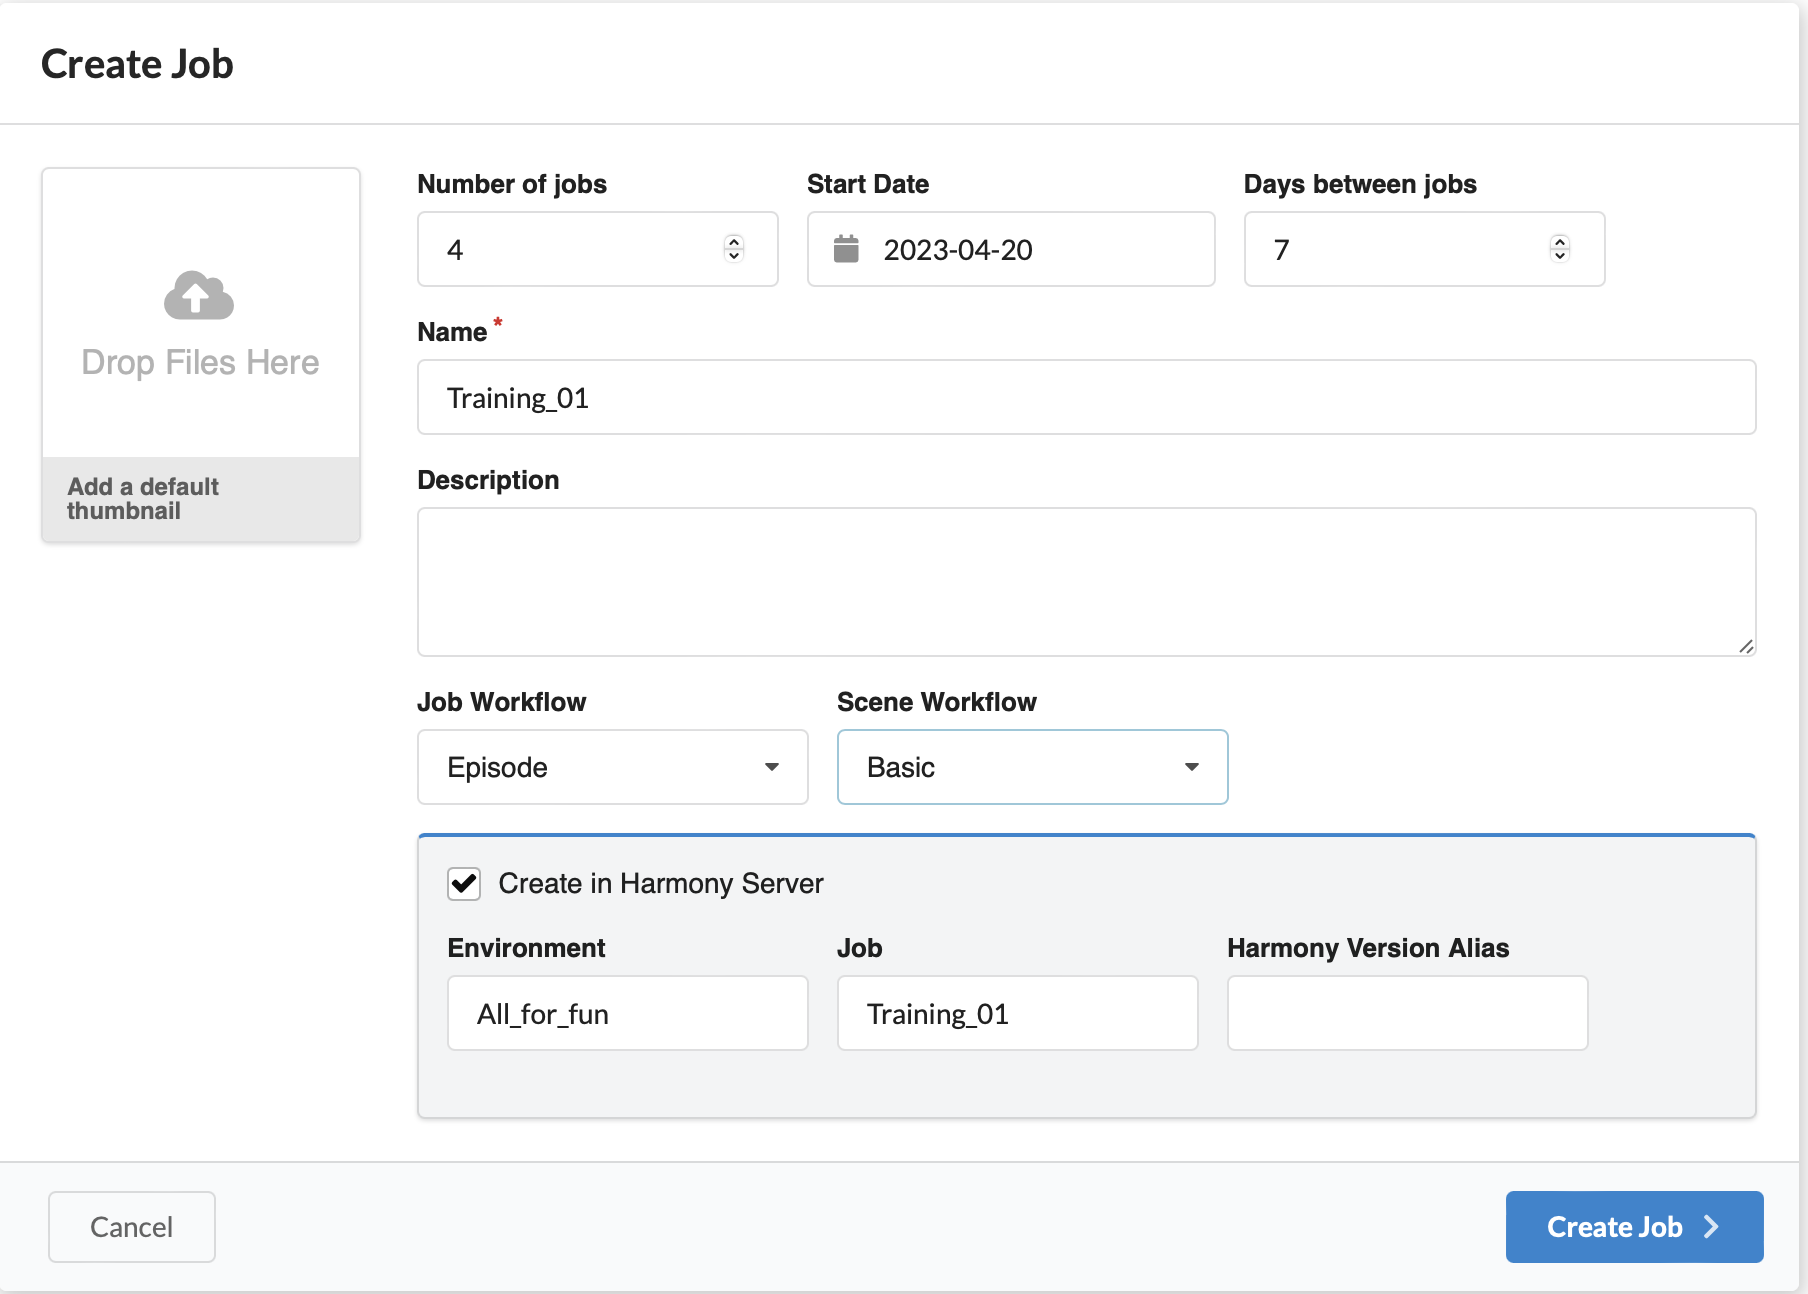
Follow the instructions in Creating Jobs, and select the “Create in Harmony Server” checkbox:
-
The Environment field is automatically set from the parent Harmony environment. It can be overridden here to point to an alternate Harmony environment, but the environment will not be created in Harmony.
-
The Job field is automatically set from the one entered into the Name field. Spaces will be replaced by underscores.
-
Harmony Version Alias: You can optionally enter a label identifying a version of Harmony (See Producer Link Settings page).
-
-
Click the Create Job button.
-
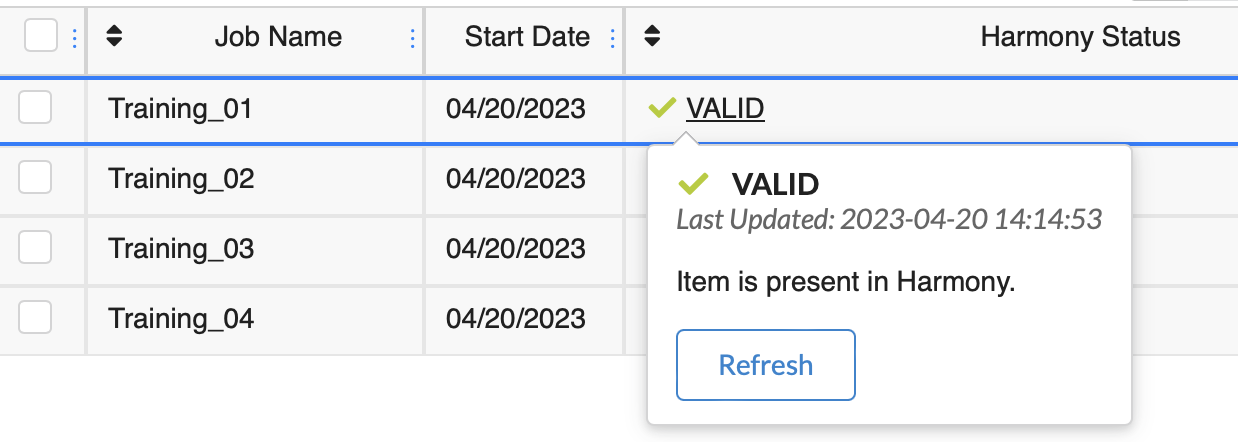
The list of jobs is quickly updated (hit the Refresh button if isn’t) while the new job creation request is sent to the WebCC queue. All the jobs have a sequential numerical order.
The Harmony Status indicates “Create in Progress” and should quickly change to “VALID”, and appear in Harmony Control Center.
NOTE
Harmony Status will stay in “Create in Progress” until the request has been processed by WebCC. The job creation request will remain in WebCC queue until a proper connection is established and until processed.
In Harmony, Job names are unique.
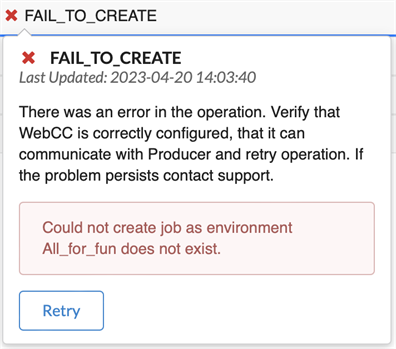
If an error occurs, Harmony Status will change to “FAIL_TO_CREATE” and display the reason provided by WebCC.
-
Follow the instructions for Creating a Scene.
-
Check the Create in Harmony Server checkbox.
-
The Environment and Job fields are automatically populated from the parent job information. They can be overridden manually, but the environment and job will not be created in Harmony.
-
The Harmony Scene name is automatically generated from the one entered into the Name field. Spaces will be replaced by underscores.
-
Harmony Version Alias: You can optionally enter a label identifying a version of Harmony (See Producer Link Settings page)
-
-
Click Create Scene.
-
The list of scenes is quickly updated (hit the Refresh button if it isn’t) while the new scene creation request is sent to the WebCC queue. All the scenes have a sequential numerical order.
The Harmony Status indicates “Create in Progress” and should quickly change to “VALID”. The scenes should also appear in Harmony Control Center.

-
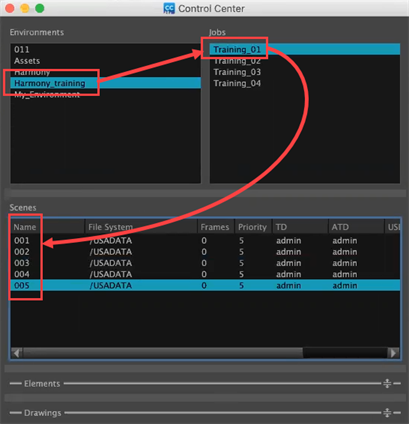
In your Harmony (Control Center or WebCC), create your scenes.
-
Once the scenes are created in Harmony, go back to Producer and in the main menu, select Production.
-
In the Environment and Job drop-down menus, select the environment and job you would like to populate with scenes created in Harmony.
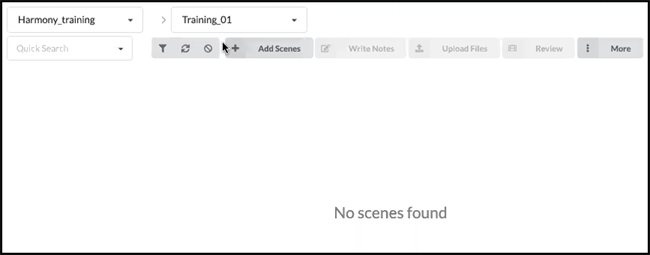
No scenes will be visible yet.
-
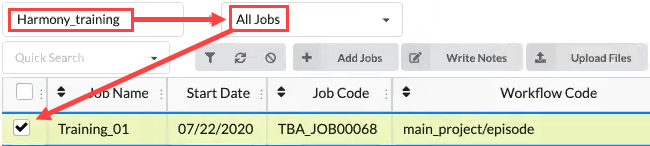
In the Jobs drop-down menu, select All Jobs.
-
From the list of jobs that appear, select the jobs for which created scenes in Harmony by checking their checkboxes.
-
In the Production tab toolbar, select More > Synchronize with Harmony.
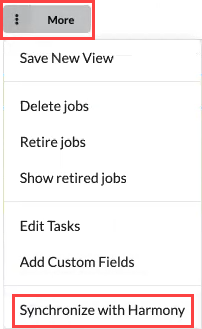
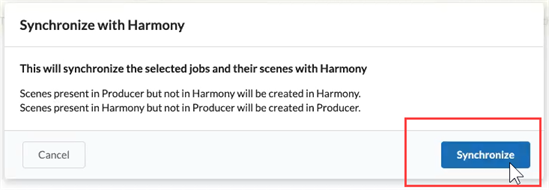
The Synchronize with Harmony dialog box opens.
-
Click on the Synchronize button.
The scenes appear in Producer.

-
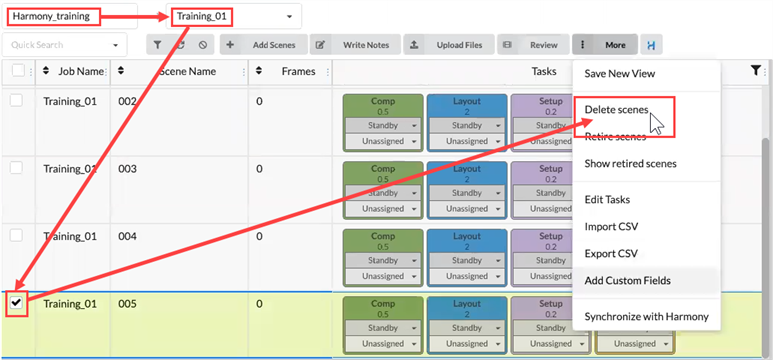
Select an environment and job
-
Check the box on the left column for each scene you wish to delete. Then go to the More tab and select Delete Scenes.
-
The Delete scenes dialog box opens.
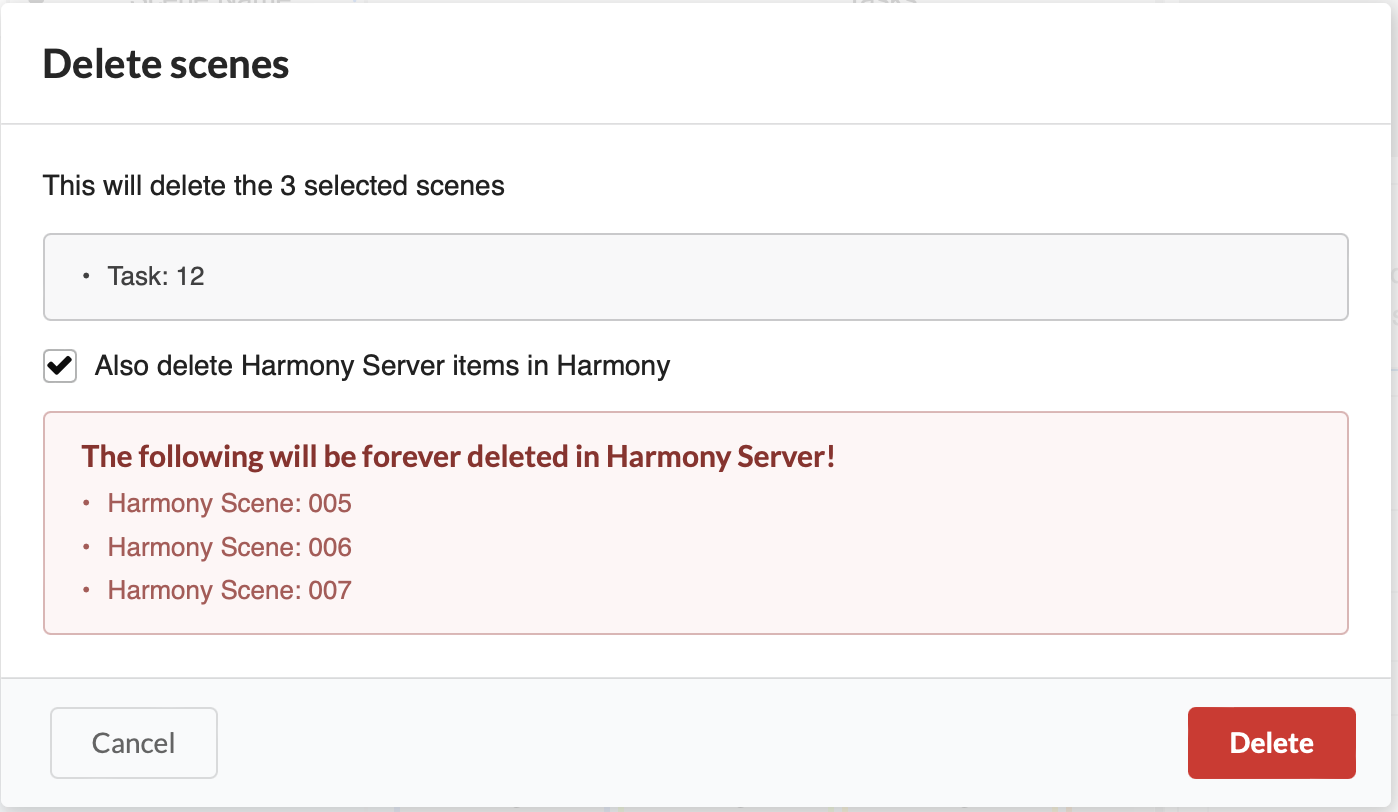
Click on the Delete button.
-
The Delete request is sent to WebCC’s message queue.
Until it’s completed, the scene list will keep on displaying the scenes with a Harmony Status to “DELETE_IN_PROGRESS”. Once deleted from Harmony, the scenes will be deleted from the scene list in Producer as well.