Configuring Producer Link
Interface
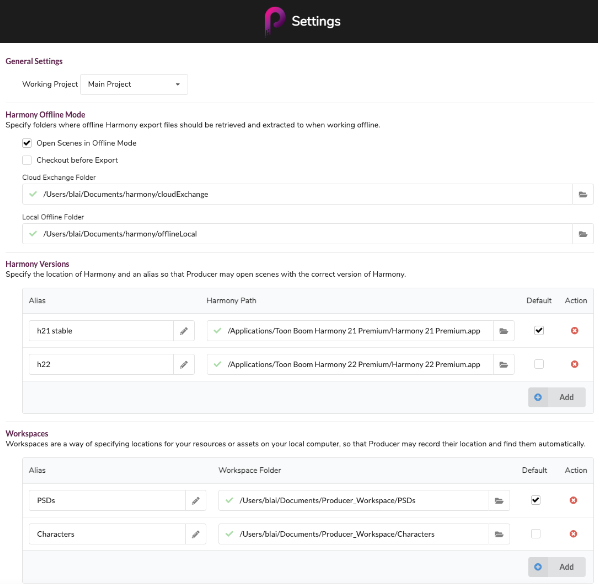
The user can configure many settings in the Settings page.
Settings
Below is a description of each configuration option in the Setting page.
| Options | Description |
|---|---|
| General Settings | |
| Working Project | This project will determine where Producer Link will look for Environments, Jobs and Scenes. |
| Harmony Offline Mode | |
| Open Scenes in Offline Mode |
If enabled, clicking on the
If disabled, clicking on the |
| Checkout before Export | If enabled, the default value of the Export button will be “Check out and Export” (instead of “Export only”). |
| Cloud Exchange Folder |
The Cloud Exchange Folder is a locally mounted folder shared from the cloud which is synchronized with the Harmony Server Exchange Folder. For this option to work, the user will need to install a cloud storage application connected to the studio server, in which every user will have their own subfolder used for exporting their scenes offline. The user folders will act as an intermediate between the studio’ server and the Local Offline Folder described in the next option below. Each user subfolder will contains two subfolders: Exported: The Exported subfolder contains the *.7z and *.7z.props file. Imported: The Imported subfolder contains the *.7z file. NOTE
Just to name a few, Google Drive and Dropbox can be used as cloud storage applications.
The Cloud Exchange Folder option lets the user define where the user cloud storage subfolder is mounted locally.
The checkmark icon
The warning icon |
| Local Offline Folder |
Lets the user define where on his computer the unzipped scene files will be stored to allow him to work in Harmony Standalone.
The checkmark |
| Harmony Versions | |
| Alias | Lets the user write an alias for his Harmony version path. The ID provided within this field does not have any other purpose other than providing a name to differentiate each Harmony Version listed within the Harmony Versions section. |
| Harmony Path | Here, the user defines the Harmony Premium.app location.
The checkmark  and warning and warning |
| Add | Allows the user to add another Harmony version to the Harmony version list. |
| Default | Lets the user define which Harmony version will be defined as the default one. |
| Action | Lets the user remove the Harmony version, by clicking on the Remove Harmony Version  button . button . |
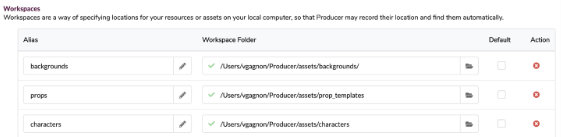
| Workspaces | |
| Alias | This field lets the user write an alias for his Workspace Folder path. The ID provided within this field does not have any other purpose other than providing a name to differentiate each workspace listed within the Workspaces section. |
| Workspace Folder | The Workspace Folder defines the path for a single resource or asset type folder. The more resources or assets that a user will have to play with, the more workspaces will be needed to be defined in Producer Link.
The checkmark and warning |
| Default | Lets the user define which workspace will be defined as the default one. |
| Action | Lets the user remove the workspace, by clicking on the Remove Workspace button. |
| Add | Lets the user add another workspace to the workspace list. |
 button from the Production page will export the highlighted scene and launch the Open Offline Scene dialog from Producer Link.
As users will be accessing files from various locations and various computers, the path to those files will be different for most users. For example, files could be stored on a centralized cloud location such as DropBox or a centralized server in the studio. Each computer will have a different path to access these files.
Workspaces
To allow everyone on your team to access and open files, your data such as backgrounds, library assets, Maya projects and so on must be located in a centralized repository accessible by everyone who needs access to it to work. Each computer must be able to access the location via an absolute path that will be configured in Producer Link.
You can have one or multiple repositories. These shared locations are called workspaces. Each location will be identified in Producer with a Workspace alias. The Workspace Alias will then be linked to the absolute path from each computer who will need to access the location.
Everyone will be using the same Workspace aliases, but everyone will most likely be using a different absolute path to access these shared locations from their computers.
Therefore, the first step will be to create this shared space and give access to the users. This is done outside of Producer and Producer Link. This is an internal operation to your organization.
How-Tos
To create a new workspace or new Harmony version alias, you can click the Add button and fill in the information for the row. It should auto-save once you click anywhere else in the page. Ensure you have selected a default by checking the checkbox if you have multiple rows.
To configure workspaces using the command line, you can refer to Producer Link Command Line.
To simplify working from home on a Harmony database, a studio using Producer can choose to set up and use the Harmony Offline Mode. See Harmony Integration > Working Remotely. Once the above is completed by a studio system administrator, the user may now configure Producer Link as detailed below.
Once the above is completed by a studio system administrator, the user may now configure Producer Link as detailed below.
-
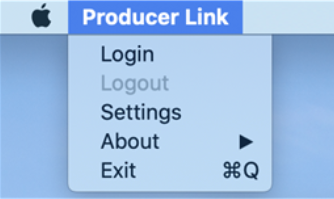
In Producer Link, make sure you are connected to your Producer instance. If you are not, you should “Login”.
-
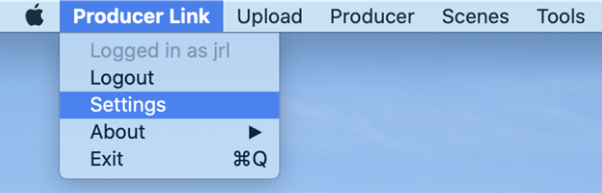
In Producer Link, open “Settings”
-
Under General Settings, choose the Working Project from the drop-down list.
-
Under Harmony Offline Mode, make sure the “Open Scenes in Offline Mode” option is checked (this is the default value).
-
Enable the “Check out before Export” option if you would like the default value of the Export button to be “Check out and Export” (instead of “Export only”).
-
Still under Harmony Offline Mode, click on the folder icon at the end of the “Cloud Exchange Folder” line and browse to where the cloud folder that was shared with you is mounted on your machine. This should be a subfolder named after your Harmony username.
 NOTE The path may appear slightly different from the sequence of folders you have just browsed since some cloud storage services may use “shortcuts”. This is no cause for concern.
 -
Under Harmony Offline Mode, click on the folder icon at the end of the “Local Offline Folder” line and browse a folder of your choosing where offline scene files will be stored and uncompressed on this remote computer to work in Harmony Standalone.