Creating Scenes
Once you've created an environment and jobs for your project, you can start to populate your job with scenes.
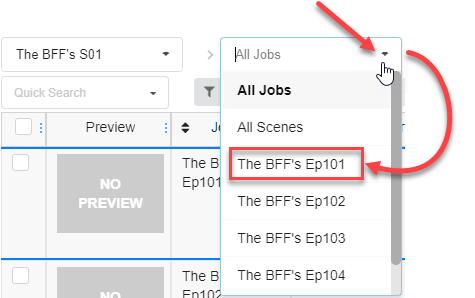
- In the Production page, from the list of jobs, double-click on the job you would like to create scenes for. Alternatively, go to the Jobs drop-down menu and select a job from the list.
-
Once inside the job, click on the Add Scenes button.

-
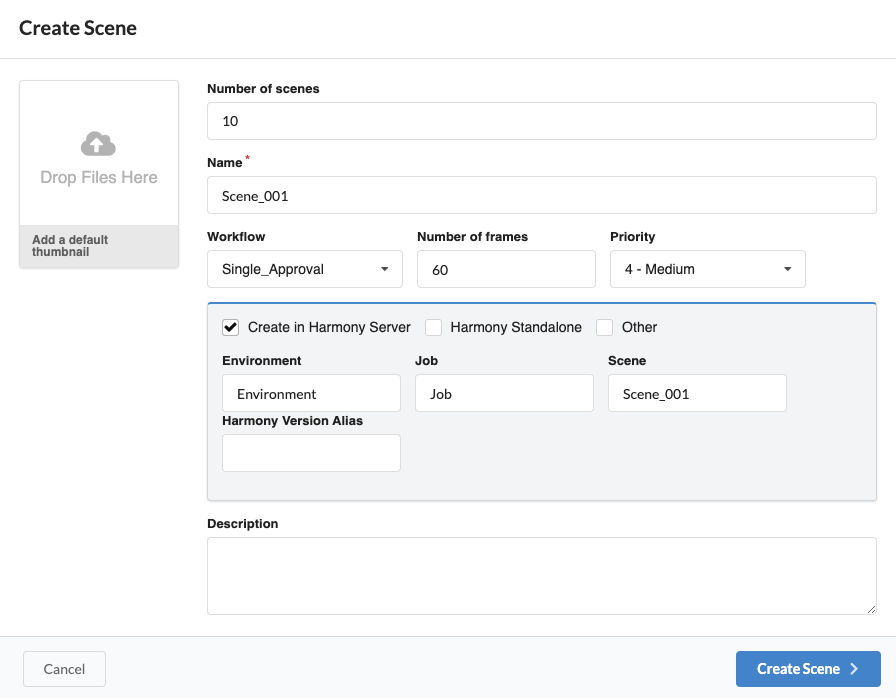
The Create Scene window appears.
-
Number of scenes: Enter the number of scenes you wish to create.
-
Name: Type in the name of the first scene.
NOTE If you create more than one scene, it is important to add a number to the end of the name, as the other scenes will use the same name plus the subsequent number. -
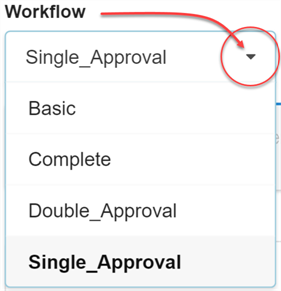
Workflow drop-down: select the workflow you would like to associate with the new scenes.
-
Number of frames: enter a numerical value for the number of frames that you would like automatically created for each scene.
-
Priority drop-down: select the priority (No priority, 1 - Critical to 5 - Low) for the new scenes.
-
[Optional] Description: optionally add a description for the scene
-
-
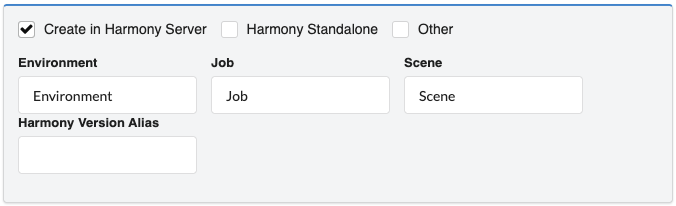
OPTIONAL: Link the scene to an actual file by selecting one of the three proposed options:
-
Create in Harmony Server: Link a Harmony Scene asset by checking the box.
Fill in the Environment name, Job name, Scene name and Harmony Version Alias, if applicable.
 NOTE This will create the scene on the Harmony Server, but the Environment and Job must already exist in Harmony. If the scene already exists in Harmony, this will simply link to that scene.
OR
-
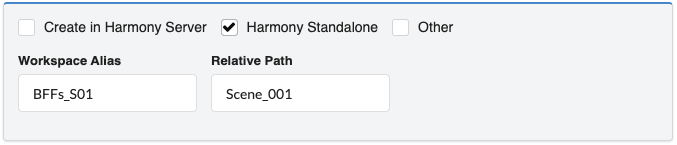
Harmony Standalone: Links to a scene from a standalone version of Harmony. Fill in a Workspace Alias and Relative Path.
-
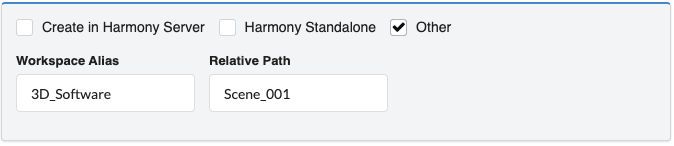
Other: Links to another type of scene from a third party software.
-
- Click the Create Scene button.
The scene(s) are added to your job.