Creating Environments
Environments are a collection of jobs, each of which is a collection of scenes. Typically, environments are used to separate the seasons of an animated series, or to separate animation series themselves. Special environments can also be created to store scenes containing character models and assets for a series.
A new project does not have any environments. To start creating the structure of a project, environments must be manually created by a user with administrative privileges. A project can have as many environments as needed.
Users with the appropriate privileges can add, edit, retire, and delete environments.
-
In the main menu, select Production.
-
In the Environments drop-down menu, select All Environments.
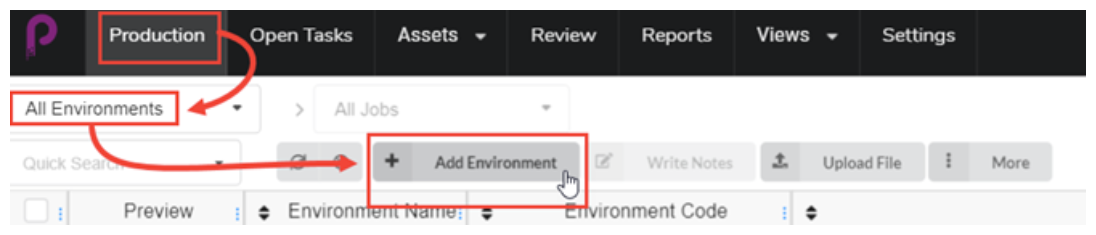
- Click on the Add Environment
 button.
 - The Create Environment dialog opens.
-
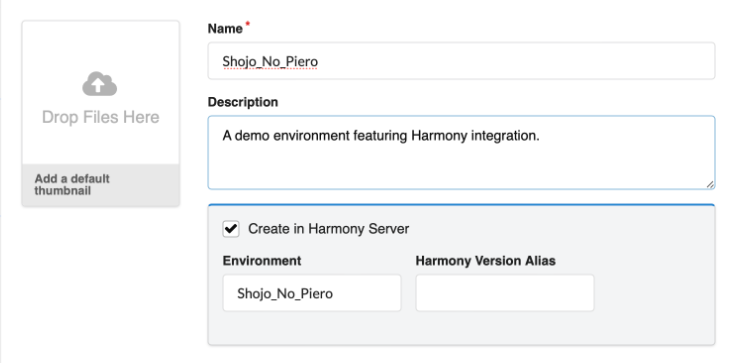
Name: Type in the name of the new environment.
-
[Optional] Description: Optionally, add a description of the new environment.
-
Add a default thumbnail box: you can optionally drag and drop a file that will be used at the environment's Preview image. This can also be done at a later time.
-
[OPTIONAL] Check the Create in Harmony Server checkbox.
-
The Harmony Environment is automatically generated from the Name field but can be overridden. If there are spaces in the name, they will automatically be replaced by underscores. Harmony doesn’t allow spaces in names.
-
Harmony Version Alias: You can optionally enter a label identifying a version of Harmony (See Producer Link Settings page)
NOTECheck the Create in Harmony Server option box if you are using Harmony Server and want to create or register the environment in Harmony database. Do NOT check this option if not using Harmony Server.
Refer to Harmony Synchronization section for more information.
-
-
Click on the Create Environment button.
The environment appears in your project.