The first step in Surface Shading is to identify the surfaces that will need lighting, shading or cast-shadows. Volume Objects can be used to join multiple drawings into a single surface, or separated into different Volume Object IDs and blended with the Height Matte. The Volume Objects for a rig can be created at either the rigging or compositing stage—but it is important that these Volume Objects accurately represent a surface in relation to the rest of surfaces in the rig.
The Surface Map node combines all the Volume Objects in your rig and allows you to a add a height to each volume definition. This allows you to define each surface’s range in relation to the others in the rig. These surfaces can be animated within the surface mapping, joints can be masked and height maps can be used to further define and animate the surface. All surface depths are in the same units as the field used by pegs in the scene—this provides a consistent relationship between the surface heights and the pegs and drawings in the scene.
The Surface Shading nodes render in relation to the overall surface defined by the Surface Map. Volume Object nodes are used to define individual surface layers and the Surface Map node accumulates these into a single elevation-map facing towards the camera. When a light is placed in the scene, surfaces that are in front of others will receive more light and will occlude the surfaces that are further away.
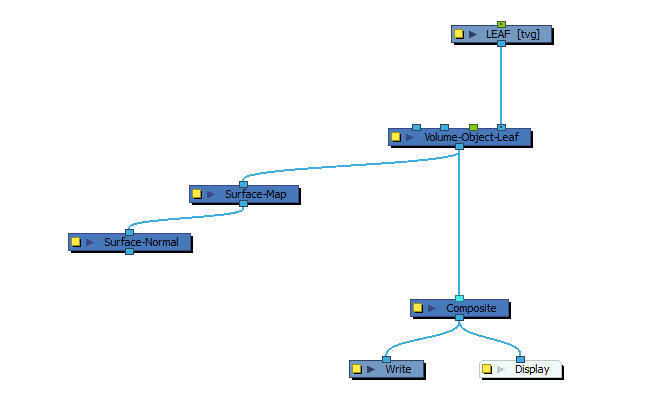
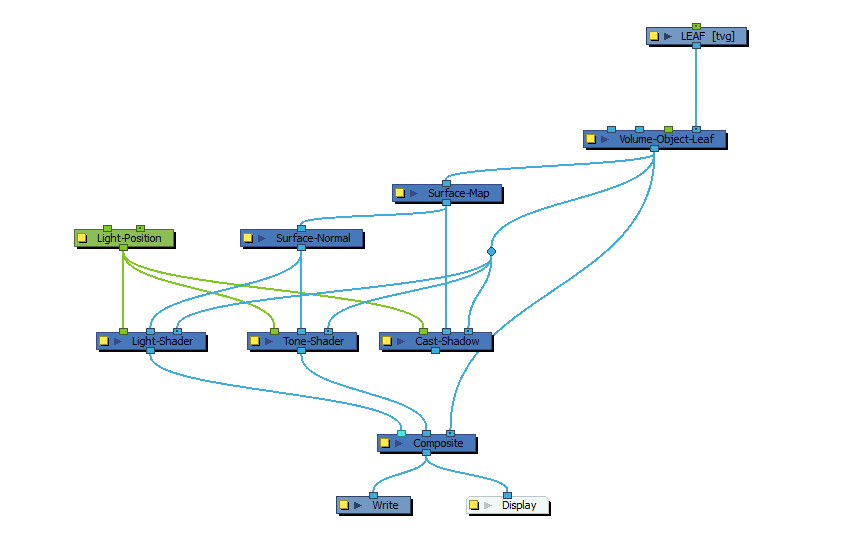
Here's what a basic surface shading effect node structure looks like: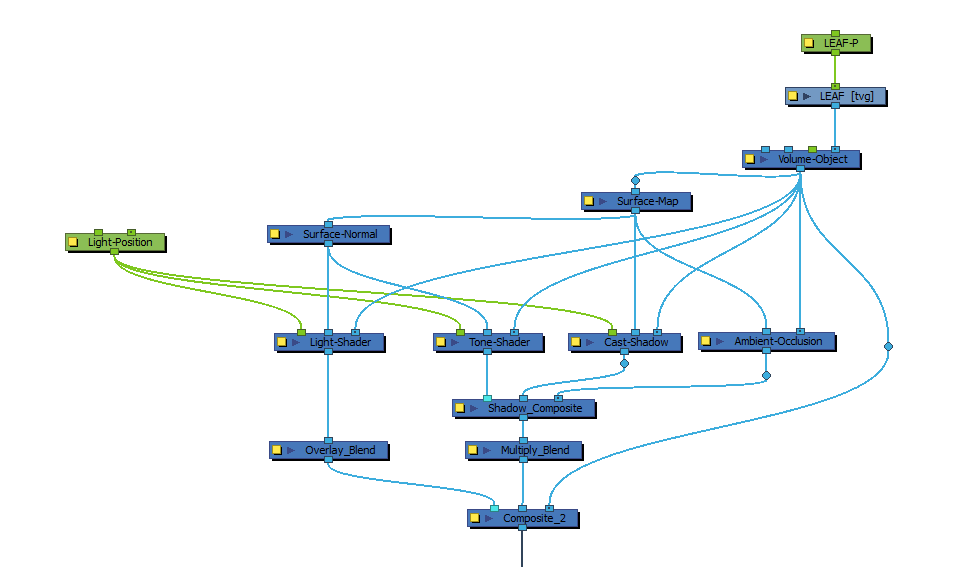
- In the Node Library view, select a Volume Object node from the Shading category and drag it to the Node view.
-
In the Node view, do one of the following:
-
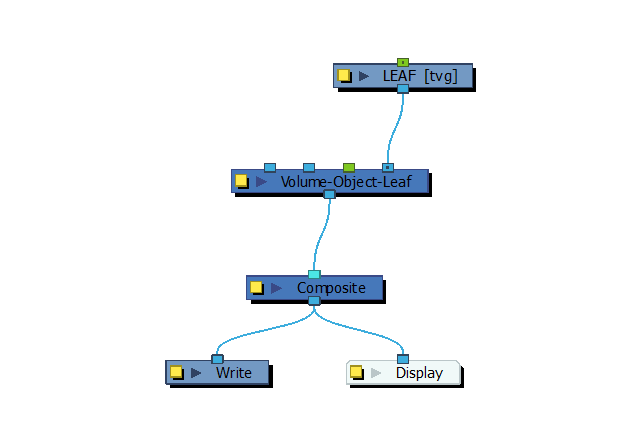
If you want to create a Volume Object for a single drawing, connect the Volume Object node between the drawing node and the Composite node.
-
If you need to combine several elements into one volume object, connect each of these elements to a Pass Through composite, then connect that Composite node to the Volume Object node.
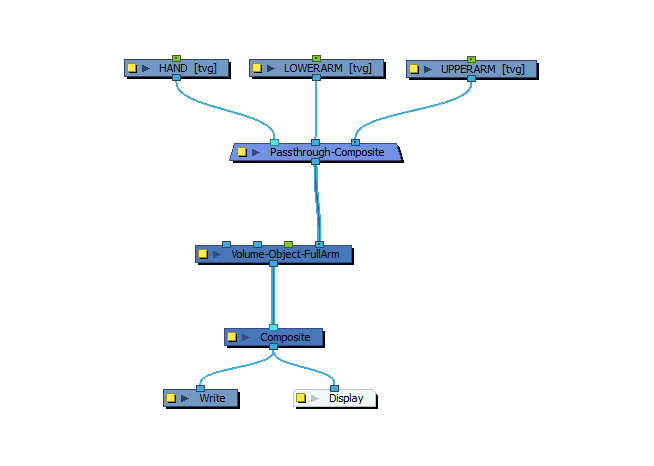
TIPS- To create a Pass Through composite, drag a Composite node from the Combine section of the Node Library into the Node view, then click on its
 Layer Properties button and, in the Layer Properties dialog, set the Mode parameter to Pass Through.
 - If you are working with a complex character rig, your rig will contain many Volume Object nodes representing different part of the rig. You should name each Volume Object node so that it identifies which part of the rig the object represents. To rename the node, click on its Layer Properties button and type its new name in the Name field.
-
-
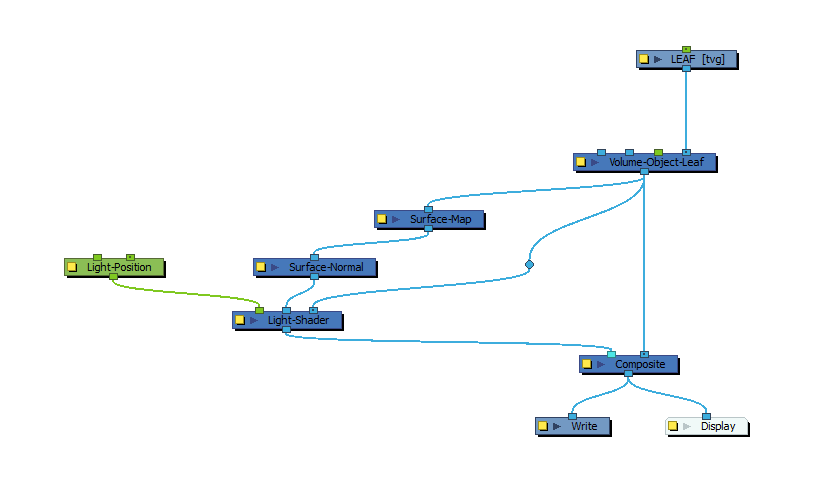
In the Node Library view, in the Shading category, select a Surface Map node and drag it to the Node view. Then, connect the output port of the Volume Object node to the input port of the Surface Map node.
-
In the Node Library view, in the Shading category, select a Surface Normal node and drag it to the Node view. Then, connect the output port of the Surface Map node to the input port of the Surface Normal node. This will convert the map provided by the Surface Map node into a normal map, which the Light Shader and Tone Shader nodes can use to generate their effects.
 NOTE
NOTEThe Surface Map node provides the surface information of your combined Volume Object nodes in field units. The Ambient Occlusion and Cast Shadow nodes can be attached directly to this node as they only require the height of the surfaces to generate their effect.
However, in order for the Light Shader and Tone Shader nodes to be able to work with the Surface Map node, a Surface Normal node needs to be attached between them. The Surface Normal node converts the surface information from field units to directional normals, which is required by the Light Shader and Tone Shader nodes to generate their effects.
-
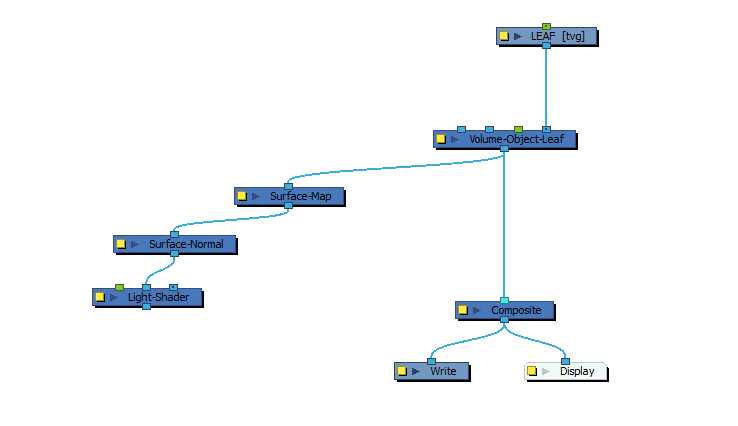
In the Node Library view, in the Shading category, select a Light Shader node and drag it to the Node view. Then, connect the output port of the Surface Normal node to the middle input port of the Light Shader node.
-
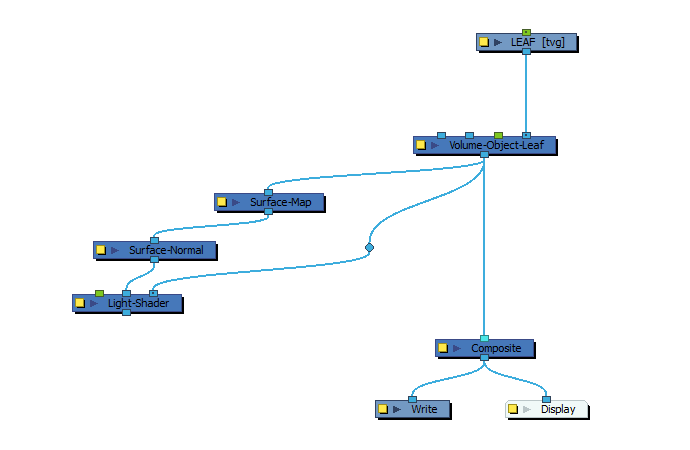
Create a new connection from the output port of the Volume Object node to the rightmost input port of the Light Shader node.
-
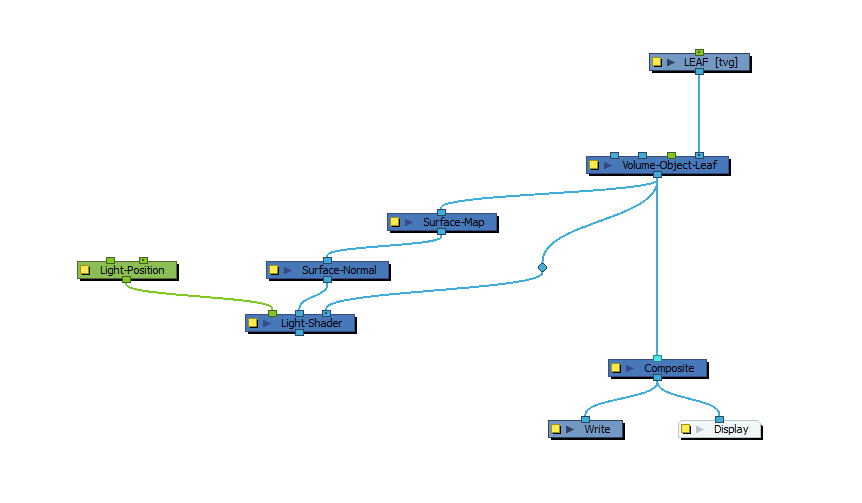
In the Node Library view, in the Shading category, select a Light Position node and drag it to the Node view. Then, connect the output port of the Light-Position node to the leftmost (green) input port of the Light-Shader node.
-
Connect the output port of the Light Shader node to the scene composite, left of the port connecting the Composite node to the Volume Object node. This will ensure that the light shading effect is composited on top of the artwork.
-
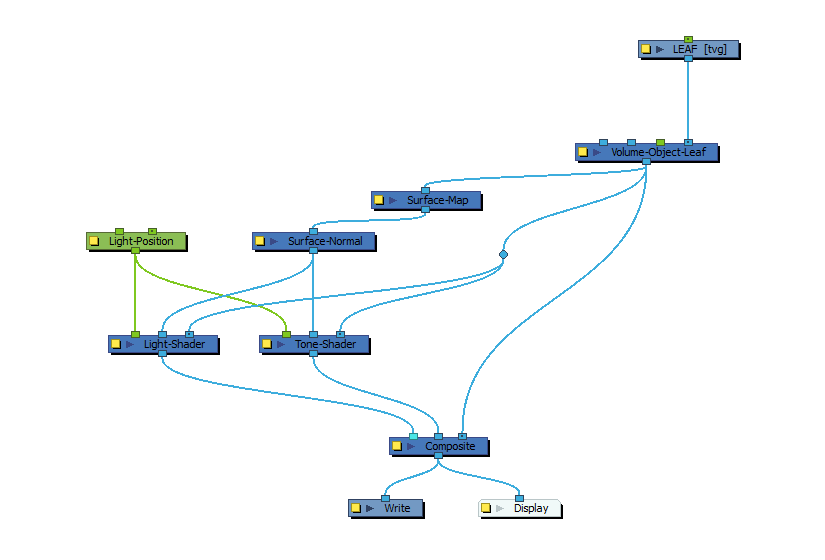
In the Node Library view, in the Shading category, select a Tone Shader node and drag it to the Node view. Then, connect it to the Volume Object node, the Surface Normal node and the Light Position node in the same way you did with the Light Shading node.
-
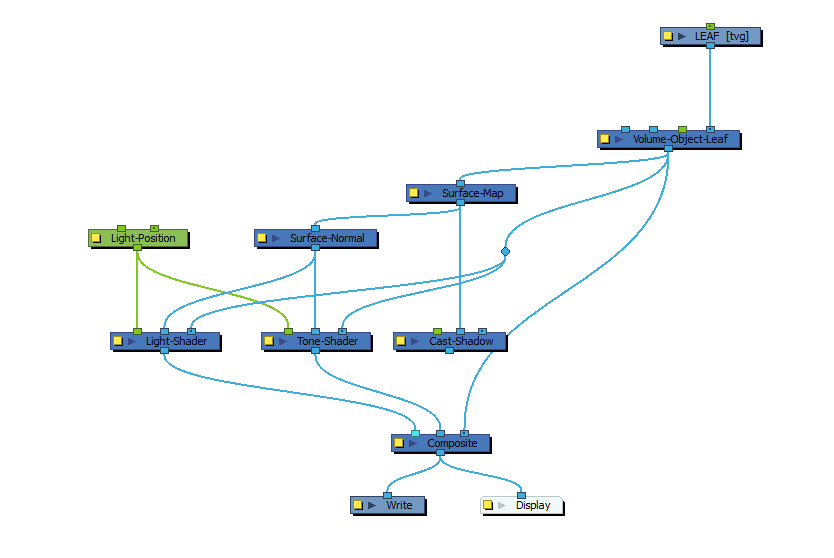
In the Node Library view, in the Shading category, select a Cast Shadow node and drag it to the Node view. Then, connect the output port of the Surface Map node to the middle input port of the Cast Shadow node.
-
Create a new connection from the output port of the Volume Object node to the rightmost input port of the Cast Shadow node.
-
Create a new connection from the output port of the Light Position node to the leftmost input port of the Cast Shadow node.
 NOTE The Light Position node is used to define the position of the light source in the scene. In this example, the Light Shader, Tone Shader and Cast Shadow all use the same light source. However, it is also possible to connect different Light Position nodes to each of these nodes to create a more complex lighting effect that uses different light sources.
 -
Connect the output port of the Cast Shadow node to the scene composite, just left of port connecting the Composite node to the Volume Object node.

-
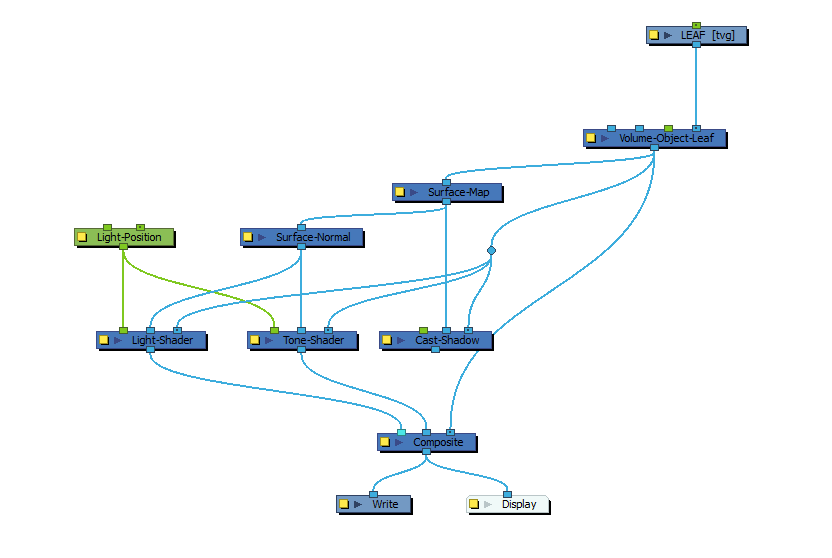
In the Node Library view, in the Shading category, select anAmbient Occlusion node and drag it to the Node view. Then, connect the output port of the Surface Map node to the leftmost input port of the Ambient Occlusion node, and the output port of the Volume Object node to the rightmost input port of the Ambient Occlusion node.
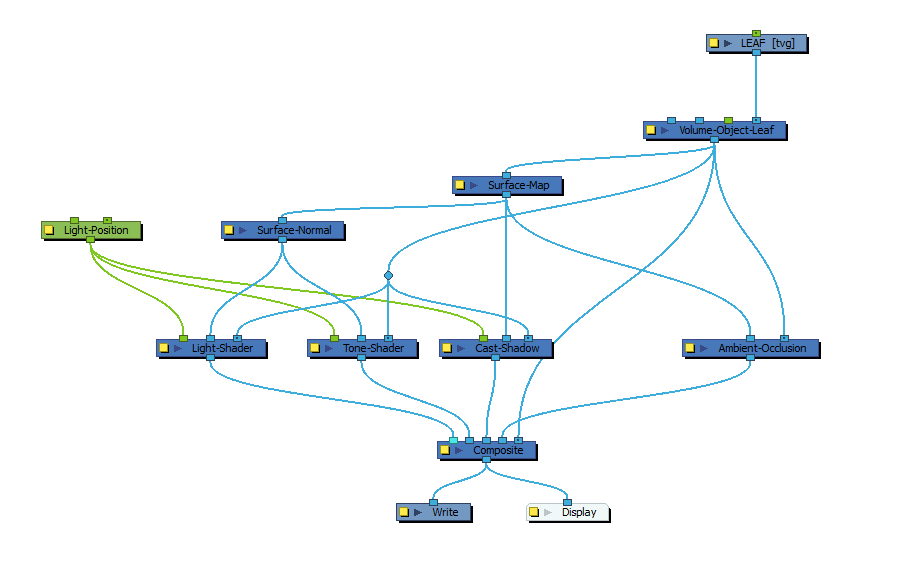 NOTE While the Cast Shadow node generates shading based on the position of the light source, the Ambient Occlusion node generates shading based on the height map of the volume object.
 -
At this point, the rig is ready, but the Surface Map needs to be customized to best represent the surface being rendered.
In the Node View, click on the
Layer Properties button of the Surface Map node to open its Layer Properties dialog. -
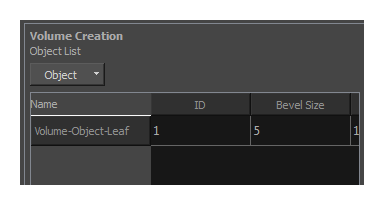
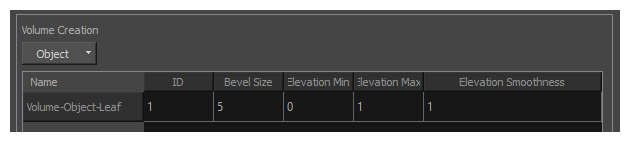
In the Volume Creation section, from the Object List , select all the Volume Object nodes you want to use in this map.
 NOTE If multiple Volume Object nodes are connected to the Surface Map node, they will all appear in this list.
 -
The Surface Map requires that the elevation range of each Volume Object be specified. This is done by specifying the Elevation Min and Elevation Max for each volume object in the list.
 TIPS
TIPS- You can set the elevation parameters to negative values to set the height of objects further back in the stage.
- After the elevation values are set, they can be animated by connecting a peg or an animated height map to the Volume Object node. For more information, see Defining and Animating Elevation
-
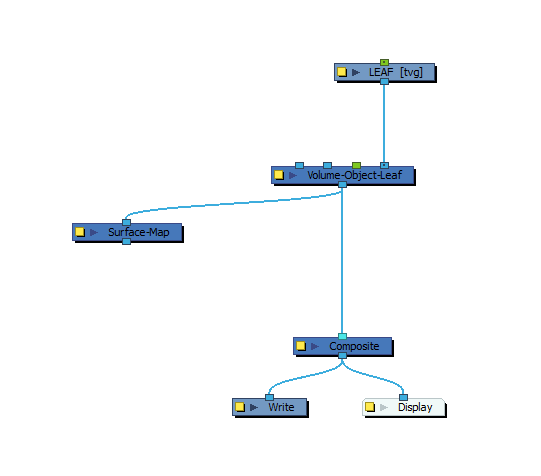
You can also carve out parts of your volume object in the Surface Map node the same way you can with the Normal Map node of the legacy Light Shading effect—see Adding and Carving Volumes.
-
For best results, consider using blending modes to composite the shading effects to your rig—see Surface Blending.