Once you have hooked your elements to a peg, you can start adding keyframes to create a motion path. This way, you can make an animation, such as an on-the-spot walk cycle or swimming cycle cross the screen.
This topic includes the following:
| • | Creating a Basic Motion Path |
| • | Displaying and Hiding a Motion Path |
| • | Adding and Controlling Motion Points |
| • | Switching between Keyframes and Control Points |
| • | Adjusting the Tension, Bias and Continuity |
| • | Previous and Next Control Point |
| • | Orient to Path |
| • | Constant Z |
| • | Snap Last Keyframe |
To create a basic motion path:
| 1. | In the  tool. It is also possible to create your motion path with the Transform tool. It is also possible to create your motion path with the Transform |
| 2. | Select Tools > Turn On Peg-Only Mode or press [M] to turn on the Peg-only mode. This will limit selection in the Camera view to pegs only. |
| 3. | In the Timeline view, go to the frame on which you want the motion path to start. |

| 4. | In the Camera view, select the elements that you want to follow a motion path. Their parent peg will automatically be selected because of the Peg-only mode. |
| 5. | In the Camera view, click and drag your selection to the first position of the motion path trajectory. |

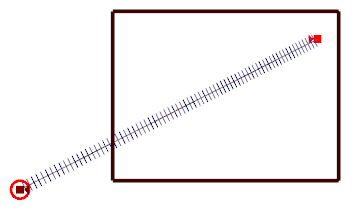
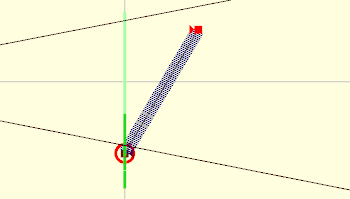
A keyframe is automatically created in the Timeline view. This keyframe is also displayed in the Camera, Top and Side views as a red square with an arrow.
| 6. | In the Timeline view, go to the last frame of your trajectory. |
| 7. | In the Camera view, drag your selection to the last position of the motion path trajectory. |
The trajectory appears in the Camera view and a new keyframe is created in the Timeline view.
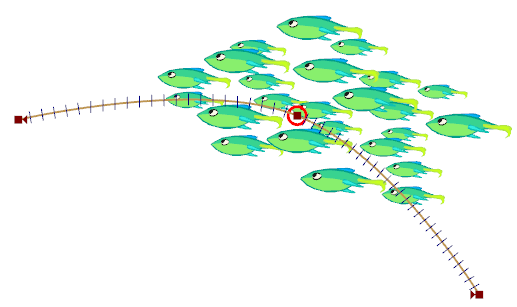
When you create a motion path with non-constant segments, notice a series of tick marks that represent the position of the element for each frame.
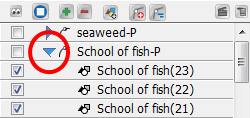
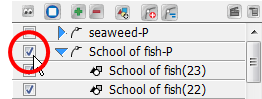
A basic motion path is created and your animation now follows the trajectory you created. In this example, the fish will swim across the screen in a straight line.
You can also modify the velocity of the motion path using the Function Editor view—see Function Editor View.
By default, when you select a peg, its motion path is automatically displayed in the Camera view but as soon as you select an element that is not related to this peg, the motion path is hidden. You can enable the peg layer to allow the motion path to be displayed at anytime in the Camera view, even when it is not selected.
To display a motion path:
| 1. | In the Timeline view, click the peg layer arrow button to expand it. |
| 2. | In the Timeline view, enable the peg layer. |
The motion path is displayed in the Camera view even when the peg is not selected.
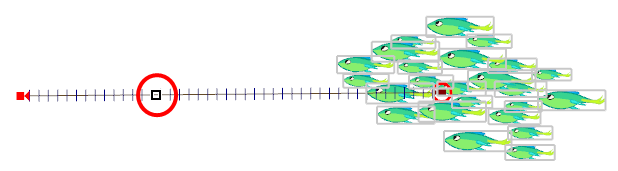
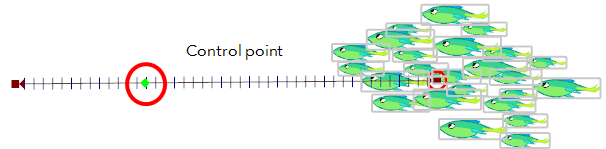
You can create a motion path that is not straight by adding motion points to the trajectory. Motion points can be either keyframes or control points. Keyframes are locked to a specific frame and control points are not.
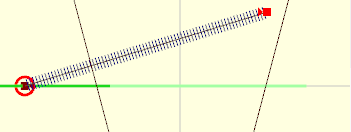
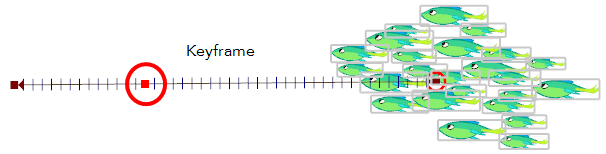
| • | Add keyframes when you want your element to reach a specific position on a specific frame number. A keyframe is displayed as a red square. |
| • | Add control points when you want your element to reach a specific position, but not at a specific frame number. A control point is displayed as a green circle. |
With the Motion tool, you can modify motion paths by adding and moving keyframes on the peg.
When used simultaneously, the Camera, Top and Side views allow you to create motion paths that go from
| • | In the Camera view, you can control the |
| • | In the Top view, you can control the |
| • | In the Side view, you can control the |
To add motion point:
| 1. | In the tool. |
| 2. | In the Timeline view, select the peg layer. |
The motion path trajectory will appear in the Camera, Top and Side views.
| 3. | In the Camera, Top or Side view, place the pointer over the trajectory while holding one these two keys: |
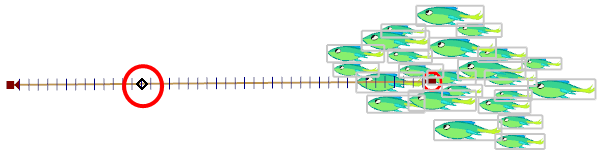
| ‣ | Hold the [Alt] key and click to add a keyframe. The pointer will change to a black square. |
| ‣ | Hold the [Shift] key to add a control point. The pointer will change to a black diamond. |
| 4. | In the Camera, Top or Side view, place the black square where you want your motion point to be added and click. |
A keyframe or a control point is added exactly at that place.
| 5. | In the Camera view, click and drag the new control points to control the motion path. |
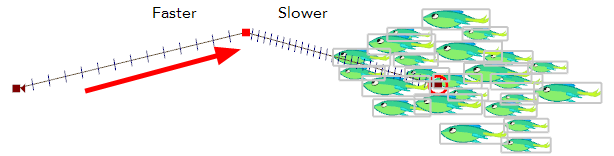
| ‣ | The keyframe is locked to a specific frame. Repositioning the new keyframe along the path will modify the speed of the two segments. |
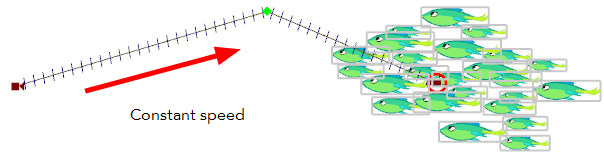
| ‣ | The control point is not locked to a specific frame. Repositioning the new control point will not affect the speed of the two segment, it will remain constant throughout the motion path. |
| 6. | To delete a control point, select it from the motion path and press [Del]. |
To add and remove control points from the Properties view:
| 1. | In the tool. |
| 2. | In the Timeline view, select the motion path peg to display it in the Camera view. |
| 3. | In the Camera view, select one of the control points on your motion path. The control point properties are displayed in the Properties view. |
| 4. | In the bottom of the properties view, click on the Add  button. button. |

The Add Motion Point dialog box opens.
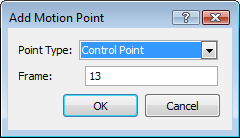
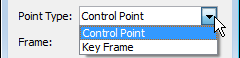
| 5. | Use the Point Type drop down menu to select between Control Point and Keyframe. |
| 6. | In the Frame field, enter the frame number where you want the new motion point to be added. |

| 7. | Click OK. |
The new motion point is added to your motion path.
| 8. | To delete a selected motion point using the Properties view, click Delete. |
You can also modify the velocity between the different control points using the Function Editor view—see Function Editor View.
You can easily switch from a keyframe to a control point or the opposite using the Properties view.
To switch between keyframe and control point using the Properties view:
| 1. | In the tool. |
| 2. | In the Timeline view, select the motion path peg to display it in the Camera view. |
| 3. | In the Camera view, select one of the control points on your motion path. |
The control point properties are displayed in the Properties view.
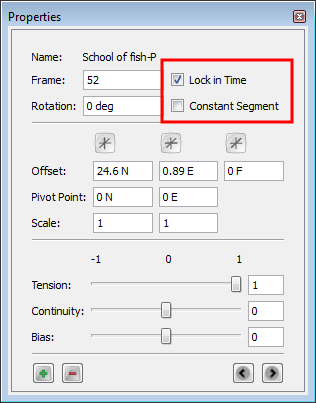
| 4. | Select or deselect the Lock in Time option: |
| ‣ | If you selected a control point, the Lock in Time option is disabled. Enable it to turn your control point into a keyframe. |
| ‣ | If you selected a keyframe, the Lock in Time option is enabled. Disable it to turn your keyframe into a control point. |
| 5. | You can also enable or disable the Constant Segment option: |
| ‣ | By default, the Constant Segment is disabled because Studio automatically creates non-constant segments between keyframes. Enable it to turn your segment to a constant segment. |
| ‣ | If the motion point you selected precedes a constant segment, the option will be enabled. Disable it to change your segment to a non-constant segment. |
You can use the Tool Properties view to edit keyframes and control point parameters such as position, continuity, bias, tension and lock in time.
Each time a Keyframe or a Control Point is selected in the Camera, Top or Side view, its parameters appear in the Properties view.
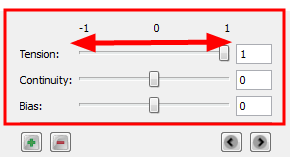
You can adjust these parameters on existing Control Points and Keyframes by selecting the point in the Camera View with the Motion  tool and using the Continuity, Tension and Bias sliders in the Properties view.
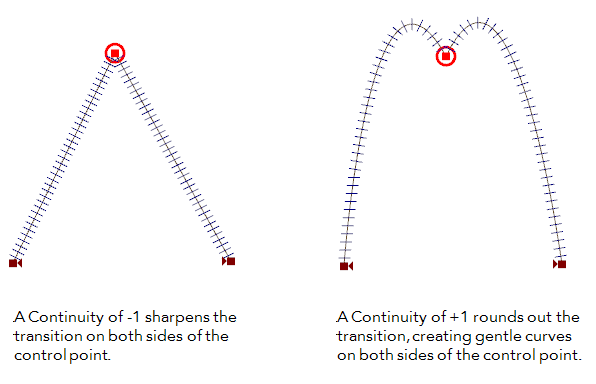
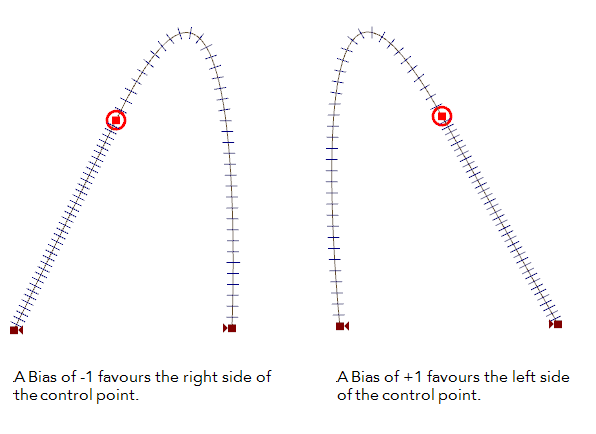
| • | Continuity: Controls the smoothness of a transition between the segments joined by a point. |
| • | Tension: Controls how sharply the path bends as it passes through a control point or keyframe. |
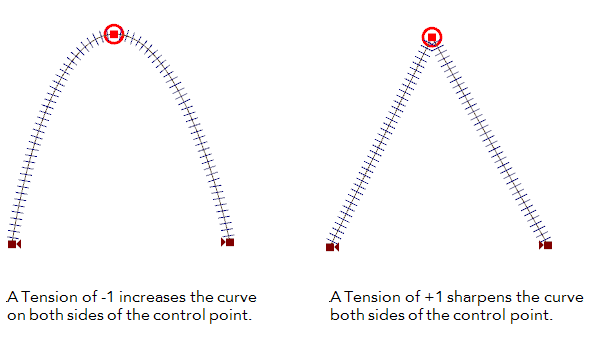
| • | Bias: Controls the path slope so that it flows towards one side of the motion point or the other. |
In Studio, there are shortcuts and options available for navigating between control points on a motion path.
To navigate between control points using shortcuts and menu option:
| 1. | In the tool. |
| 2. | In the Timeline view, select the motion path peg to display it in the Camera view. |
| 3. | In the Camera view, select one of the control points on your motion path. |
| ‣ | To go to the previous control point, select Element > Arrange > Previous Control Point or press [,]. |
| ‣ | To go to the next control point, select Element > Arrange > Next Control Point or press [.]. |
To navigate between control points using the Properties view:
| 1. | In the tool. |
| 2. | In the Timeline view, select the motion path peg to display it in the Camera view. |
| 3. | In the Camera view, select one of the control points on your motion path. |
The control point properties are displayed in the Properties view.
| 4. | In the bottom of the Properties view, click on the Previous and Next buttons to navigate through the control points. |
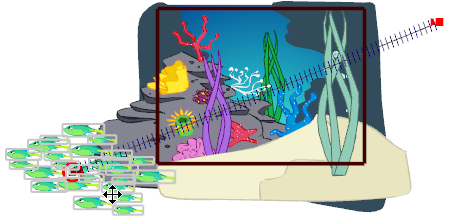
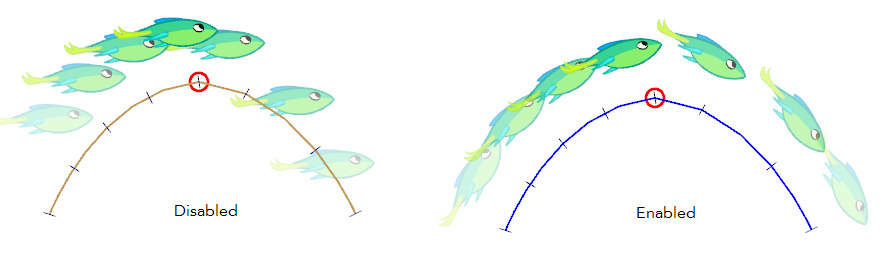
Studio has an option which forces the element connected to the path to follow the motion path.The Orient to Path option is available in the Peg layer Properties view.
In this example, the default setting shows the fish keeping its original orientation throughout the motion path. However, when the Orient to Path option is enabled, the fish follows the motion path. You could use this option if you wanted to make the fish leap out of the water and back in again.
To enable the Orient to Path option:
| 1. | In the Timeline view, select the parent peg of the element you want to follow the motion path. |
The properties of the selected peg are displayed in the Properties view.
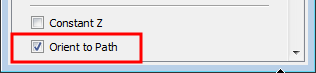
| 2. | In the Properties view, select the Orient to Path option. |
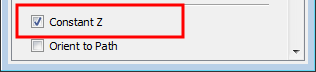
In the Properties view of a peg layer, you have the Constant Z option. This option is disabled by default, which means that when you create a motion path along the Z-axis, the automatic interpolation calculates the X, Y and Z axis values. When it is enabled, the interpolation calculates the X and Y axis values and will keep the Z-axis value as constant.

To enable the Constant Z option:
| 1. | In the Timeline view, select the peg on which you want to enable the constant Z option. |
The properties of the selected peg appear in the Properties view.
| 2. | In the Properties view, select the Constant Z option. |
The Snap Last Keyframe command forces the last keyframe and the keyframe before it to retain the same position values.
To enable the Snap Last Keyframe option:
| 1. | Select Tools > Snap Last Keyframe. |