Download Documentation
Function Editor View
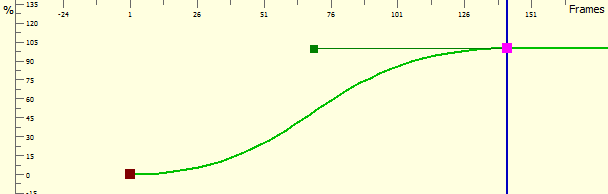
The graph in the Function Editor View displays the motion over the first and last keyframes set in the scene, as well as any motion points created in between.
If the scene is 60 frames, but the motion path ends at frame 40, then the editor will only display up to frame 40.
You can use the Function Editor View to create and edit motion paths and movements as well as edit velocity.
This topic is divided as follows:
Function Editor View - Overview
|
1.
|
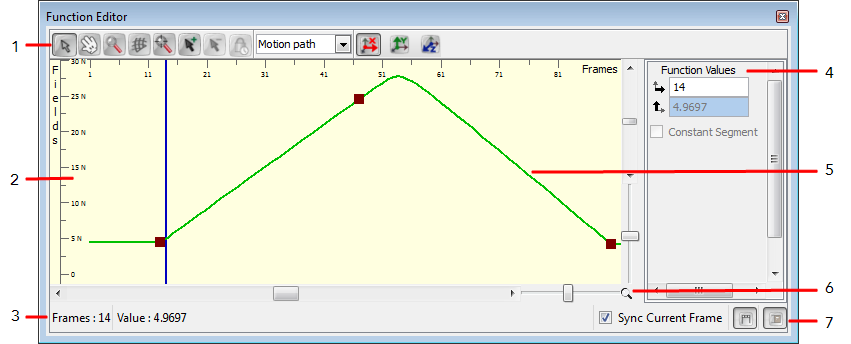
Function Editor View toolbar: |
|
‣
|
 Select: Lets you manipulate the motion point and velocity Bezier handles. Select: Lets you manipulate the motion point and velocity Bezier handles. |
|
‣
|
 Grabber: Lets you pan in the Function Editor view. Grabber: Lets you pan in the Function Editor view. |
|
‣
|
 Zoom: Lets you zoom in and zoom out (hold [Alt]) in the Function Editor View. Zoom: Lets you zoom in and zoom out (hold [Alt]) in the Function Editor View. |
|
‣
|
 Show Grid: Shows or hides the grid. Show Grid: Shows or hides the grid. |
|
‣
|
 Reset: Resets the pan and zoom in the Function Editor View. Reset: Resets the pan and zoom in the Function Editor View. |
|
‣
|
 Add Keyframe: Lets you add a keyframe on the curve. Add Keyframe: Lets you add a keyframe on the curve. |
|
‣
|
 Remove Keyframe: Lets you delete a keyframe on the curve. Remove Keyframe: Lets you delete a keyframe on the curve. |
|
‣
|
 Lock In Time: Lets you toggle the selected motion point between a keyframe or a control point. Lock In Time: Lets you toggle the selected motion point between a keyframe or a control point. |
|
‣
|
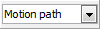 Function Drop-down menu: Choose the function you want to display and edit from this drop-down menu. Function Drop-down menu: Choose the function you want to display and edit from this drop-down menu. |
|
‣
|
 Projection X: Displays the X axis values in the Fields scale of the graph. Projection X: Displays the X axis values in the Fields scale of the graph. |
|
‣
|
 Projection Y: Displays the Y Axis values in the Fields scale of the graph. Projection Y: Displays the Y Axis values in the Fields scale of the graph. |
|
‣
|
 Projection Z: Displays the Z Axis values in the Fields scale of the graph. Projection Z: Displays the Z Axis values in the Fields scale of the graph. |
|
2.
|
Graph Area: Displays a Fields scale vertically on the left, a Frame scale on the top and the selected function curves and motion points. |
|
3.
|
Function Editor View Status Bar: Displays the values, frame and fields, for the currently selected motion point. |
|
4.
|
Editing Panel: The Editing Panel is contextual, the fields displayed there are relative to the type of function you selected in the function drop-down menu. Enter specific values in these fields to edit the motion points on the curve. |
|
5.
|
Function Curve: Displays the selected movement of a peg as an editable curve with visible motion points. |
|
6.
|
Frames and Fields Scales Zoom: These sliders let you increase or decrease the spacing between each value on the Frames or Fields scale. |
|
7.
|
Function Editor View bottom toolbar: |
|
‣
|
 Sync Current Frame: When this option is enabled, when you select frames in the Function Editor view, the entire scene's views (Camera, Timeline, etc) will be in-sync and follow. When this option is disabled and you select frames in the Function Editor view, the other scene views stay at the current frame. Sync Current Frame: When this option is enabled, when you select frames in the Function Editor view, the entire scene's views (Camera, Timeline, etc) will be in-sync and follow. When this option is disabled and you select frames in the Function Editor view, the other scene views stay at the current frame. |
|
‣
|
 Show/Hide toolbars: Shows or hides the Function Editor View toolbar. Show/Hide toolbars: Shows or hides the Function Editor View toolbar. |
|
‣
|
 Show/Hide Editing Panel: Shows or hides the Editing Panel. Show/Hide Editing Panel: Shows or hides the Editing Panel. |
Adjusting the Velocity
The velocity, or ease-in ease-out, is used on non-constant segments to give a more natural feeling to the movement.
Ease-in and ease-out is the acceleration and deceleration of the movement. The speed of the motion is adjusted between two keyframes so that the movement will start slowly, speed up and then slow down again as it reaches the second keyframe. Adjusting the velocity will create a more natural feel to the movement.
You can set your preferences so that when you create a motion path, a default velocity is automatically applied—see
PreferencesTo adjust the velocity of a movement:
|
1.
|
In the Animation Tools toolbar, select the Motion  tool. tool. |
|
2.
|
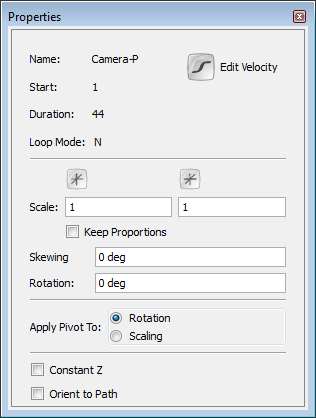
In the Camera or Timeline view, select the motion path peg whose velocity you want to adjust. |
The selected peg properties appear in the Properties view.
|
3.
|
In the Properties view, click the Edit Velocity  button. button. |
The Function Editor view opens.
|
4.
|
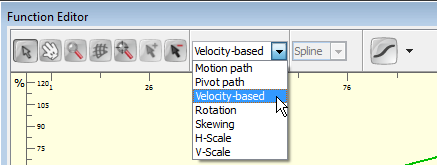
In the drop-down menu, select Velocity-based, to edit the velocity of the motion path. |
|
5.
|
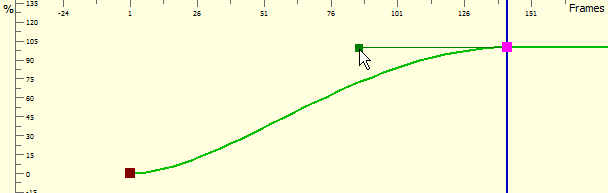
In the Function Editor view, click the Curve button and adjust your curve: |
|
‣
|
Click on a keyframe to select it. |
|
‣
|
Drag the handle to adjust the curve. |
|
6.
|
You can also use the default curve options to quickly adjust your velocity. |
|
‣
|
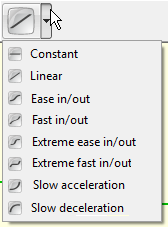
Click the Curve icon to open the drop-down menu and select the desired velocity option. |
|
•
|
 Constant: Changes a non-constant segment to a constant segment removing the automatic motion tweening created by Studio. Constant: Changes a non-constant segment to a constant segment removing the automatic motion tweening created by Studio. |
|
•
|
 Linear: Creates a straight line of constant speed for a more automated animation look. Linear: Creates a straight line of constant speed for a more automated animation look. |
|
•
|
Ease in/out: Creates a gradual acceleration at the beginning and a gradual deceleration at the end of the curve. This creates a more natural animation look. |
|
•
|
 Fast in/out: Creates a curve that starts quickly, slows down in the middle and ends with a final acceleration. Fast in/out: Creates a curve that starts quickly, slows down in the middle and ends with a final acceleration. |
|
•
|
 Extreme ease in/out: Creates a more dramatic ease in, ease out effect. Extreme ease in/out: Creates a more dramatic ease in, ease out effect. |
|
•
|
 Extreme fast in/out: Creates a more dramatic fast in, fast out effect. Extreme fast in/out: Creates a more dramatic fast in, fast out effect. |
|
•
|
 Slow acceleration: Creates a curve that starts slowly to smoothly accelerate over time. Slow acceleration: Creates a curve that starts slowly to smoothly accelerate over time. |
|
•
|
 Slow deceleration: Creates a curve that starts quickly to smoothly decelerate over time. Slow deceleration: Creates a curve that starts quickly to smoothly decelerate over time. |
Adding and Deleting Motion Points in the Function Editor View
Modifications can be made to a motion path and any peg or element movement by adding and deleting motion points in the function curve. This is done in the Function Editor View.
Adding Motion Points
To add motion points in the Function Editor View:
|
1.
|
In the Animation Tools toolbar, select the Motion  tool. tool. |
|
2.
|
In the Camera or Timeline view, select the peg of the motion path you want to edit. |
The selected peg's function curve will appear in the Function Editor View.
|
3.
|
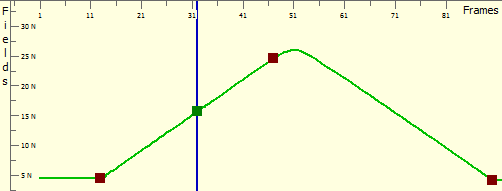
In the graph section, click on the frame number where you would like to add a motion point. You can also type in the desired frame in the Editing Panel. |
In the graph section, the selected frame number is indicated by a blue vertical line.
|
4.
|
Click the Add Keyframes button. |
A keyframe appears on the function curve at the selected frame. This new keyframe is also visible on your motion path in the Camera, Top and Side views, as well as on your peg layer in the Timeline view.

|
‣
|
If you want the new motion point to be a control point rather than a keyframe, click the Lock In Time button to disable it. |
The selected keyframe changes to a control point.
|
‣
|
To change a control point into a keyframe, select the control point on the function curve and click on the Lock In Time button to enable it. The selected control point changes into a keyframe. |
Delete Motion Points
To remove motion points from the Function Editor View:
|
1.
|
In the Animation Tools toolbar, select the Motion tool. |
|
2.
|
In the Camera or Timeline view, select the peg of the motion path you want to edit. |
The selected peg's function curve will appear in the Function Editor view.
|
3.
|
In the graph section, click on the motion point you want to delete. You can also type in the desired frame in the Edition Panel. |
The selected motion point is highlighted in the function curve.
|
‣
|
If the selected motion point is a control point, you first need to change it to a keyframe by clicking the Lock In Time button to enable it. |
|
4.
|
Click the Remove Keyframe button. |
The selected keyframe is deleted from the function curve. It is also deleted from your motion path in the Camera, Top and Side views as well as on your peg layer in the Timeline view.
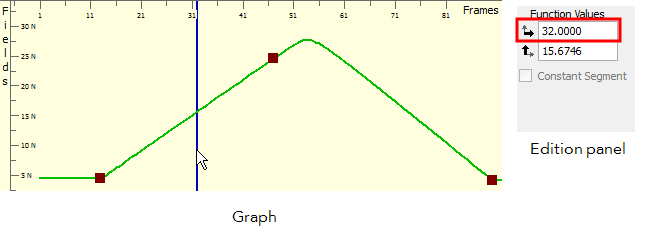
Changing the Values of a Motion Point
You can modify your motion paths and movements by positioning the motion points directly in the Camera, Top or Side view, but you can also modify the value of the motion points from the Function Editor View.
To modify a motion path motion point's values:
|
1.
|
In the Animation Tools toolbar, select the Motion tool. |
|
2.
|
In the Camera or Timeline view, select the peg of the motion path you want to edit. |
The selected peg's function curve will appear in the Function Editor view.
|
3.
|
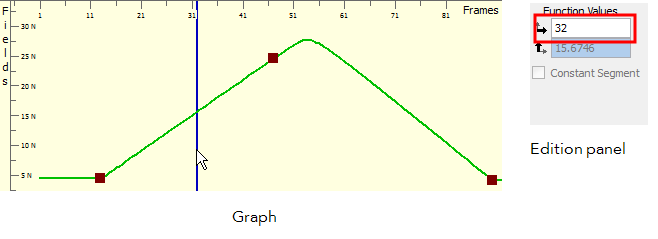
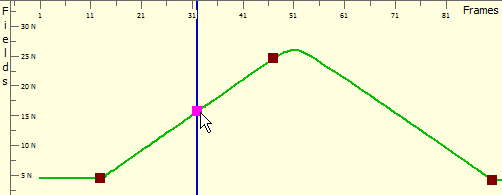
In the graph section, click on the motion point you want to reposition. |
The selected motion point will be highlighted in the function curve.
|
4.
|
Choose with the Field Values  buttons which values: X, Y, or Z you want to edit and display in the vertical value scale of the graph. buttons which values: X, Y, or Z you want to edit and display in the vertical value scale of the graph. |
|
5.
|
Position your motion point: |
|
‣
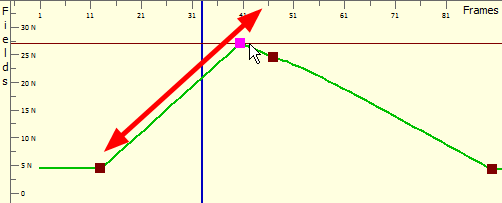
|
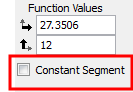
Keyframe: Drag your keyframe up and down to modify the Fields value of the keyframe. Since a keyframe is locked in time, you cannot modify the Frame value. A red guide appears to help you align the keyframe to the right value. |
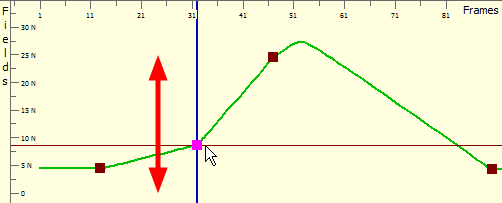
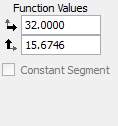
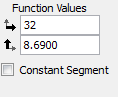
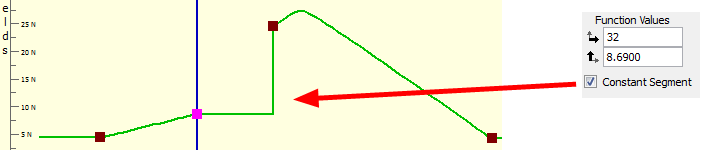
You can also type in the desired value in the Editing Panel.
|
‣
|
Select the Constant Segment option if you want to change the non-constant segment following the selected keyframe to constant. |
|
‣
|
Control Point: Drag your control point along the curve to modify the Fields value. A control point is not locked in time but is constrained by the curve. The frame value will automatically be changed in relation to the fields value you are giving it. A red guide appears to help you align the keyframe to the right value. |
You can also type in the desired value in the Editing panel.