Timeline View
The Timeline view is where you assemble the timing of your scene’s visuals and sounds. You can add sound track layers to this timeline, as well as edit audio files imported into the sound tracks. You can also add transitions and control the playback of a selected panel or the entire storyboard from this view.
When setting up your animatic in Storyboard Pro, you will want to be in the Timeline view, so you can easily change the duration of your panels, add sound and transitions, and play back your animation with a display of the time or frames—see Adding a View.
NOTE: By default, timecode format is used to display the timing in the most accurate manner. The starting timecode of your project is set to 00:00:00.00. However, sometimes it may be best to use the number of frames as a timing value and a later timecode value as the start of your project. You can modify the format and default starting time code value via the Preference dialog box—see
Preferences.

To enable the Timeline view, do one of the following:
|
‣
|
Select Windows > Timeline. |
|
‣
|
In Workspace toolbar, select Timeline. |

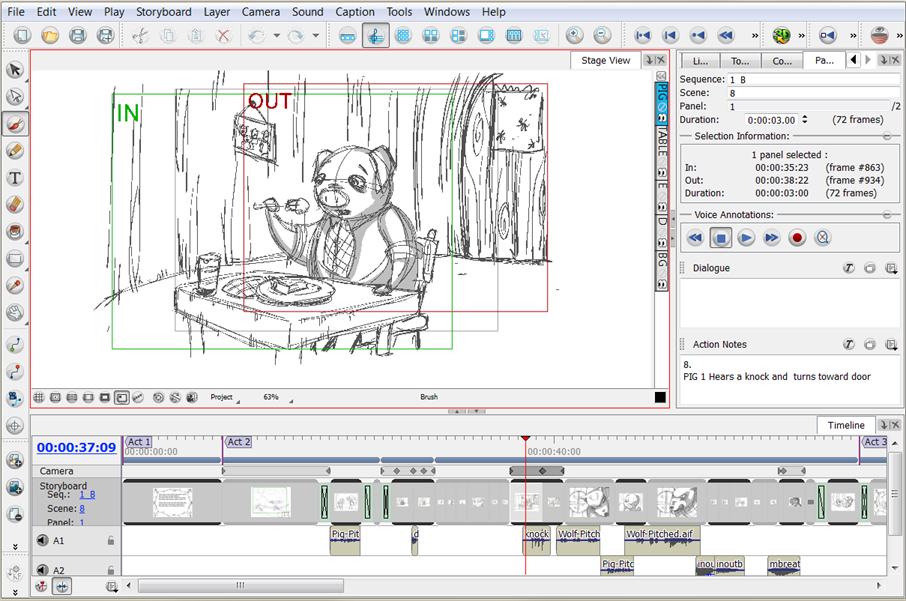
- The current timecode (time marker's position) is always displayed in the top-left corner of the Timeline view. Under the current timecode, the total duration of the project is displayed. You can click and drag the timecode to scroll through your project.
- The names and beginnings of the different acts are displayed as little flags at the top of the Timeline view.
- Sequences contained in your project are displayed as blue bars.
- The different scenes of your project are represented by grey frames at the top and bottom of the panels.
- The different panel blocks display a thumbnail at their centre.
- Transitions are displayed as green rectangles between scenes.
- Camera movements are displayed as grey bars in the Camera row and keyframes as darker grey diamond shapes.
- The audio blocks are below the scenes.
- The current sequence, scene, and panel names are displayed at the beginning of the panels' row. You can click the names and drag the cursor left or right to scroll through your project.
- The soundtracks names as well as Mute and Lock icons are displayed at the beginning of the Timeline view.
- Sound options are available at the bottom of the Timeline view for easy access.


