
Download Documentation
Creating a Multiplane

One of the exciting features in Studio is the Multiplane. In the Multiplane you can create backgrounds in several layers and spread them in depth along the Z-axis. This way you add depth to your project, and when you move the camera through this environment, it creates an impressive perspective illusion.
Distributing the Elements on the Z-axis
When it is time to position elements along the Z-axis, you can do it via the Top, Side, Camera, or Properties view
Top and Side Views
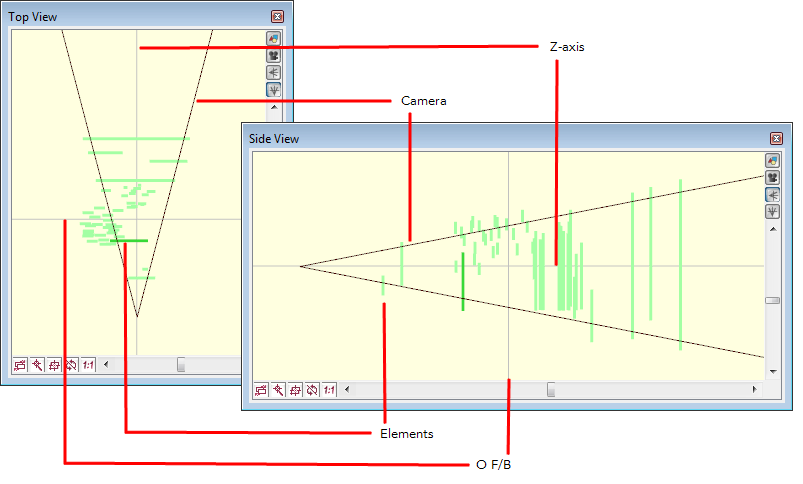
The Top and Side views are representations of your scene's space viewed from the top and side.
When you move your element along the Z-axis, you will notice that it seems they are getting smaller or larger. This is because of the perspective effect, the elements that are closer to the camera appear larger and the elements that are far away, appear smaller. Because of this, once they are positioned you might need to resize your elements using the Animation Select  tool.
tool.
To position elements in the Top view:
|
1.
|
In the Animation Tools toolbar, select the proper tool: |
|
‣
|
Select the Animation Select tool if you want to set the static position of your element. The element will be positioned without creating a keyframe. |
|
‣
|
Select the Transform  tool if you want to animate the element along the Z-axis, this will create a keyframe. tool if you want to animate the element along the Z-axis, this will create a keyframe. |
|
2.
|
In the Timeline or Camera view, select the elements you want to reorder. |
In the Top view, the selected element is represented by a darker green line.

|
3.
|
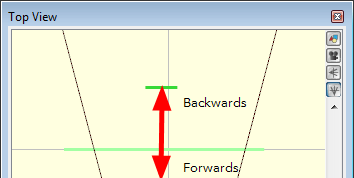
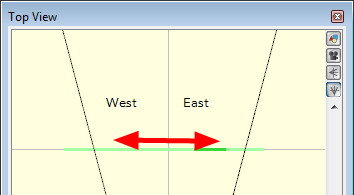
In the Top view, grab your element and drag it to a new position or use the arrow keys: |
|
‣
|
A vertical drag will position it along the Z-axis (Forward or Backward). |
|
‣
|
An horizontal drag will position it on the X-axis (East or West). |
As you position your elements in the Top view, you can see the position update simultaneously in the Camera view.
To position elements in the Side view:
|
1.
|
In the Animation Tools toolbar, select a tool: |
|
‣
|
Select the Animation Select tool if you want to set the static position of your element. The element will be positioned without creating a keyframe. |
|
‣
|
Select the Transform tool if you want to animate the element along the Z-axis. This will create a keyframe. |
|
2.
|
In the Timeline or Camera view, select the element you want to reorder. |
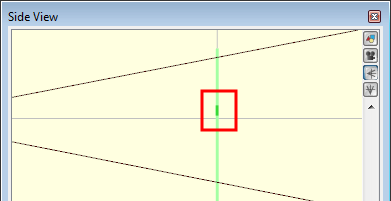
In the Side view, the selected element is represented by a darker green line.
|
3.
|
In the Side view, grab your element and drag it to a new position or use your arrow keys: |
|
‣
|
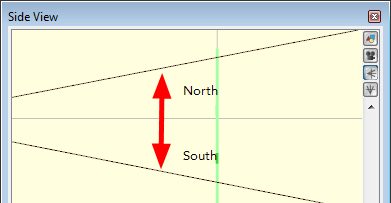
A vertical drag will position it along the Y-axis (North or South). |
|
‣
|
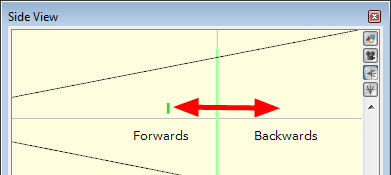
An horizontal drag will position it on the Z-axis (Forward or Backward). |
As you position your elements in the Side view, you can see the position updating simultaneously in the Camera view.
Camera View
You can order your elements along the Z-axis directly in the Camera view.
To distribute elements in the Camera view:
|
1.
|
In the Animation Tools toolbar, select the proper tool: |
|
‣
|
Select the Animation Select tool if you want to set the static position of your element. The element will be positioned without creating a keyframe. |
|
‣
|
Select the Transform tool if you want to animate the element along the Z-axis, this will create a keyframe. |
|
2.
|
In the Camera view, select the element you want, then to reorder it press and hold the [Alt]. |
|
3.
|
Next, press the [Up Arrow] arrow key to nudge the element backward or the [Down Arrow] arrow key to nudge the element forward. As you send your element backward or forward, you can see the result in the Top or Side view. |
Properties View
You can use the Properties view to order your elements along the Z-axis using positive and negative values.
To order elements using the Properties view:
|
1.
|
In the Timeline view, select the layer of the element you want to order. |

The layer properties are displayed in the Properties view.
|
2.
|
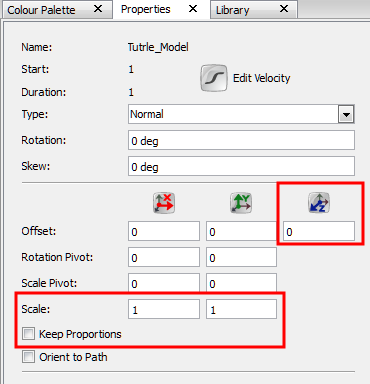
In the Properties view, set the desired values: |
|
‣
|
Offset: Type in a positive or negative value for the Z-axis position. |
|
‣
|
Scale: Type in a positive or negative value to resize your element following the Z-axis position of your element. |
|
‣
|
Keep Proportions: Retains the ratio, and resizes your element proportionally. |
Instead of using the default Field value, you can change of type of unit displayed in the Properties view to inches or centimetres—see
Preferences.