This section is divided as follows:
| • | Adding Bones |
| • | Setting Up Bones |
| • | Zones of Influence |
| • | Animating Bones |
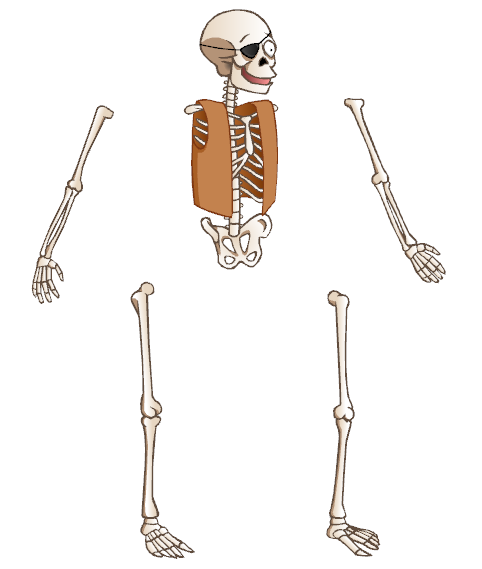
To add bones to your character:
| 1. | Make sure you are working in the Camera  view. view. |
| 2. | In the Timeline view, select the layer that contains your artwork. |
| 3. | From the Bone Tools toolbar, select the Bone Creator  tool or press [U]. tool or press [U]. |
| 4. | Take a look at your character or object, and decide which parts will be at the back (hidden behind other parts). These are the parts you should start creating bones for first. |
The bones and bone chains that are created first will be at the top of the Timeline layer stack when you are finished; therefore, they will be located at the front of the visibility hierarchy.
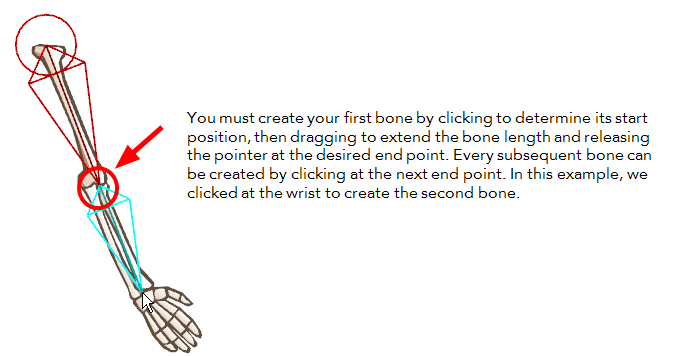
| 5. | In the Camera view, click and drag to create the first bone, following your design. |
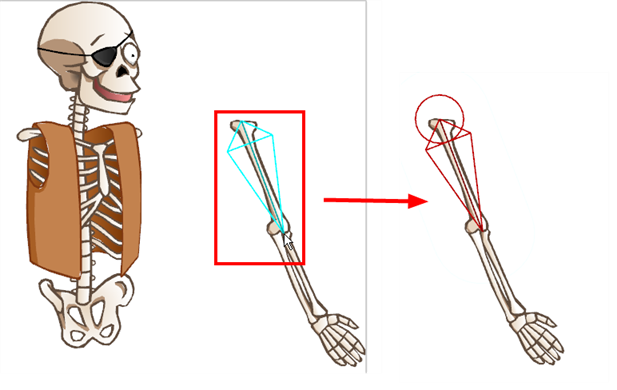
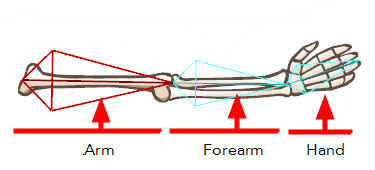
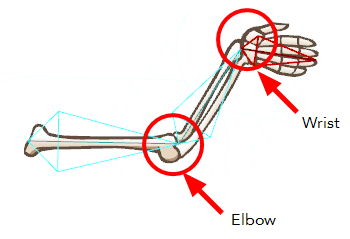
When creating the bone structure, think about where you want the image to bend. In this example, we want to have two bends (one at the elbow and one at the wrist). Therefore three bones should be created: the arm, forearm and hand.
| 7. | Once you have created a full bone chain for one limb, you can, for example, start a new freestanding bone or bone chain for a different part of your character or object. Hold down the [Shift] key to do this. |
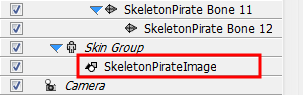
| 8. | Take a look at the Timeline view. As you create a bone chain, notice that a new bone layer is automatically added for each bone in the chain under the Bone Group. The bones in a chain are organized in a hierarchy, while freestanding bones are just below the main Bone Group. |
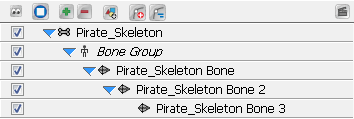
Notice also that the drawing layer with your character or object artwork is automatically connected to the Skin Group of your new Skeleton effect group. This auto-parenting occurs because you started creating your bones with this layer selected.
Once you start creating bones you can, at any time, modify them in Setup mode to optimize their positioning without creating an animation.
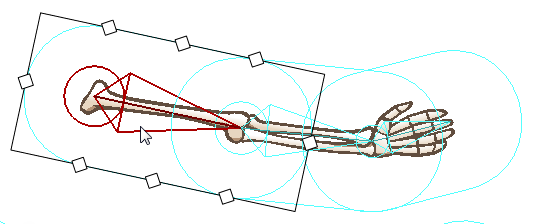
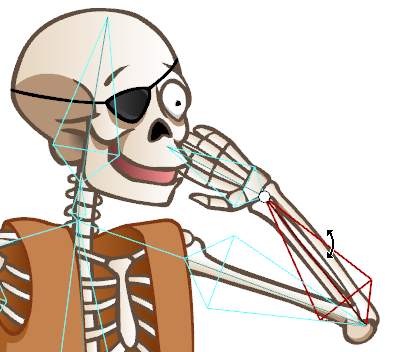
To modify bones using the Bone Setup tool:
| 1. | From the Bones Tools toolbar, select the Bone Setup  tool or press [J]. tool or press [J]. |
| 2. | In the Camera view, select the bone you want to modify. |
The selected bone turns red and two control handles appear.
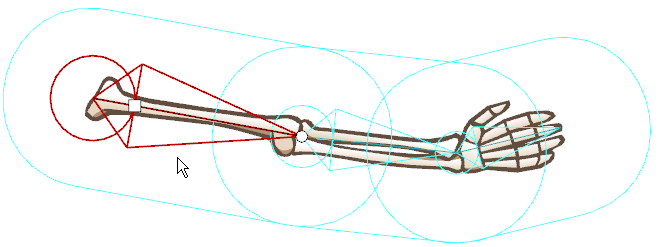
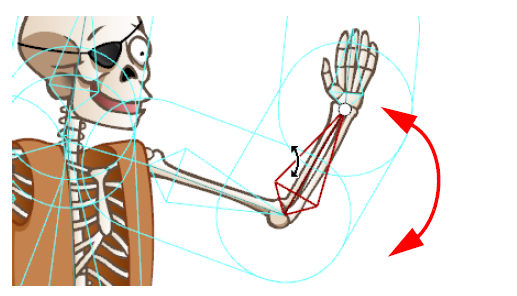
| ‣ | To rotate the bone, place the pointer over the bone until you see the rotation cursor. Click and drag to rotate the selected bone. You can change the rotation angle of any bone in the chain. |
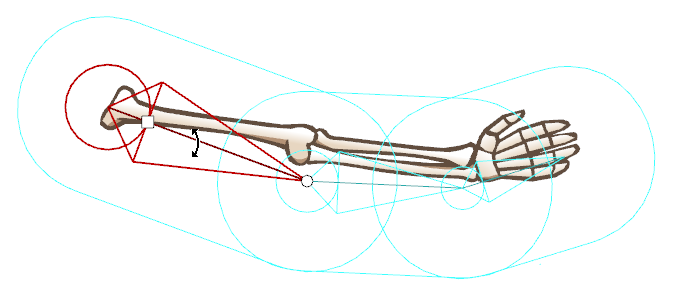
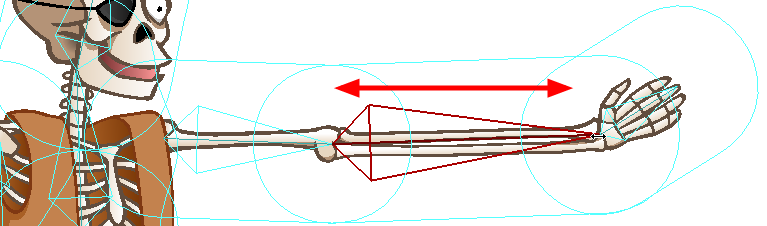
| ‣ | To shorten or lengthen the bone, click on the round handle at the tip of the bone and either drag it towards or away from the root of the bone. You can lengthen or shorten any bone in your chain. You can also rotate as you scale, creating two transformations in one step. |
| ‣ | To reposition the bone, click the square handle and drag it to the desired position. |
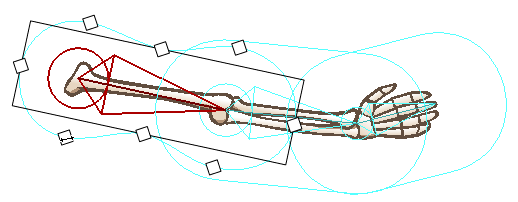
If you set the influence area of a bone to Elliptical, meaning it is bound within an ellipse shape, you can modify that shape. To modify the size and form of the ellipse, simply manipulate the square points around its bounding box.
To modify the influence area using the Bone Influence tool:
| 1. | From the Bone Tools toolbar, select the Bone Influence  tool. tool. |
| 2. | In the Camera view, select the bone whose influence area you want to modify. Make sure that in the Properties view, the zone of influence is set to Elliptical. |
The selected bone appears in red and a black bounding box is displayed around the influence area.
| 3. | Click and drag the square points to resize or reshape the influence area. |
Now that the Skeleton puppet is ready, you can start animating it.
To animate bones:
| 1. | From the Bone Tools toolbar, select the Bone Manipulator  tool. tool. |
| 2. | In the Timeline view, go to the frame where you want to set the first pose of the puppet. |

| 3. | In the Camera view, select the bone you want to animate. |
| 4. | When a bone is selected you can: |
| ‣ | Use the square handle to drag the selected bone to a new position. Note that this handle is only available on the parent bone of a chain. |
Repositioning a bone will create a square black keyframe marker in the Timeline view, on the layer of the selected bone.

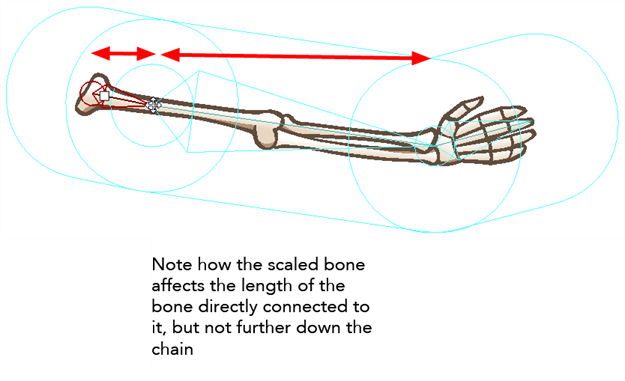
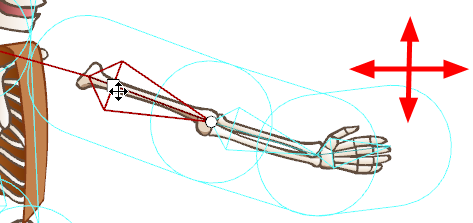
| ‣ | Use the circle handle to squash and stretch the bone. In the example below, notice how the parent bone is unaffected, but the child bone becomes squashed and stretched. |
Scaling a bone with the Bone Manipulator tool will create up and down arrow-shaped keyframe markers in the Timeline view, on the layer of the selected bone, as well as on the layer of the child bone. The reason this manipulation produces the same types of keyframe markers that you would typically see for a scale and a rotation, is because the Bone Manipulator tool allows you to scale and rotate in the same movement.

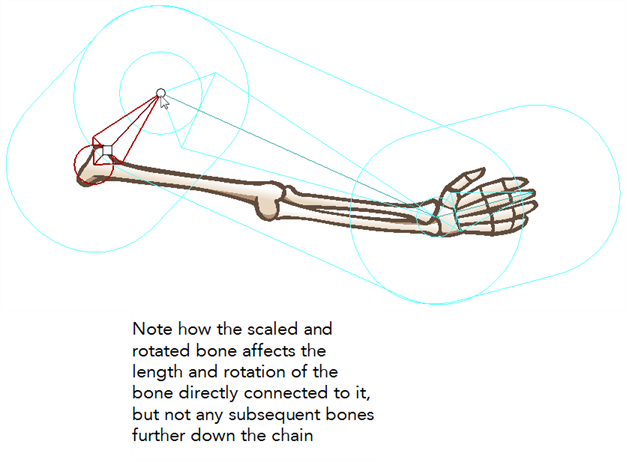
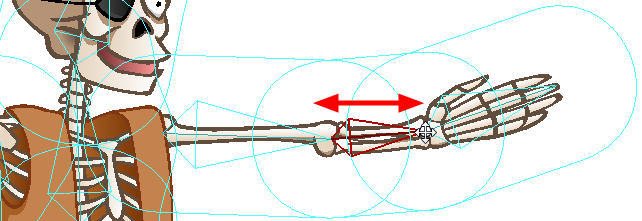
You can also use the Scale  tool from the Animation tools toolbar to perform a different type of scaling. Grab the tip of the bone to squash and stretch it. In the example below, notice that the parent and child bones are unaffected by the scaling, but the child's position changes relative to the scaling of the selected bone.
Scaling a bone with the Scale tool will create a down arrow keyframe marker in the Timeline view, on the layer of the selected bone.
| ‣ | With the Bone Manipulator tool, click directly on the bone and drag the cursor to rotate it. |
Rotating a bone will create a tiny up arrow keyframe marker in the Timeline view, on the layer of the selected bone.
| ‣ | If the Skeleton Effect is collapsed, note that you will not see the keyframe marker. If you expand the puppet's elements by clicking on the arrow next to the master peg element, notice a red square on the parent element of the bone you moved. This indicates that a child of this bone has a keyframe.  |
| 5. | In the Timeline view, go to the frame where you want to set a second keyframe. |

| 6. | In the Camera view, animate the character. |
| 7. | Repeat this process until all the poses are done. |