Layers and Columns
In Studio there are two ways to see your layers:
| • | As horizontal layers in the Timeline view |
| • | As vertical columns in the Exposure Sheet view. |
Whether you work in the Timeline or Exposure Sheet view, they are the same and any modification you do to one or the other is applied to both.
This topic is divided as follows:
| • | Layer Concepts |
| • | Layer Types |
| • | Adding New Elements |
| • | Deleting Elements |
| • | Modifying Elements |
| • | Expanding and Collapsing Layers |
Layer Concepts
In order to understand what happens when you duplicate a drawing, extend an exposure, create cycles or delete a drawing, it is important to know how layers and columns work.
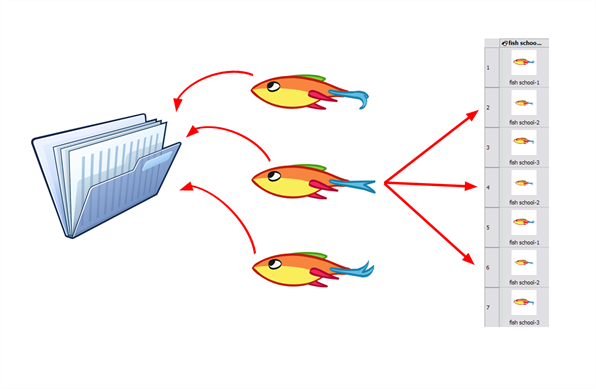
The layers are linked to a folder containing all the drawings you create. This folder is contained inside your Studio project's folder.
When you create a new drawing in your Camera view, a drawing file is created inside the Drawing folder.
When you type a drawing name in a Exposure Sheet cell or Timeline frame, the system looks in the Drawing folder for the corresponding drawing to display. If there is no corresponding drawing, a new one is created.
 .
.
When you create a drawing cycle, all of the repeated drawings are linked to the same original drawing. This means that when you modify, repaint or correct a drawing named "1", all drawings named "1" are updated simultaneously. In order to modify a drawing independently from its other exposures, you must duplicate the drawing—see Duplicating a Drawing.
Layer Types
There are several types of layers you can add in the Timeline and Exposure Sheet views.
 Drawing Element
The most common layer type is the Drawing element. Any time you need to create a vector drawing, use a Drawing element. Note that bitmap images are contained in Image Element layers.
The Drawing layer is tagged with the Drawing  icon.
icon.
 Image Element
If you import picture or bitmap images into your project, they are inserted in an Image element.
The Image layer is tagged with the Image  icon.
icon.
 Camera Element
The Camera element represents the camera filming your stage. You must position it if you want to change the camera frame in your scene or animate it with a Peg layer if you want to create a camera motion.
| • | The Camera layer is tagged with the Camera  icon. icon. |
| • | The Camera layer is not visible in the Exposure Sheet view. |
If you want to have several cameras with different settings, you can keep adding Camera layers in your Timeline view. To switch between available cameras, select a camera from the Camera list located in the Scene toolbar.
 Effect Element
To enhance the look of your scene, you can add effect layers and attach your drawings to them. In Toon Boom Studio, there are seven effects.
In the Timeline view, the Effect element is tagged with the Effect  icon.
icon.
The Effect layers are not visible in the Exposure Sheet view.
 Peg Element
A Peg Element can be described as a trajectory or motion path layer that does not contain drawings. It can be attached to any drawing layer, cut-out puppet or other peg layers. The layers attached to the Peg layer follow the trajectory that you set in this Peg layer.
In the Timeline view, the Peg element is tagged with the Peg  icon.
icon.
Peg layers are not visible in the Exposure Sheet view.
 Sound Element
You can import sound files to add dialog and sound effects to your project. The sound layer is added to your Timeline and Exposure Sheet view when you import a sound file in your scene.
The Sound element is tagged with the Sound  icon.
icon.
 Annotation Element
An Annotation Element is mainly used for educational purpose. The teacher can use these layers to draw and mark comments and corrections over an animation.
In the Timeline view, the Annotation element is tagged with the Annotation  icon.
icon.
 Media Element
A Media Element is used in different ways. The main way is to import an SWF movie in your project and keep it in one single layer instead of it being spread on several layers. The second way is to link a media element to your scene instead of importing templates from the Library directly in your scene. This way you can connect several scenes to the same template. If you modify the original template, it is altered in all the scenes simultaneously.
The Media element is tagged with the Media  icon.
icon.
Adding New Elements
In this section you will learn the different ways to add elements to your project. By default, when you create a new scene, there is one Drawing layer included in the Timeline and Exposure Sheet views.
This section is divided as follows:
| • | Adding Layers in the Timeline View |
| • | Adding an Element from the Top Menu |
| • | Adding New Columns in the Exposure Sheet View |
Adding Layers in the Timeline View
You can add a new layer in the Timeline view in two different ways; using the Layer toolbar or using the New Elements dialog box.
To add a Drawing layer using the Timeline's Layer toolbar:
| 1. | In the Timeline's Layer toolbar, click the Add Drawing Elements button. button. |
A new layer appears in the Timeline and Exposure Sheet view.
| 2. | Double-click the layer to rename it. |
To add layers using the New Elements dialog box:
| 1. | In the Timeline's Layer toolbar, click the Add Elements button. button. |
TheNew Elements dialog box opens.
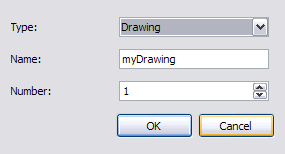
| 2. | In the Type list, select an element type. |
| 3. | In the Name field, type a name for the layer. If you are adding more than one layer at the same time, all of these layers are given that layer's name and a numerical suffix. |
| 4. | In the Number field, set the number of layers. |
| 5. | Click OK. |
Adding an Element from the Top Menu
To add a new element from the top menu:
| 1. | Select Element > Add > Element Type. |
A new element appears in the Timeline and Exposure Sheet view.
Adding New Columns in the Exposure Sheet View
To add a new column:
| 1. | In the Exposure Sheet toolbar, click one of the following buttons: |
| • |
 Add Drawing Element Add Drawing Element |
| • |
 Add Image Element Add Image Element |
| • |
 Add Sound Element Add Sound Element |
| • |
 Add Media Element Add Media Element |
| • |
 Add Annotation Element Add Annotation Element |
A new element appears in the Timeline and Exposure Sheet view.
| 2. | Double-click the Column header to rename the new column. |
Deleting Elements
You can delete elements from your scene in two different locations: the Timeline and Exposure Sheet view.
Deleting a Layer from the Timeline View
There are three ways to delete a layer in the Timeline view:
| • | Delete Layers  button button |
| • | Top menu > Element > Delete Element |
| • | Quick access menu |
To delete layers in the Timeline view:
| 1. | In the Timeline view, select the layers to delete. |
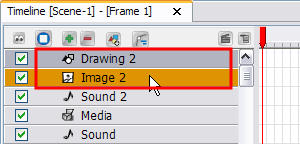
| 2. | In the Timeline's Layer toolbar, click on the Delete Layers button or right-click on the selection and select Delete Element. button or right-click on the selection and select Delete Element. |
Deleting Columns from the Exposure Sheet View
You can delete columns in the Exposure Sheet view by using the quick access menu or the top menu.
To delete layers in the Exposure Sheet view:
| 1. | In the Exposure Sheet view, select the columns to delete by clicking on their header. |
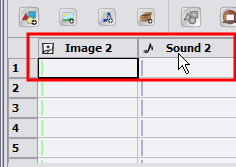
| 2. | From the top menu, select Element > Delete Element or right-click and select Delete Element. |
Modifying Elements
Once you add elements to your project, you can modify their properties, name or ordering.
This section is divided as follows:
| • | Ordering Elements |
| • | Show and Hide Elements |
| • | Renaming an Element |
| • | Exposure Sheet Thumbnails |
| • | Changing the Colour of a Column or Layer |
Ordering Elements
You can change the order of your layers in the Timeline and Exposure Sheet view. When you change the order of your layers in one of these views, the other one is updated automatically.
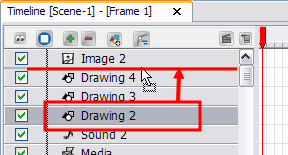
To reorder layers in the Timeline view:
| 1. | In the Timeline view, select the layers to move. |
| 2. | Drag the selection to the new location and drop it in between the existing layers. Dropping the selection on an existing layer would create a hierarchy. |
| ‣ | Layers located on top of the Timeline view are displayed in front of the other ones. |
| ‣ | Layers located at the bottom are displayed behind. |
To reorder columns in the Xsheet view:
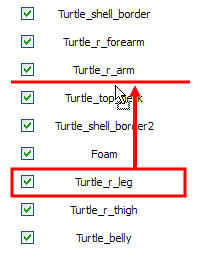
| 1. | In the Exposure Sheet toolbar, click the Show Element List button to display the Element List panel. button to display the Element List panel. |
| 2. | In the Element List panel, drag up or down the columns to reorder. Layers located on top of the Element List are displayed in front of the other ones. Layers located at the bottom are displayed behind. |
Show and Hide Elements
As you work in the Drawing or Camera view, some elements may be in the way or are used as references. You can hide these layers to make your work area easier and less cluttered.
To show or hide all layers in the Timeline view:
| ‣ | In the Timeline's Layer toolbar, click the Enable/Disable All  button or select Element > Display > Timeline > Show All. button or select Element > Display > Timeline > Show All. |
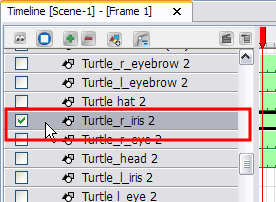
To show or hide individual layers in the Timeline view:
| ‣ | In the Timeline view, deselect the layer's checkbox or select Element > Display > Timeline > Show/Hide. |

To disable all layers but the selected one:
| ‣ | Select Element > Display > Timeline > Hide All Others from the top menu or select Display > Hide All Others in the Timeline contextual  menu. menu. |
To show and hide columns in the Exposure Sheet view:
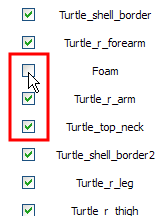
| 1. | In the Exposure Sheet toolbar, click the Show Element List  button. button. |
| 2. | In the Element List section, show or hide the columns by selecting or deselecting a column's checkbox. |
| ‣ | Select Element > Display > Exposure Sheet > Hide to hide a column. |
To disable all columns except the selected one:
| 1. | Select Element > Display > Exposure Sheet > Hide All Others. |
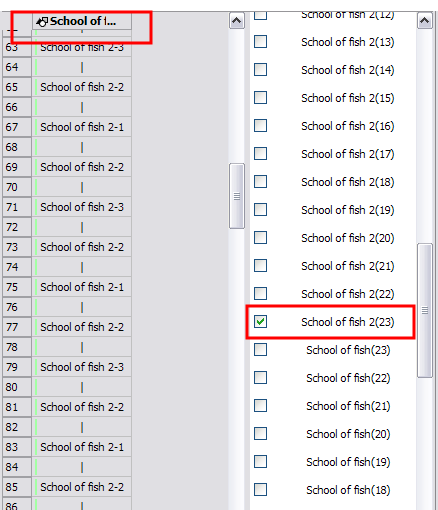
To show all hidden Exposure Sheet columns:
| 1. | Select Element > Display > Show All Exposure Sheet Elements. |
Renaming an Element
You can rename an element in three different ways; directly in the column header, in the Timeline layer or in the Rename dialog box.
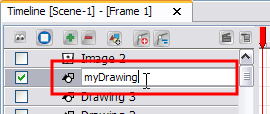
To rename a layer in the Timeline view:
| 1. | In the Timeline view, double-click on the name of the layer to rename. |
| 2. | In the Name field rename the layer and press [Return] to validate the modifications. |
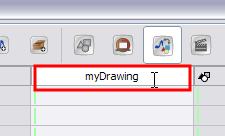
To rename a layer in the Exposure Sheet view:
| 1. | In the Exposure Sheet view, double-click on the column header of the layer to rename. |
| 2. | In the Name field, type a new name and press [Enter]to validate the modifications. |
To rename a layer in the Rename Element dialog box:
| 1. | In the Timeline or Exposure Sheet view, select the layer to rename. |
| 2. | Select Element > Rename Element or right-click and select Rename Element. |
The RenameElement dialog box opens.
| 3. | In the Name field, rename the layer. |

| 4. | Click OK. |
Exposure Sheet Thumbnails
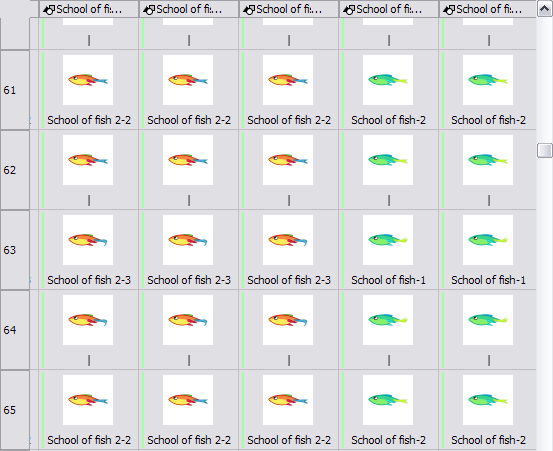
When there are a large number of columns and drawings in the Exposure Sheet, it is not always easy to quickly identify a particular column. Displaying the column thumbnails makes this easier. This option displays a small thumbnail picture in each cell where there is a drawing.
To display the thumbnails:
| 1. | In the Exposure Sheet toolbar, click the Thumbnails button or select View > Thumbnails from the Exposure Sheet contextual button or select View > Thumbnails from the Exposure Sheet contextual  menu or right-click and select View > Thumbnails. menu or right-click and select View > Thumbnails. |
The thumbnails appear.
Changing the Colour of a Column or Layer
To easily identify layers in your Timeline and Exposure Sheet views, you can change their colour. You can change the drawing exposure colour and track background independently.
To change the drawing exposure colour:
| 1. | In the Timeline or Exposure Sheet view, select the layer whose colour you want to change. |
| 2. | Select Element > Display > Change Colour from the top menu or right-click the header of the column in the exposure sheet and select Display > Change Colour. |

| 3. | In the Select Colour window, select the new colour for your layer. |
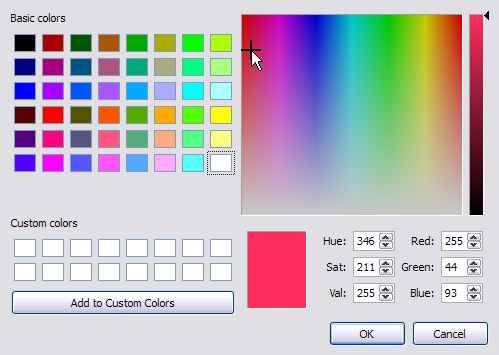
| 4. | Click OK. |
The layer's colour is updated.

To change the Timeline layer's background colour:
| 1. | In the Timeline view, select the layer whose background colour you want to change. |
| 2. | Select Element > Display > Background Colour or right-click in the Timeline and select Display > Background Colour. |

| 3. | In the Select Colour window, select the new colour for your layer. |
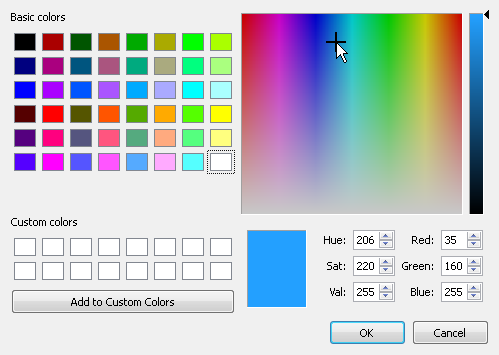
| 4. | Click OK. |
The layer's background colour is updated.

To reset a layer's colour in the Timeline view:
| 1. | In the Timeline or Exposure Sheet view, select the layers whose colour you want to reset and select Element > Display > Default Colour or right-click in the Timeline and select Display > Default Colour. |
Expanding and Collapsing Layers
To simplify the look of your Timeline view, you can collapse and expand your layers. If some layers are attached, you can collapse the top layer to hide all of the layers attached to it.
To collapse a layer selection in the Timeline view:
| 1. | In the Timeline view, click the Expand Arrow button on the layer you want to collapse. button on the layer you want to collapse. |

Modifying the Column Width
In the Exposure Sheet view, you can change the width of a column. If the name of your column is too long and does not fit in the column header, make the column wider to see it all.
To modify the column's width:
| 1. | In the Exposure Sheet view, place your cursor on the edge of the column header you want to adjust. |
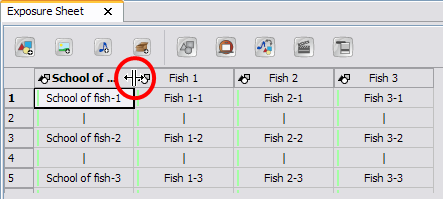
| 2. | Once you see the Extend cursor appear, adjust the column width by clicking and dragging the Extend Cursor. |
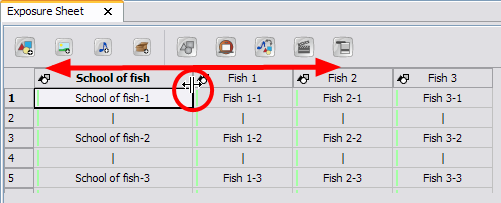
| 3. | To restore all columns to their default width, in the Exposure Sheet contextual  menu, select menu, select View > Reset Column Width or by right-clicking on the column and select Display > Reset Column Width. |