T-SBFND-008-019
When sketching characters with a background in Storyboard Pro, you might find that the outlines of characters clash too much with the outlines of backgrounds and that filling your character's outlines with white or another solid colour would make the panels more legible. However, since storyboarding is often a hasty process, you may not have time to fill each drawing you make manually.
The Generate Auto-Matte dialog box allows you to quickly create a colour matte to fill the inside of sketch outlines, hiding anything that is behind your sketch. The shape of the matte generated automatically based on the outlines of your artwork, and will fill your drawing even if there are gaps in the outline and even if the drawing extends beyond the camera frame.
You can generate a matte on one or several layers in a single panel at a time.

- In the layer panel or the Layers view, select the layers for which you want to generate a matte by doing one of the following:
- To select a single layer, simply click on it.
- To select several non-contiguous layers, press and hold Ctrl (Windows) or ⌘ (macOS) and click on each layer you want to select.
- To select several contiguous layers, press and hold Shift and click on the first layer you want to select, then on the last layer you want to select.
- If you want your matte to be filled with one of the colours in your colour palette, select the desired colour in the Colour view. Otherwise, you can also pick a colour for the matte later.
-
Do one of the following:
- In the top menu, select Layer > Generate Auto-Matte.
- Right-click on the selected layer(s) and select Generate Auto-Matte.
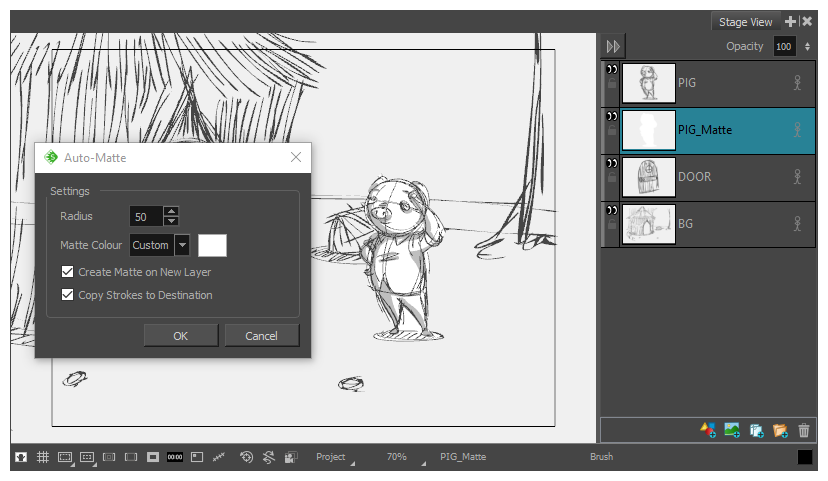
The Generate Auto-Matte dialog appears.

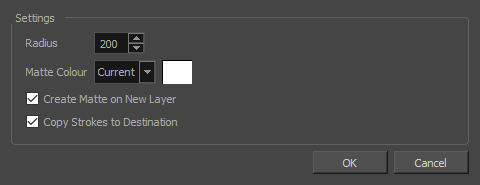
- If you want a precise matte or a matte for a small drawing, reduce the Radius setting. If you want to generate a very rough or approximate matte, increase the Radius setting.
- If you want the matte to be filled with the currently selected colour, leave the Matte Colour setting to Current. Otherwise, set it to Custom, then click on the colour swatch to the right to open a colour picker dialog and select a colour for your matte.
-
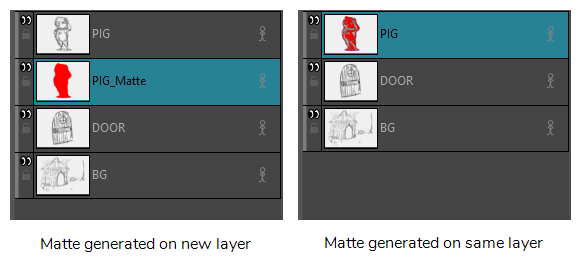
If you want the matte to be generated in the layer containing your outlines, uncheck the Create Matte on New Layer option. Otherwise, a new layer will be created underneath the layer containing your outlines, and the matte will be generated in that new layer.
 NOTE In both cases, the generated matte will appear behind the outlines in your artwork.
 -
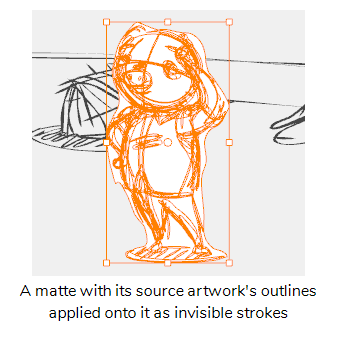
If you chose to generate the matte in a new layer, but you want to be able to fill the different sections of the matte in different colours, check the Copy Strokes to Destination option. This will copy your artwork onto the matte, but as invisible outlines (referred to as strokes). You will be able to fill those outlines with different colours.

- Click on OK.
A coloured matte is generated for each selected layer, and is placed behind the artwork in each selected layer.
NOTEIf you chose to create the matte in a new layer, and a matte layer already exists for one of the selected layers, you will be prompted to either Replace the existing matte, to Keep Both the old and new mattes or to Cancel.

If this happens for multiple layers, you can check the Apply to All option to either replace the matte, keep both mattes or cancel for all layers.

If you need to generate the matte for all the drawings in your storyboard, you should assign a keyboard shortcut to the Generate Auto-Matte dialog to streamline the procedure.
- Select Edit > Preferences (Windows) or Stage > Preferences (Mac OS X).
- Select the Shortcuts tab.
- In the Shortcuts list, select Layer > Generate Auto-Matte.
- Click inside the Press Shortcut Key field.
- Press the shortcut key you want to assign to the Generate Auto-Matte dialog.
- Click on OK.