
Chapter 8: How to Work in the 3D Space
Storyboard Pro brings your animation into the third dimension by letting you import 3D objects into your scene. You can place, manipulate, and modify 3D objects and add new depth to your storytelling.
Viewing Objects from the Top and Side
The Top and Side views are representations of your scene’s space viewed from the top and side. The views also display the viewing area that the camera can see.
When you move your element along the Z-axis, notice that it seems the object becomes smaller or larger. This is because of the perspective effect. That is, the elements closer to the camera appear larger and elements that are further away, appear smaller. Because of this, you may need to resize your elements once they are positioned.

The Stage view displays the NS/EW/FB offset positions, but you can also use the Side view and Top view windows to reposition elements:
| • | Top View: Displays the EW and FB positions. |
| • | Side View: Displays the NS and FB positions. |
Changing an element’s position affects all the contents in that element.
Because these are 2D layers in your scene, they appear as lines in the Top and Side view windows (since you are viewing them from their sides). When you import 3D objects, you will see the full 3D object in the Top and Side view windows
To access the Top and Side views:
| ‣ | In the Panel view, click the View Menu |
Converting Your Scene to 3D
By default, newly created scenes are set to the 2D mode, so your project is not encumbered with unnecessary features if you plan to work in 2D for more than a few scenes. Once your scene has been converted to 3D, you can move and rotate 2D and 3D layers in 3D space. This means that even if you do not have any 3D objects in your scene, you can still move 2D objects along the Z-axis to create a multiplane effect. A 3D scene will also allow a camera to be moved in 3D space using the Camera tool.
To enable the 3D option:
- In the Thumbnails view, select the scene you want to convert to 3D.
- Do one of the following:
| ‣ | In the Storyboard toolbar, click the Enable 3D |
| ‣ | Select Storyboard > Enable 3D for Current Scene. |
| ‣ | Select Edit > Preferences (Windows) or Storyboard Pro > Preferences (Mac OS X). In the General tab, select Enable 3D Functionalities. Optionally, you can also select the Enable 3D Experimental Features to add the Camera Function view to the Windows menu. |
- Drag and drop a 3D object, that you have imported into the Library, to a panel or into the Stage view
Resetting Your Scene to 2D
Storyboard Pro lets you reset your scene to 2D. When you do so, the following happens:
| • | Imported 3D models are removed. |
| • | 3D camera moves are removed. |
| • | 2D layers that have been moved and rotated in 3D are be set back to 2D, removing those transformations. |
To reset a scene to 2D, do one of the following:
| ‣ | In the Storyboard toolbar, click the Reset Scene to 2D |
| ‣ | Select Storyboard > Reset Scene to 2D. |
Positioning Elements in 3D Space
Because you will be placing these objects in 3D space, you should have the Top View and Side View windows open.
| • | Top View: Select Windows > Top View or right-click the tab area and select Top View. |
| • | Side View: Select Windows > Side View or right-click the tab area and select Side View. |
To position a 2D element in 3D space:
- Open your project library and drag one or more elements into your scene. By default, the elements appear in the NS/EW/FB offset position of zero in the 3D space.
- Click the First Frame Transformation
 button and select one of the elements in your scene from the Stage view.
A bounding box appears around the element and the layer appears highlighted in purple in the Top and Side views.
- Drag and place the object in the 3D space. Use the view that will allow you to move the element to the right position:
| ‣ | Stage View: Changes the EW and NS positions. |
| ‣ | Top View: Changes the EW and FB positions. |
| ‣ | Side View: Changes the NS and FB positions. |
As you drag the element around in 3D space, the position of the element automatically changes in the other views.
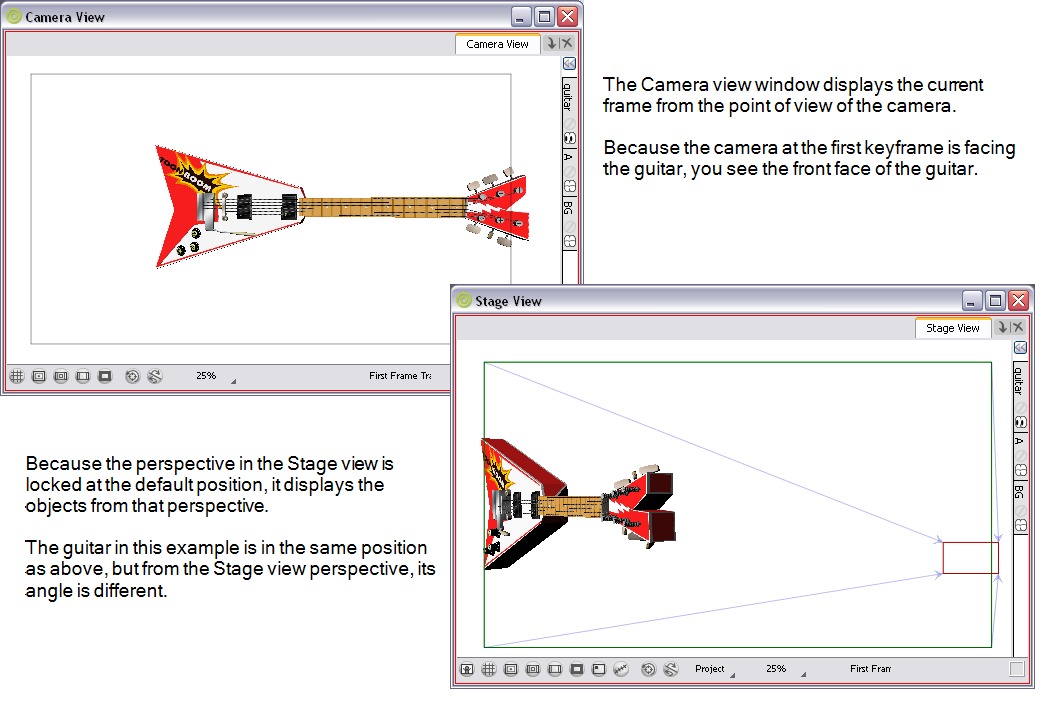
Previewing the Panel with the Camera View
In the Stage view, the perspective is from a fixed point in space, which is where the camera is placed by default.
If you switch to Camera view and preview the scene, the perspective is from the camera, so you can see exactly what the camera captures as it moves from one keyframe to another.
Therefore, if you make changes to the camera position, especially if you change the camera’s focus, use the Camera view to preview the camera move accurately.
To display the Camera view:
| ‣ | Select Windows > Camera View or right-click the tab area and select Camera View. |
Importing 3D Objects to the Library
When creating your animated project, you can import four types of 3D files by dragging them to the Timeline view. The supported 3D file formats are: *.osb, *.3ds, *.obj and *.fbx. When you import a 3D model, it is automatically added to the Library in the 3D Models folder according to its format. You can then reuse that 3D model easily within your project file.
When you import a 3D model into your library, each time you drag it into your scene, it continues to refer to the original model (it does not make a copy of the 3D model). The 3D Models library is also local to your project file, so you must import your 3D models in each project file.
To import a 3D object into the Library:
- In the Library view, right-click on the 3D Models library folder, and select Import Files.
The browser window opens.
- Locate your 3D file and click Open.
The selected 3D file appears in the Library view in a folder labeled according to its format (for example, OsbModels for *.osb files).
- Select the subfolder that represents the format of the model you imported. All the 3D models that match that format appear in the Library tab.
- Drag the 3D model to the Stage view.
The 3D model appears in its original size and is located at the zero NS/EW/FB position. The 3D model appears in all three view windows.