AI Erase and Replace
Once you have created your AI masks using the AI Mask Selector, AI Mask Brush or both, you can use the  AI Erase and Replace operation to remove elements from your imported image. The AI processor will remove any elements that are masked and reconstruct the image by replacing the masked elements with whatever the AI processor believes would exist in its place.
-
Apply masks to your image using the AI Masking tools.
-
Open Tool Properties.
-
Select
AI Erase and Replace from the Operation options.A progress bar will appear as your image is processed with AI.
Once processed, the AI Erase and Replace dialog will open.
-
Click OK.
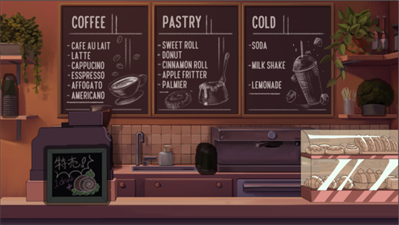
Once you click OK, a new layer containing the generated image will be created above the original image layer.

 Show Original Image icon.
For more information about the AI Masking tools, see AI Masking.
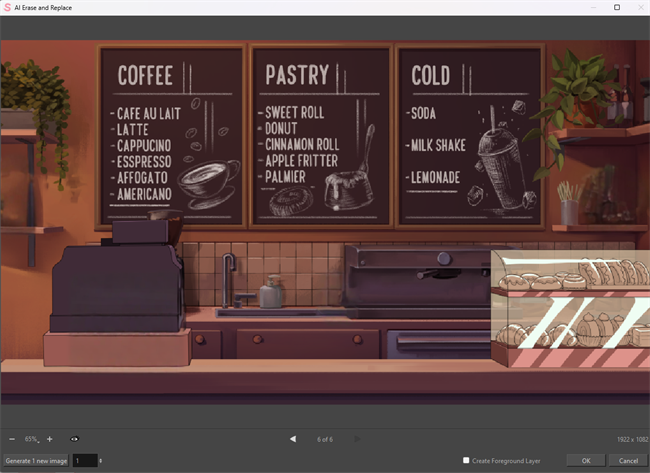
AI Erase and Replace Dialog
The AI Erase and Replace dialog is where you can view the output image that has been processed. This will allow you to preview how the AI has interpreted the removal and substitution of the masked areas. The AI Erase and Replace dialog will also indicate the size of the rendered image.
You may also generate multiple outputs at once from the dialog. You can select a number from the number box and click the Generate New Images button.

This will output the designated number of preview images as selected. To view the new generated images, you can use the previous image and next image command to cycle through the different generated images.

By generating multiple outputs, you can review other ways that the image may be processed. The original image will be processed again and new images will be output in the AI Erase and Replace dialog. You can compare the images that are generated to the original by clicking the Show Original Image icon or by pressing Alt. Each new image is kept on the disk until the Cancel or OK command is selected. When you click OK, the current image in the preview is the image that will be rendered.