T-SBFND-002-004
If a project is already open and you want to create a new one, you can access the New Project dialog from the File menu.
- Do one of the following:
- Select File > New.
- In the File toolbar, click the New
button.
- Press Ctrl + N (Windows) or ⌘ + N (macOS).
The New Project dialog box opens.

- In the Project Name field, type the name of the project. This name will be used to name the project's folder and the main project file.
- Next to the Project Directory field, click on the Browse button to navigate to a location to save your project.
- In the Project Title field, type the name of the project title. By default, this field will already be filled with what you typed in the Project Name field.
- If you want your project to have a subtitle, type it in the Project Subtitle field. This is not mandatory.
- In the Colour Space drop-down menu, select a colour space to use, or stay with the default sRGB.
- In the Camera Size drop-down, choose the resolution for your project.
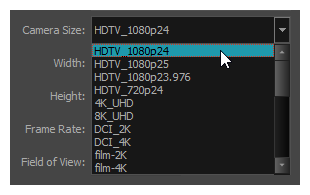
The Width, Height, Frame Rate and Field of View automatically update based on the Camera Size selection.
NOTE If you need to create your project in a resolution that is not listed, refer to Creating Custom Resolutions.
- Click Create.