Toon Shader
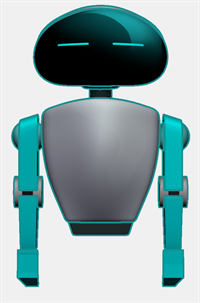
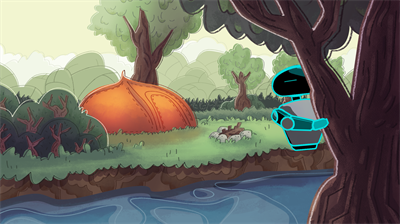
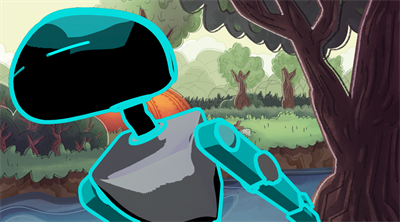
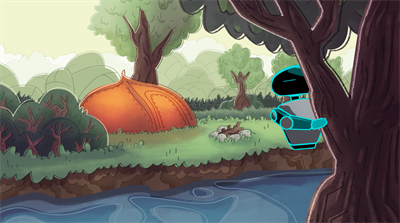
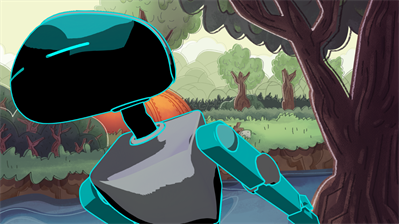
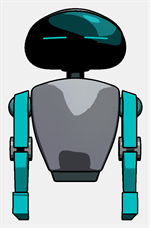
The Toon Shader is an effect that can be applied to a 3D object. The intention of this effect is to make your 3D objects appear 2D so that they integrate more seamlessly into your 2D scene.
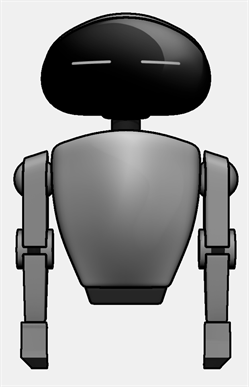
The effect will generate a contour line around all the separate geometry contained in the 3D object. It will also give you the ability to posterize your image so that the colour gradation in the objects appear more hand drawn.
Applying the Toon Shader Effect
-
In the Layers View, right-click the 3D Layer.
-
Select 3D Effect > Toon Shader in the drop down menu.
Once the Toon Shader is selected, the effect will automatically apply a contour around to the 3D model in the Stage view and Camera view.
-
In the Layer view, right-click the 3D Layer.
-
Select 3D Effect > Toon Shader Settings in the drop down menu.
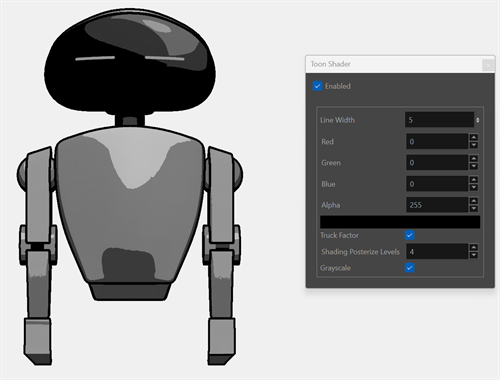
The Toon Shader properties window will appear.
Toon Shader Properties
The Toon Shader properties window allows you to control the overall strength and look of the effect. You can control the line width, colour as well as how it will appear in relation to the camera.
The Toon Shader property options are the following:
-
Line Width.
-
RGBA.
-
Truck Factor.
-
Shading Posterize Levels.
-
Grayscale.
Line Width
Line Width defines the width of the contour line generated around the geometry of the 3D model.

To change the Line Width do one of the following:
-
Click on the Line Width box and type in a new value.
-
Click and drag on the arrow keys of the Line Width box.
The outline is rounded and generated at the depth of the object’s surface. The border will not apply to textures and will only affect the perimeter of the geometric shapes.
RGBA
The RGBA section controls the colour and transparency of the line generated by the Toon Shader. The RGBA section is divided into Red, Green, Blue and the Alpha attributes and a colour picker.
The values of the chosen colour using the Colour Picker will be applied to the RGBA attribute boxes automatically. You can manually set the colour by entering the RGBA values in their respective attribute boxes.
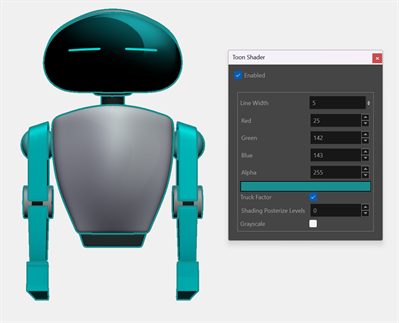
Truck Factor
Truck Factor affects the weight of the line based on its relation to the camera.
When Truck Factor is enabled, the line weight will change relative to the 3D object's distance from the camera. The line weight will appear smaller as it moves back in Z-depth away from the camera.
When Truck Factor is inactive, The line weight will remain consistent regardless of the distance between the 3D object and the camera.
Shading Posterize Levels
Posterize simplifies the toning of shadows and/or colours on an object. By adjusting the value of the attribute, you can control the number of tones that will be applied to a 3D object.
When integrating a 3D object into a 2D scene, the smoothness of the model and textures can stand out against a 2D drawn image. By adjusting the Shading Poserize Levels, you can make your 3D object less smooth to fit in a 2D scene better.
Grayscale
If your 3D object has colour, it will be converted to grayscale, with perceived luminance weighting.
This can help to integrate a 3D object into a 2D scene visually.