Another use of the Weighted Deformation node is that it can be connected to Peg nodes to create free form deformation points, similar to the Free Form deformation. The resting position of each point is determined by the pivot point of its corresponding peg. You can deform the drawing by moving a peg around, but you can also rotate, scale and skew the peg to create interesting warp effect that surpass the capacities of the Free Form Deformation.
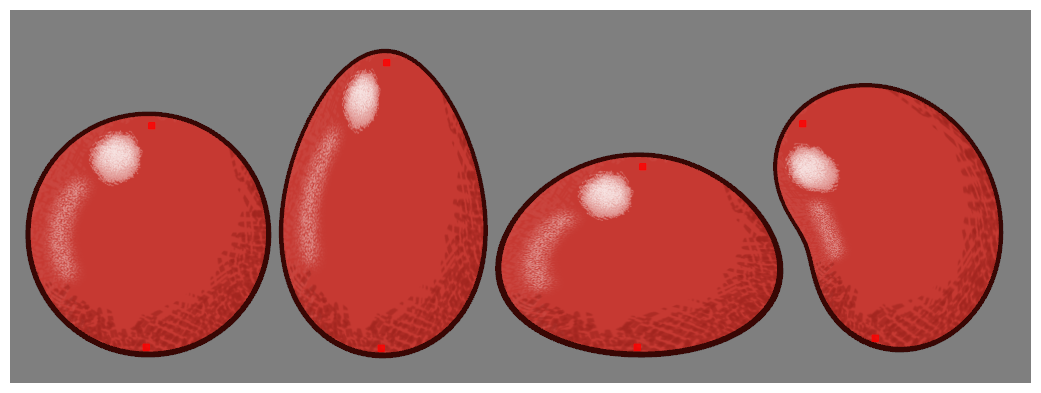
With only two pegs attached to a Weighted Deform, the deformation will blend between the two transformations based on the distance from the peg’s pivot point. This allows you to create fairly organic deformations with very simple transformation controls.
The Weighted Deform is controlled by two peg transformations that are interpolated as a drawing deformation. This also allows you to simply deform a shape organically in a rig with contextual controls. It also allows you to attach pegs to a rig that dynamically modifies the deformation when the peg is transformed.
-
In the Node Library view, in the Deformation > Weighted category, select a Weighted Deform node and drag it to the Node view.
-
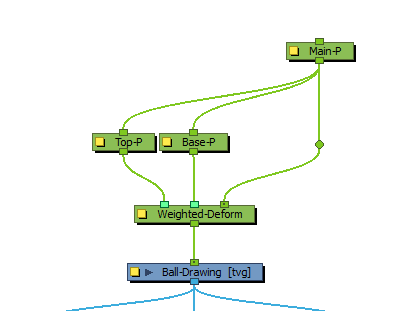
While holding the Alt key, drag the Weighted Deform node over the connection between the Drawing node you want to deform and its parent peg. The Weighted Deform node should be a child of the Peg node and a parent of the Drawing node.
-
Create a Peg node for each free deformation point you want to add. To create Peg nodes, do the following:
- In the Node Library view, in the Move category, select a Peg node and drag it to the Node View.
- Press Ctrl + P.
-
Connect the output port of each Peg node to the input of the Weighted Deform node. New input ports will appear on the Weighted Deform node as you drag connection cables from other nodes towards it.
-
Connect the output port of the parent peg of the weighted deformation system to the input port of the Peg nodes you just created.
- In the Advanced Animation toolbar, select the
 Translate tool.
 - In the Node view, select one of the pegs.
-
In the Camera view, click and drag on the peg’s pivot point to position it where you the resting position of its free form deformation point to be.
-
Repeat the two previous steps for each peg that is connected to the Weighted Deform node, until the pivot point of all the pegs are positioned where you want the resting position of the free form deformation points to be.
TIPYou can view the position of all the pegs connected to the Weighted Deform node by selecting the node, then displaying its controls.
To display the Weighted Deform node’s controls, do one of the following:
- In the Camera view toolbar, click on
 Show Control .
 - From the top menu, select View > Show > Control.
- Press Shift + F11.
You cannot manipulate the free deformation points displayed with this method. To manipulate the free deformation points, you must select their corresponding Peg nodes and manipulate them one by one with the
 Transform tool.
 The Weighted Deform is ready to be used. To manipulate the free deformation points, you must select the Peg node that represents the point and move them individually with the
Transform tool. This can be tricky, as those pegs are not technically attached to a drawing, but to an effect node. Hence, clicking on the drawing will select the parent peg of the deformation system, and not the free deformation points. The most reliable way to transform a peg attached to the Weighted Deform is by selecting the Peg node in the Node view, then manipulating its bounding box in the Camera view. For example, you can move the peg by clicking and dragging close to the centre point of the bounding box.
You can also rotate, scale and skew each peg by manipulating their bounding box. This can create interesting warp effects.
- In the Camera view toolbar, click on