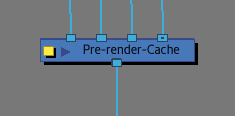
Pre-Render Cache Node
The Pre-render Cache node is a special type of Composite node that can create and store a cache of its rendered image on demand, and only output that cached image in the Camera view when it is in Render View mode.
This node can be very useful when working on a scene that contains an element that is extremely long to render, such as a 3D model, a complex special effect or even a scene rendered in 4K.
Typically, when you view a frame of your scene in Render View mode, Harmony renders every element of your scene one by one to composite them into the preview image. Then, if you change anything in your scene, Harmony has to render every element in your scene from scratch again to ensure that the preview is accurate. For example, in a scene with one character and a very resource-intensive special effect, making a change to the character requires Harmony to re-render every element in the scene including the resource-intensive special effect, which is very time consuming.
The Pre-render Cache node allows you to control when certain elements in your scene are rendered again. In the previous example, you can connect the resource-intensive special effect to a Pre-render Cache node, then make it generate a cache of the rendered special effect. From that point on, when the Camera view is in Render View mode, it will pull the rendered special effect from the Pre-render Cache node’s cache instead of regenerating it every time. If you make a change to the special effect that requires its preview image to be regenerated, you can manually render the Pre-Render Cache node again, which will update its preview image in the Camera view.
The Pre-render Cache node now shows green frames in the Timeline once a frame is rendered and available in the cache.
- The Pre-render Cache node is not intended to be used in the design department (Backgrounds, Props and Rigs) nor in the animation department since they do need to modify too often the contents of the scene. The Pre-render Cache node is in fact more efficient in the Compositing department.
- The Pre-render Cache node can only output a flat bitmap image.
- The cached rendered images are only used when generating a preview image for the Camera view. When rendering your scene’s frames as images or as a movie, the nodes connected to the Pre-render Cache nodes are rendered again, and the cached images are ignored.
- Effects that require vector images, such as the Colour Override or the Apply Peg Transformation effects, will not work when connected under a Pre-render Cache node, since the Pre-render cache node acts like a bitmap Composite.
Connection
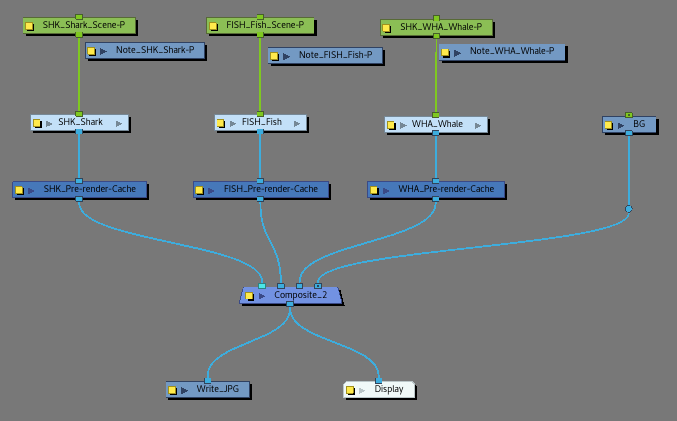
The Pre-render Cache node should be connected as the intermediary node between the element, effect or composite for which you want to cache the rendered image, and the composite for the remainder of the scene. For example, if a character is made of various effects, the most efficient place to put the Pre-render Cache node will be under the character’s group on the scene level.
Example: One Pre-render Cache node by character’s rig
Being a “composite” type node, you can connect as many input images as you want to the Pre-render Cache node.
The Pre-render Cache outputs a bitmap image and, contrary to regular Composite nodes, it does not allow vector effects to travel up its node system. Hence, effects such as the Colour Override or the Apply Peg Transformation effects will not work when connected under a Pre-render Cache node.
When a scene contains more than one Pre-render Cache node, it is possible to manage every or some Pre-render Cache nodes at the same time—see Manage Pre-Render Cache Dialog Box.
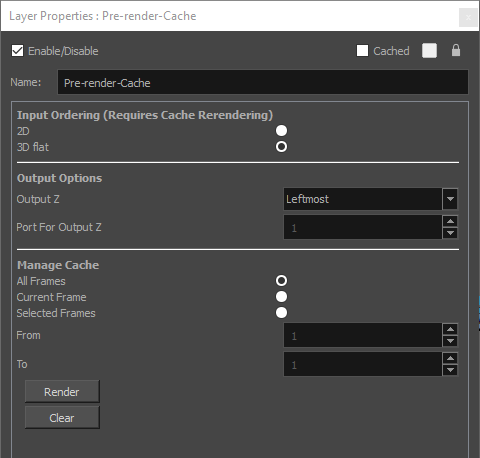
The Pre-Render Cache node shares some of its properties with the Composite node.
|
Parameter |
Description |
|---|---|
|
Enable/Disable |
Allows you to enable or disable the node. When disabled, a node has no visible effect on the rendered image, nor on the preview in the Camera, Perspective, Side and Top views. |
|
Colour Swatch |
Sets the colour of the layer in the Timeline view and of the node in the Node view. |
|
Name |
Allows you to enter a name for the node. |
|
Input ordering (Requires Cache Rendering) |
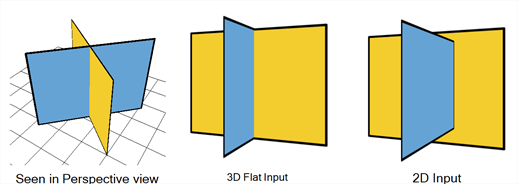
You can use the 2D composite type to create effects such as a camera recording overlay on your scene. Since you always want this element to be in front regardless of the other elements' Z-axis position, you can set the option to 2D.
|
|
Output Options |
|
|
Manage Cache |
|