T-HFND-010-009C
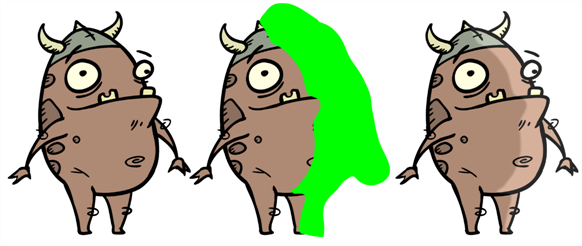
The Highlight node allows you to brighten an image's area to simulate a light source. For this effect, you will need to create a matte to determine the shape and position of the highlight on a separate element, so that you can blur the edges to create a softer effect. By adjusting the Highlight properties, you can control the type and amount of blur, as well as the colour of the Highlight effect.

Author
- Marc Fortin
- Senior Solutions Specialist
- toonboom.com
Connection
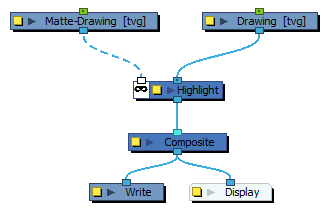
The Highlight node takes an image of any type in the right (Image) input port, and a matte drawing in the left (Matte) input port. It outputs a version of the input image with a highlight applied over it everywhere where the input image and the matte drawing intersect.

Layer Properties

| Parameter | Description |
|---|---|
| Enable/Disable |
Allows you to enable or disable the node. When disabled, a node has no visible effect on the rendered image, nor on the preview in the Camera, |
| Colour Swatch |
Sets the colour of the layer in the Timeline view |
| Name |
The name of the node as it appears in the Node View and the Timeline view. Each node must have a name that is unique to its containing group. |
| Truck Factor |
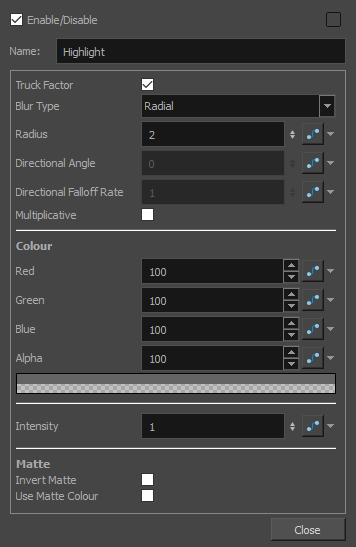
Activated by default, this option readjusts the blur when the elements undergo a change of depth or scale. When disabled, the effect's values will remain unchanged regardless of depth or scale changes. It is recommended that this option be disabled when multiple drawings are composited and attached this effect. |
| Blur Type |
Allows you to choose between the following blur types for the effect:
|
| Radius |
Enter a value for the size of the blur. The larger the value, the greater the blur effect. The blur radius is affected by the drawing scale and camera position. |
| Directional Angle |
If you set the Blur Type to Directional, this sets the angle of the blur. The value goes from 0 to 360, with 0 meaning west, and angles going counterclockwise. For example:
|
| Directional Falloff Rate |
The distance where the blur fades from the edge of the image. Select a decimal value between 0 and 1. For example:
|
| Multiplicative |
Multiplies the colours of the effect with the colours of the source image. This intensifies the effect. |
| Colour | |
| Red |
The amount of red to add to the colour of the source image. |
| Green |
The amount of green to add to the colour of the source image. |
| Blue |
The amount of blue to add to the colour of the source image. |
| Alpha | The alpha value of the effect. |
| Colour Swatch |
Opens the Colour Picker dialog, in which you can visually select a colour for the effect. |
| Intensity |
Allows you to set the factor by which to multiply the intensity of the effect. This parameter can take a decimal value between 0 and 1. At 1, the effect is fully applied. At 0, the effect is not visible. |
| Matte | |
| Invert Matte |
Inverts the matte used to generate the effect. By default, the affect is applied to opaque areas of the matte and transparent areas of the matte are ignored. When this option is enabled, the effect is applied to transparent areas of the matte and opaque areas of the matte are ignored. |
| Use Matte Colour |
Instead of using the colour in the Colour parameters, this uses the colours in the matte drawing to generate the effect. NOTE The effect of this parameter is only visible in Render View
|