Adding a Highlight to a Drawing
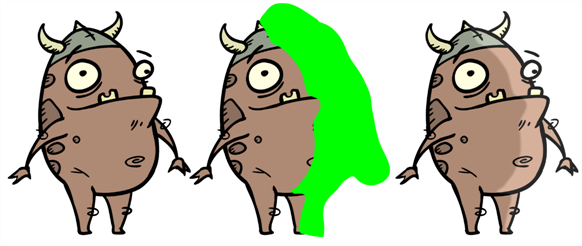
Using the Highlight effect, you can apply a highlight to a drawing. Contrary to the Glow effect, the Highlight effect does not convert your drawing into a glow, it applies the glow onto your drawing. The resulting render includes both the drawing to its glow.

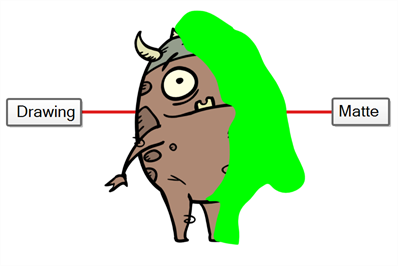
The Highlight effect uses a matte drawing layer to determine which areas of the drawing to apply the highlight to. The highlight will not be applied outside of the drawing or outside of the matte.
- Select a drawing layer and do one of the following:
- From the Node Library view, select the Highlight effect and drag it to the Node view.
- In the Node view, right-click and select Insert > Combine > Highlight.
-
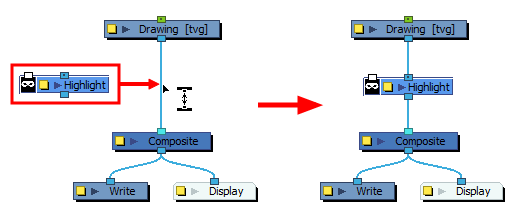
While holding the Alt key, move the Highlight node over the cable connecting the drawing to your scene's main composite. The Highlight node will become connected as an intermediary between the drawing and its composite.

- In the toolbar above the layer list in Timeline view, click on
Add Drawing Layer .
-
In the Add Drawing Layer dialog, give your new drawing layer a relevant name for a matte layer, such as "Matte-Drawing", then click on Add and Close.

-
In the new matte drawing layer, draw a matte for your effect. Your matte can be a simple shape, but should be filled with a colour, as only parts of the matte that are opaque will be taken in account.
 NOTE Mattes can also have semi-transparent areas. Areas of the drawing that are covered by semi-transparent areas of the matte are partially affected by the effect.
-
Connect the Matte drawing to the Matte port of the Highlight node.

- Display the Highlight properties and adjust the properties to control the type and amount of blur and the colour of the highlight effect—see Highlight Node.