Using the Slider Wizard is very simple. All you need to do is select the range of poses you want the slider to interpolate between, select which layers or groups the slider widget should control and the wizard will generate a Master Controller for you.
- Make sure your rig as well as your key poses are inside a group with a Composite node—see About Rig Structure and Master Controllers.
- Prepare all the poses you need to provide to the Slider Wizard in a single continuous range of frames—see About Preparing a Character's Poses for the Slider Wizard.
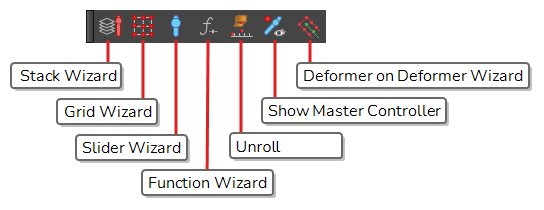
- Do one of the following to add the Master Controller toolbar to your workspace:
- Right-click on an existing toolbar and select Master Controller.
- In the top menu, select Windows > Toolbars > Master Controller.
The Master Controller toolbar appears.
-
In the Timeline view, on the group containing your character rig, select the range of frames you want to use for the Slider.
 NOTES
NOTES- If you select a group, everything inside the group will be added to the list of layers controlled by the Master Controller.
- If you select a collapsed peg in the Timeline view, its children will not be added to the list of layers controlled by the Master Controller. You must expand the peg and select its children as well.
-
In the Master Controller toolbar, click on the
Slider Wizard button.
The Slider Wizard dialog appears.
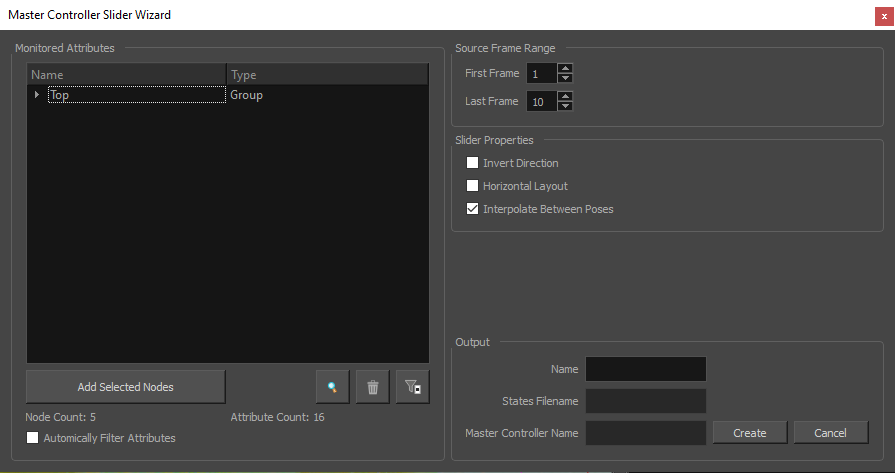
- Check mark the Automatically Filter Attributes checkbox to remove the extra attributes that are not changing.
-
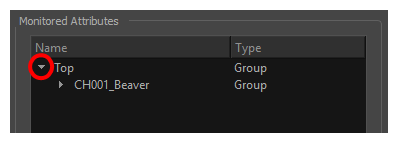
In the Monitored Attributes list, expand the Top item.
The nodes you selected will appear in the list, in a group-based hierarchy. You can expand groups in the list to see the nodes inside them as well. All the nodes in this list will be controlled by your Master Controller.
-
If you want to add nodes to the list of nodes that will be controlled by the Master Controller, select these nodes in the Timeline or Node view, then, in the Monitored Attributes section, click on the Add Selected Nodes button.
- If you want to remove nodes or attributes from the list, select them in the list, then click on the
Remove Selected Items button.
-
- Click on the
Filter Attributes button under the Monitored Attributes list to remove any nodes or attributes that do not change in the selected frame range from the list of controlled attributes. This will optimize the performance of your Master Controller.
- If you want the slider to interpolate from the first pose to the last pose by going from the top of the slider to the bottom, instead of from the bottom to the top, check the Invert Direction option.
- If you want the slider to be horizontal rather than vertical, check the Horizontal Layout option. By default, the slider will interpolate from the first pose to the last pose by going from left to right, unless you checked the Invert Direction option, in which case it will go from right to left.
- In the Output section, in the Name field, type in the name you want to give to your Master Controller.
-
Click on the Create button.
-
A dialog prompting you to select a Composite will appear. In this dialog, select a Composite inside the group for your character rig. This will create the Master Controller inside your character rig's group, ensuring that it is always copied over with your character when you create templates and import them into scenes—see About Rig Structure and Master Controllers

- Click on OK.
-
A Save dialog appears. It prompts you to select where to save the database file in which the character's poses will be saved. The dialog will open in the scene's scripts sub-directory by default and will give the database file a name based on the Master Controller's name. Hence, you can just click on Save right away.
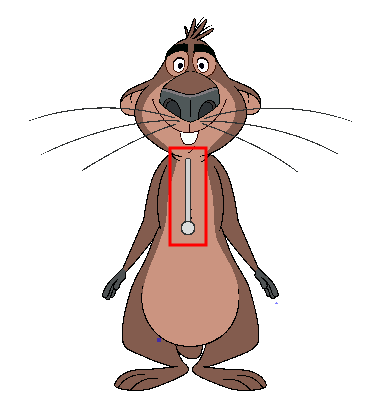
Your Master Controller has now been created and is added to your scene.
The Master Controller's Slider widget is visible in the Camera view.
-
In the Timeline view, move the timeline cursor to a frame outside of the selected range of frames, so as to not override one of your poses.

- In the Tools toolbar, select the
Transform tool.
-
In the Camera view, click and drag on the handle of the Slider widget to test your Master Controller.

At any time, you can show or hide the Master Controller's widget by selecting it in the Timeline or Node view, then doing either of the following:
- In the Camera view toolbar, click on the
Show Control button.
- In the top menu, select View > Show > Control.