Modifying Colour Curves
For more details about the Colour Curves parameters, see Colour Curves Node Properties.
- Open the Layer Properties of the Colour Curves node that you want to modify.
- Select the Channel that you want to modify.
- Use the modifier Ctrl and click on the curve where you want to add a control point.
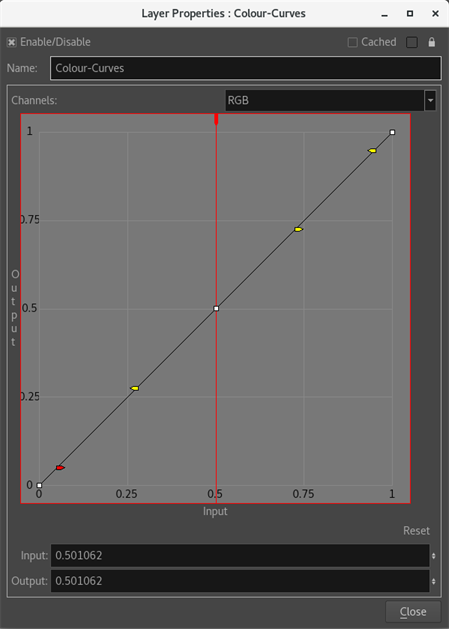
On an unmodified curve, you will notice that both Input and Output values are the same for each new control point added to the curve, since the curve has not been modified yet.
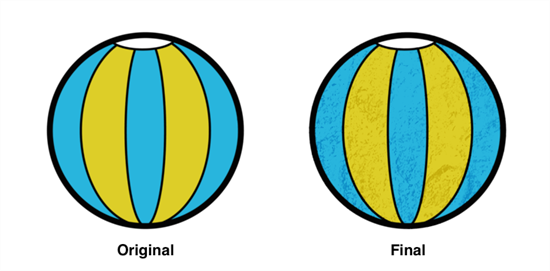
If you want to apply a texture on a drawing to give it a dirtier look, you need to make sure that the texture receives the same colours as your drawing, but in a different tonality and by keeping the original colour swatches intact. Even though there may be different ways of doing it in Harmony, the Colour Curves node may become really handy in this kind of situation.
- Import a bitmap texture image into Harmony. In the top menu, select File > Import > Images.
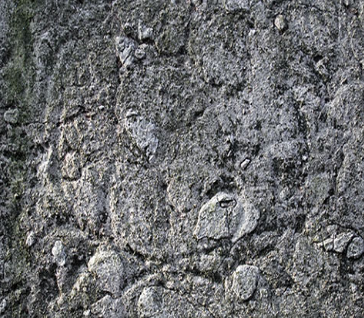
NOTEMake sure the imported image will be kept as an Original Bitmap.
- Connect a Channel Swap node under the Texture drawing node.
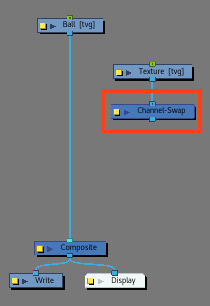
- Open the Layer Properties of the Channel Swap.
- For each channel (Red, Green, Blue and Alpha) select Luminance.
NOTES
- By selecting the Luminance option, it will limit the output to a single channel and makes it appear as if it were the same perceived brightness as it was when it was coloured.
- It would have been possible to recreate the same example without using the Channel Swap node, but you would have needed to modify every curve within the Colour Curves. The Channel Swap node makes it easier to manage.
The other reason why using the Channel Swap may be the best thing to do is because managing more than one curve, or even converting an image to a grayscale will lose the contrast value of the image. In that, the human eye sees colours as brighter values, even if they are at the same brightness. What luminance does, is it flattens to a grayscale, but uses an algorithm that weights the RGB based on the human eye. So it'll bump up greens, lessen blues, ect. to make it more real to the human eye.
- Connect a Colour Curves node under the Channel Swap node.
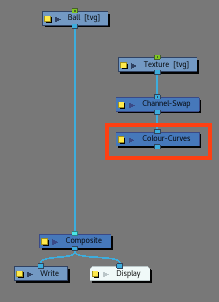
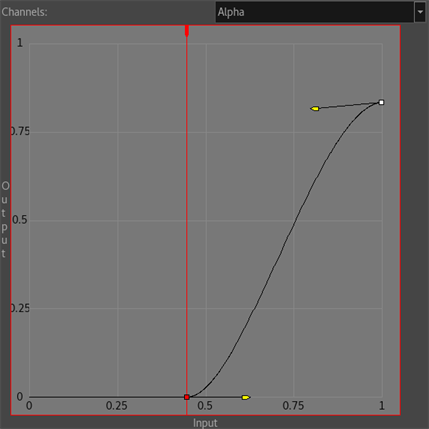
- Open the Layer Properties of the Colour Curves node to create a better contrast on your texture.
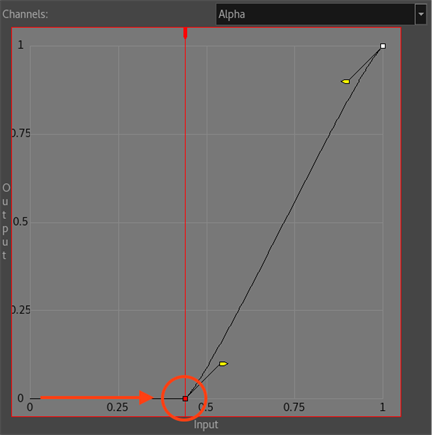
- Select the Alpha channel.
- Select the first control point and move it to the right.
By doing so, the texture will have more contrast, since the middle colour values will become darker.
- Select the last control point and move it down.
This will reduce the amount of white.
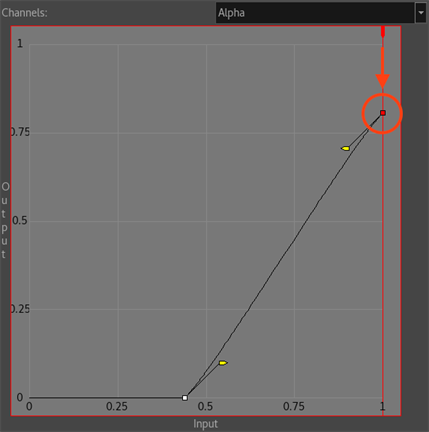
- Make a more progressive curve by playing with the handles of both control points.
- Connect a 2nd Colour Curves node under your Drawing.
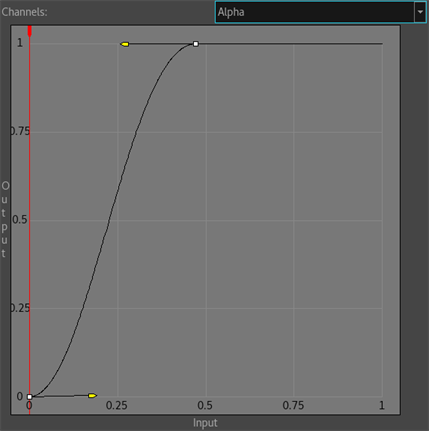
- Open the Layer Properties of the Colour Curves node to create a better contrast on your texture.
- Select the Alpha channel.
- Select the last control point and move it to the left.
By doing so, the texture will have more contrast, since the middle colour values will become brighter.
- Make a more progressive curve by playing with the handles of both control points.
- Add a Cutter node.
- While holding ALT, insert a Cutter node under the Colour Curves of the Drawing node. The Colour Curves node should be connected to the matte-port of the Cutter node.
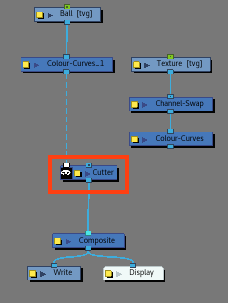
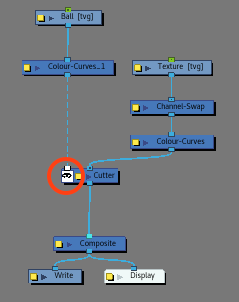
- Connect the Colour Curves from the Texture drawing node to the Image input of the cutter.
- Make sure the Cutter's matte option is inverted.
- Add a second Cutter node.
- While holding ALT, insert a Cutter node under the first Cutter node. It should be connected to the Matte-port of the 2nd Cutter node.
- Drag a second cable from the Drawing node to the Image input of the 2nd Cutter.
- Make sure the Cutter's matte option is inverted.
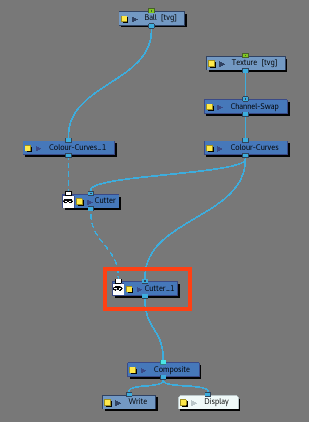
- Add a Blending node.
- While holding ALT, insert the Blending node between the Drawing node and the second Cutter node.
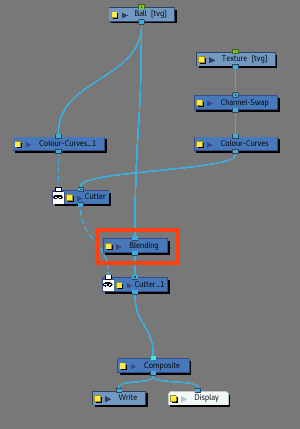
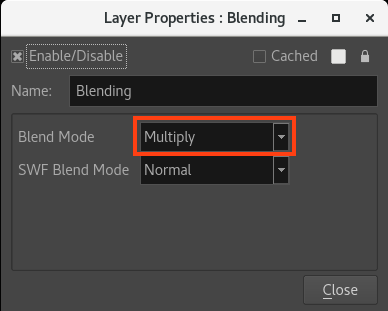
- Open the Blending’s Layer Properties.
- Select the Blend mode Multiply.
- Drag a third cable from the Drawing node and connect it to the right-most position on the Composite node.
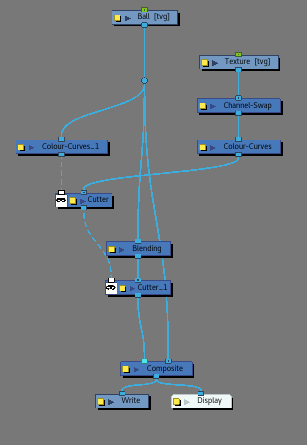
- In the Camera view, visualize the effect in Render mode.
