in Cut-out Animation
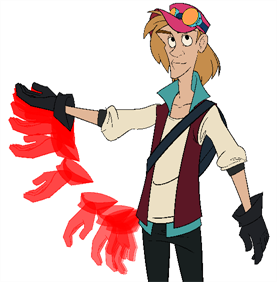
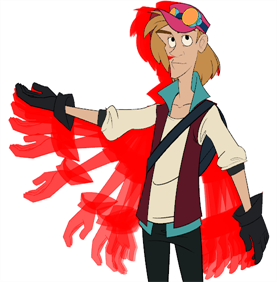
Although Onion Skin is primarily designed for frame-by-frame animation, you may find Onion Skin to be useful when doing cut-out animation. Just like with paperless animation, you can use Onion Skin to help you use existing poses in your scene as references to create new key poses, breakdowns or in-betweens. Also, displaying the Onion Skin for the different frames of a movement can help you visualize the timing of your animation.

When the Onion Skin is displayed, it is displayed for:
- The currently selected layer and its children.
- All layers for which the Onion Skin is enabled.
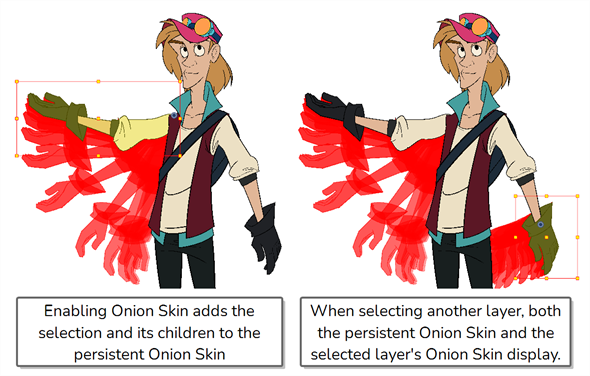
When you enable Onion Skin, it is automatically enabled on the selected layer and its children, and disabled for other layers. This way, if you select your character rig's master peg, enable Onion Skin, it will be enabled for all its layers. If you select one of its layers to animate it, the Onion Skin for the whole rig will persist.
This makes managing Onion Skin while doing cut-out animation relatively seamless. However, you may still want to manage which layers are visible in the Onion Skin. For example, you may want to add more layers to the Onion Skin as their position is needed to help you pose specific layers, or you may want to remove layers from the Onion Skin to de-clutter it, or prevent it from hindering software performance. There are several techniques for managing which layers are displayed in the Onion Skin.
The Onion Skin  Button in the Tools Toolbar
When you click on the Onion Skin button in the Tools toolbar to enable Onion Skin, it is enabled on all the selected layers and their children. This is persistent even if you select different layers. Hence, it is a good idea to select your character model, or the part of it that you want to animate, before enabling Onion Skin.
When Onion Skin is enabled, if you click on the Onion Skin button, it will disable Onion Skin for all layers.
The Onion Skin  Button in the Timeline View
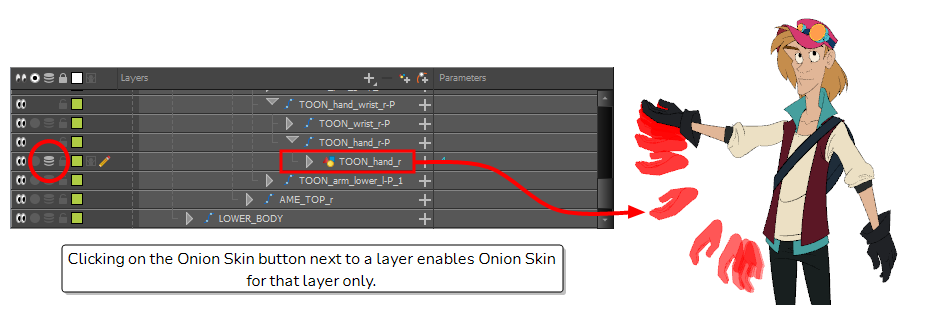
In the Timeline view, there is an Onion Skin button left of each drawing layer. If you click on it, it will toggle whether Onion Skin is enabled on that individual layer.
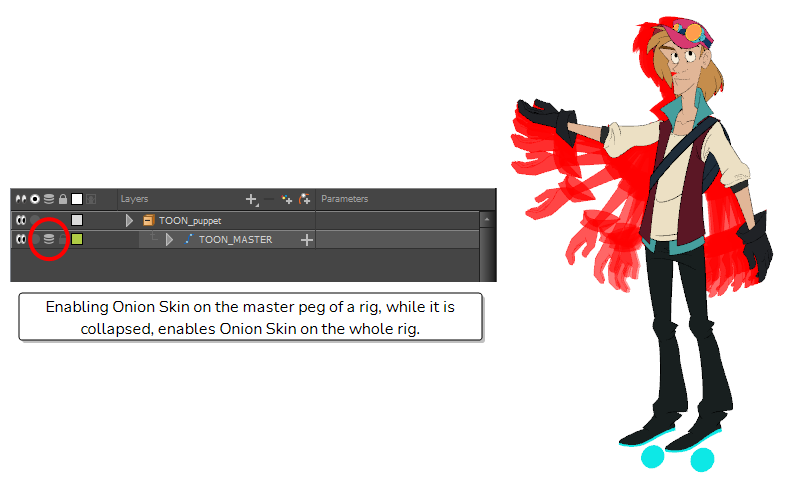
Also, and perhaps more importantly, when a peg that is the parent of one or several drawing layers is collapsed, it also has an Onion Skin button. Clicking on this button will toggle Onion Skin on every drawing layer rigged under that peg. This allows you to quickly enable Onion Skin on your whole rig or on a large part of your rig.
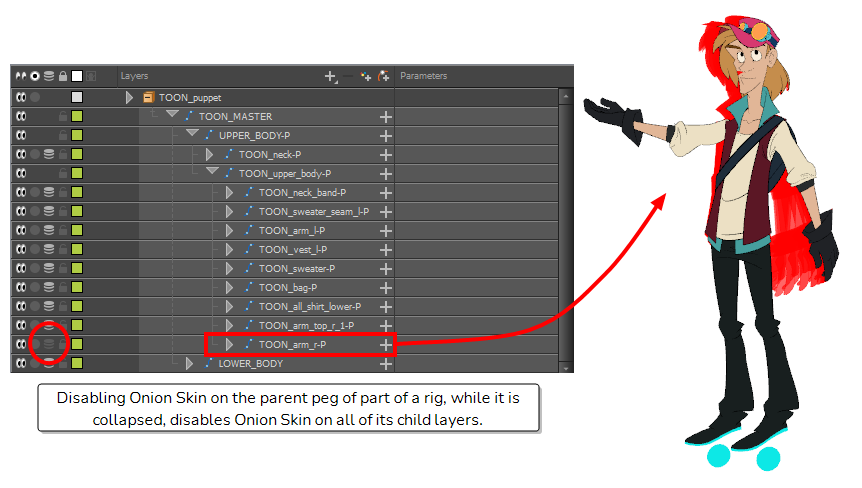
Likewise, you can quickly disable Onion Skin on part of your rig this way.
The Onion Skin Menu
In the top menu, under View, there is an Onion Skin sub-menu. This menu contains several commands allowing you to add or remove layers to and from the Onion Skin:
-
Add to Onion Skin: Adds the selected layer and all of its children to the Onion Skin.
 NOTE You can run this command instantly by pressing Shift + S.
 -
Remove from Onion Skin: Removes the selected layer and all of its children from the Onion Skin.

-
Remove Unselected from Onion Skin: Removes every layer but the selected layer and its children from the Onion Skin. This can be useful if you have Onion Skin enabled on your whole rig or on a big part of your rig, but you selected a smaller part of the rig and you only want Onion Skin to be enabled on it.
-
Add All to Onion Skin: Adds all of the layers in your scene to the Onion Skin:
 NOTE You can run this command instantly by pressing Alt + Shift + O
 -
Remove All from Onion Skin: Disables Onion Skin on all of the layers in your scene.
 NOTE You can run this command instantly by pressing Ctrl + Shift + O (Windows/Linux) or ⌘ + Shift + O (macOS).