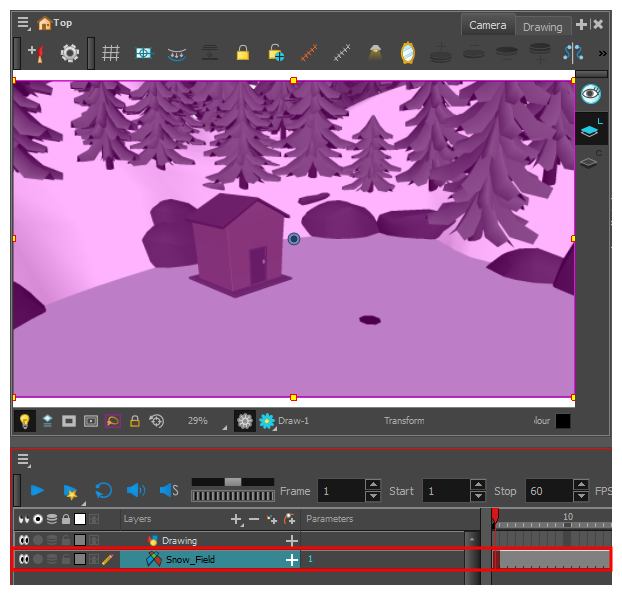
You can import a 3D model as a rendered 2D image in a bitmap layer. This can be useful if you want to use a 3D model as a reference to draw 2D backgrounds, characters or props.
When you import a 3D model as a 2D image, you will be prompted to choose the point of view from which the model is rendered. After that, the model will be rendered into a bitmap layer in your scene. Since the 3D model will be rendered into a bitmap layer, you will not be able to make 3D manipulations on it.
-
In Harmony, select File > Import > 3D Models.
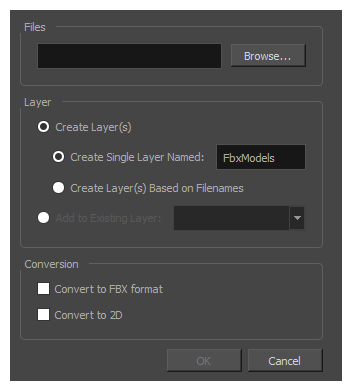
The Import 3D Models dialog box opens.
-
In the Files field, click on Browse.
An Open dialog appears.
-
Browse to an select your 3D model, then click on Open.
NOTE If you want to import a 3D model as a rendered 2D image, you can only import a single 3D model at a time.NOTE You can only import .osb, .3ds, .obj, .fbx, .abc and .dae type 3D models.
- In the Layer section, select Create Layer(s). When you import a 3D model as a rendered 2D image, you must import it into a new layer. Then, choose one of the following options:
- Create Single Layer Named: Imports the model into a layer named after the name you enter in the text input field to the right.
- Create Layer(s) Based on Filename: Imports the model into a layer named after its file name.
- In the Conversion section, check the Convert to 2D option.
-
Click OK.
The Render 3D Model dialog appears.
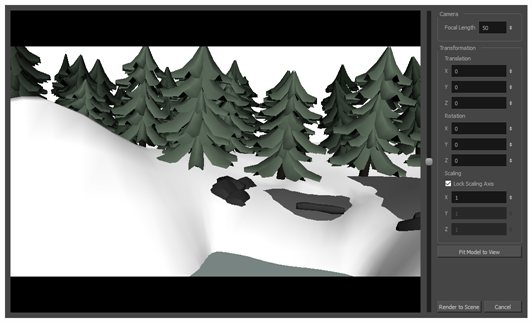 NOTE For information on all the parameters in this dialog, see Render 3D Model Dialog Box.
- If you want the model to fit inside the camera field, click on the Fit Model to View button just beneath the parameters to the right.
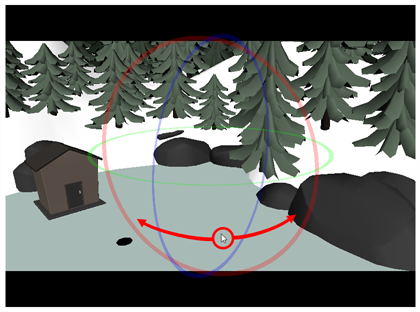
- In the preview area, do the following to adjust the camera's point of view relative to the 3D model:
- Either click and drag on the vertical slider to the right or scroll the mouse wheel up or down to adjust the distance between the camera and the model.
-
Hold Ctrl + Shift (Windows/Linux) or ⌘ + Shift (macOS), then click and drag on the preview area to rotate the camera.
-
Hold Spacebar, then click and drag on the preview area to pan the camera laterally.
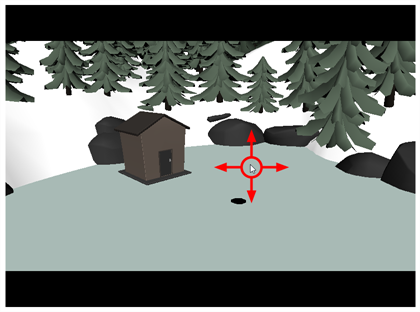
- If you want to adjust the amount of perspective applied on the way the 3D model is rendered, adjust the Focal Length parameter. Increasing it will reduce the amount of perspective applied on the model, and decreasing it will increase the amount of perspective applied on the model.
- Adjust the Translation parameters until the 3D model is in the right position for the scene:
- X: The horizontal position of the 3D model, from west to east.
- Y: The vertical position of the 3D model, from south to north.
- Z: The position of the 3D model relative to the camera, from near to far.
- Adjust the Rotation parameters until the 3D model is in the right angle for the scene:
- X: The rotation angle of the model around the horizontal axis.
- Y: The rotation angle of the model around the vertical axis.
- Z: The rotation angle of the model around the z-axis.
- Adjust the Scaling parameters until the 3D model is in the right size for the scene:
- Lock Scaling Axis: When enabled, you can use the X scaling field to set the scaling of the 3D model on all axes, preserving its proportions.
- X: The horizontal scaling of the model.
- Y: The vertical scaling of the model.
- Z: The scaling of the model on the z-axis.
- Once the model is in the right position, angle and size, click on Render to Scene.
The model is added to the scene, rendered into a 2D bitmap layer.
