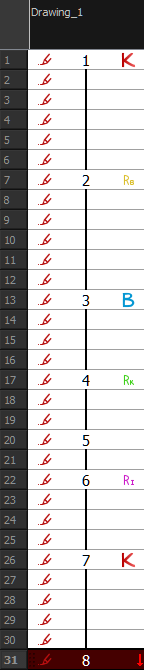
Drawing Identification
In the Xsheet view, you can identify drawings as Key, Breakdown or In-between. This helps to keep the Xsheet well organized while animating.
When working with several animators, directors or even other studios, the necessity for retakes will often arise. Harmony gives you the possibility to mark new drawings as either Retake Key, Retake Breakdown, or Retake In-betweens.
If your production requires you to mark drawings with a custom marker, you also have the option to create your own.
Make custom marks for the Xsheet by creating your own icons, then cutting, pasting and changing a bit of code. Not only is it possible to have your custom mark appear in the Xsheet and Mark Drawing toolbars, but also in the Onion Skin and Flip toolbars.
You can create custom shortcuts for the Drawing Identification options in the Preferences dialog box.
Key Drawing
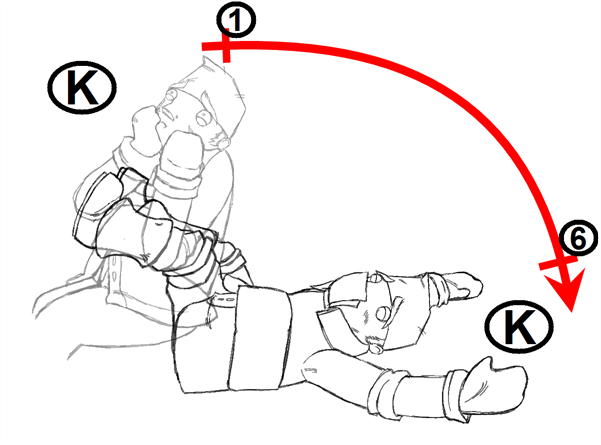
A key drawing is a visually significant pose in a movement, often an extreme position. For example, if a character that is sitting down falls on his back, the key poses would be the character sitting and the character on his back. Of course, it may vary from one animation to another.
Breakdown Drawing
A breakdown drawing is a pose somewhere between two key poses that better shows the movement. Most animation moves are arcs, such as an arm waving, somebody bending, or a leg walking. All of these movements are rotations. The breakdown pose is used to describe this curve better.
The breakdown drawing is then used to indicate secondary poses, also called the follow-through. These actions can be a big stomach jiggle as somebody jumps, a cloak floating behind somebody that is running, or arms moving after the main body action. These moves will generally have a different timing than the primary action. They will mainly start later and finish later. So, the breakdown drawings are used to complete the key drawings.
Note that a breakdown drawing is not always placed exactly in the middle of two keys. It will often be closer to one or the other depending on the timing and the action. Also, you can have more than one breakdown pose between two keys.
 How to mark a drawing as Key, Breakdown or In-between
|
1.
|
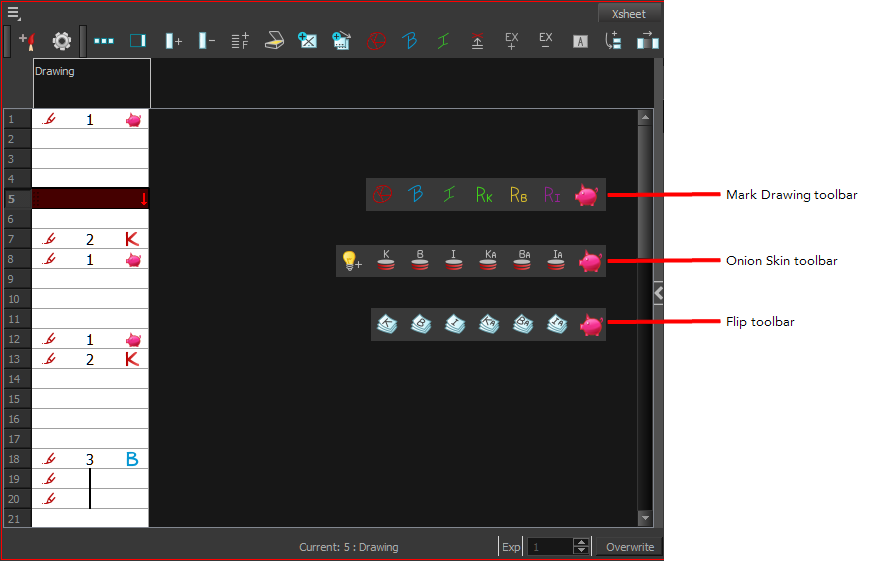
From the top menu, select Windows > Toolbars > Mark Drawing. |
The Mark Drawing toolbar displays.

|
2.
|
In the Xsheet view, select the cell you want to identify. This option is not available in the Timeline view. |
|
3.
|
In the Mark Drawing toolbar, click one of these buttons: Mark as Key Drawing  , Mark as Breakdown Drawing , Mark as Breakdown Drawing  or Mark as In-between Drawing or Mark as In-between Drawing  . In the Xsheet menu, you can also select Drawing > Mark Drawing As > Key Drawing, Breakdown Drawing, In-between Drawing, Retake Key, Retake BD and Retake IB. . In the Xsheet menu, you can also select Drawing > Mark Drawing As > Key Drawing, Breakdown Drawing, In-between Drawing, Retake Key, Retake BD and Retake IB. |
|
‣
|
If you selected Mark as Key Drawing, a  icon appears in the cell. icon appears in the cell. |
|
‣
|
If you selected Mark as Breakdown Drawing, a  icon appears in the cell. icon appears in the cell. |
|
‣
|
If you selected Mark as In-Between Drawing, there is no icon displayed in the cell since it is used to remove a Key or Breakdown marker. |
How to create custom markers
|
1.
|
With a bitmap editing software, create the following icons in PNG format: |
|
‣
|
Mark Drawing Toolbar icon (24 x 24 pixel) |
|
‣
|
Onion Skin Toolbar icon (24 x 24 pixel) |
|
‣
|
Flip Toolbar icon (24 x 24 pixel) |
|
‣
|
Xsheet Column icon (16 x 16 pixel) |
|
3.
|
When your icons are ready, open the Toon Boom Harmony drawingTypes.d folder. |
In Harmony Server, the path is global for all users so you must create the folder and place in /USA_DB.
If the drawingTypes.d folder does not exist, you must create it. To do so, copy the resources folder from the following location.
|
•
|
Windows: Start > Programs > Harmony 12 |
|
•
|
Mac OS X: Applications > Toon Boom Harmony 12 > resources > drawingTypes.d |
|
•
|
Linux: /usr/local/ToonBoomAnimation/harmony_12/lnx86_64/bin/Stage/resources/drawingTypes.d |
|
4.
|
Paste your icons in the drawingTypes.d directory. |
|
5.
|
In the same directory, open the drawingTypes.xml file in a text editor. |
|
6.
|
For each custom icon you want to create, add the following line. Make sure to place it before this closing tag: </DrawingTypes>. |
|
‣
|
<DrawingType text="NewButtonName" pixmapFile="XsheetIcon.png" commandIcon="MarkDrawingIcon.png" flipIcon="FlipIcon.png" onionIcon="OnionIcon.png" /> |
|
7.
|
In that line, replace the following information with your new icon information: |
|
‣
|
NewButtonName: Write the name of your new marker. This name will appear in the button tooltip. |
|
‣
|
XsheetIcon.png: Write the name of the icon that you created to appear in the Xsheet column. Include the file extension. |
|
‣
|
MarkDrawingIcon.png: Write the name of the icon that you created to appear in the Mark Drawing toolbar. Include the file extension. |
|
‣
|
FlipIcon.png: Write the name of the icon that you created to appear in the Flip toolbar. Include the file extension. |
|
‣
|
OnionIcon.png: Write the name of the icon that you created to appear in the Onion Skin toolbar. Include the file extension. |
|
8.
|
Save the file and close it. |


