Workload Manager
Keeping track of how much work everyone has on their plate is an important part of a supervisor’s duties. An artist can get overwhelmed or late when tasked with too big of a workload. On the other hand, artists can end up waiting for work if too little has been assigned to them.
The Workload Manager is a tool specifically designed to address this need.
User Interface
Report Data
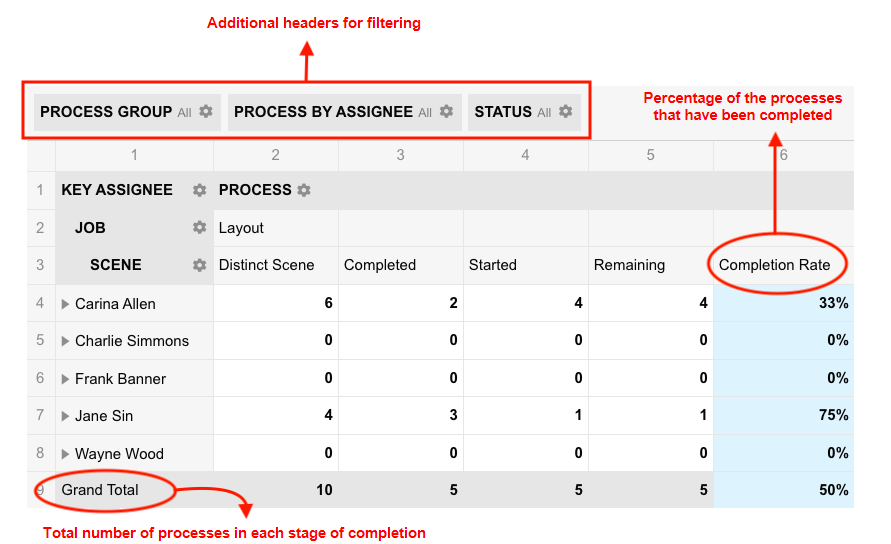
By default, Workload Reports will show a list of key assignees and their number of processes by their status of completion. Job and Scene details can be shown by expanding the rows. These headers can be reorganized to customize the way the data is displayed.
With this table, it is simple for managers to see how much work is remaining for specific people and whether tasks should be reassigned.
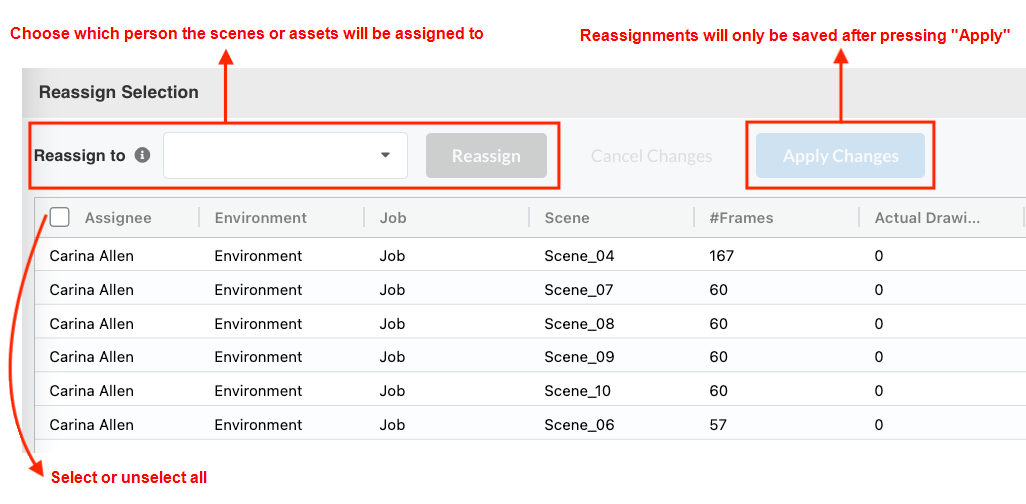
Reassign Selection
Unlike other types of reports, Workload Reports do not have a visual graph to display data.
Instead, there is a “Reassign Selection” section. This allows managers to reassign tasks in the case where assignees have too much or too little work on their plate.
First, create or select a Workload Report. Here is a sample and description of the various areas.
-
Key assignee: This first column lists the assignees of the various manual (non-approval) tasks.
-
Job: Clicking on the triangle icon preceding an assignee will expand to show the names of the jobs containing tasks assigned to that user.
-
Scene: Clicking on the triangle icon preceding a job name will expand to show the names of scenes within that job that are assigned to that user.
Vertical headers description:
-
Horizontal headers description:
-
Process: This header lists the processes present in the scenes’ or assets’ workflows.
-
Process group: Adding this header to the table will show processes by group rather than individually.
-
Process by Assignee: This header lists the processes present in the scenes’ or assets’ workflows while also allowing the display approval processes by assignee.
-
Status: Display the statuses of the various tasks.
-
Key concepts:
-
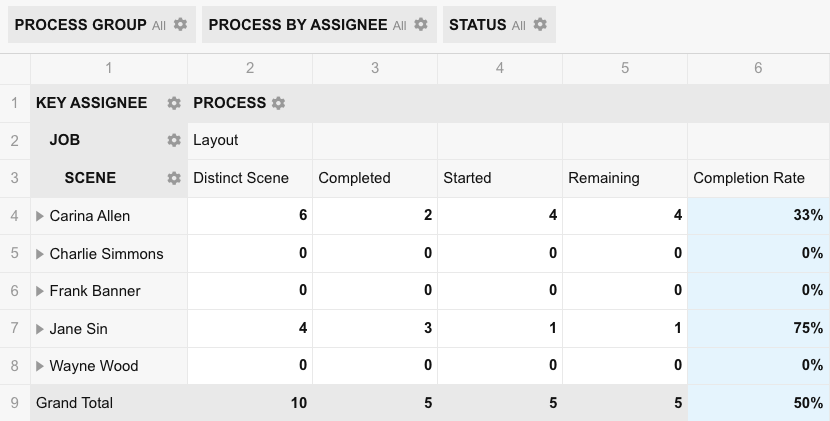
Key assignee: Key assignee varies from regular assignee in that they refer to the assignees of manual tasks (ie not approval tasks). Consider the example below:
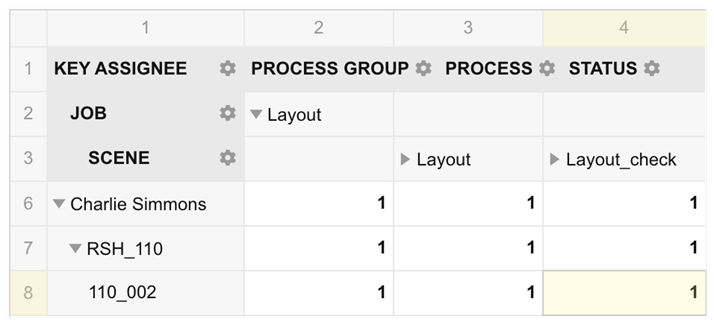
The first column on the left lists Charlie Simmons as the key assignee. Because Charlie’s information has been expanded to display which scenes are assigned to him (line 8), we know that the process Layout of scene 110_002 is assigned to Charlie. However, the Layout_check (an approval process) of the same scene is most likely assigned to someone else (a supervisor). Still it is listed on the same row since the key of that list is key assignee, the assignee of the manual task.
-
Process group: A process group is generated automatically and comprises a manual process and all the approval processes immediately following it in its workflow. The group is named after its manual process. Consider a workflow made up of the following seven processes (where the processes in italic are approval processes).
Layout, Layout_check, Layout_app, Setup, Anim, Anim_check and Anim_app
This workflow would be divided in 3 process groups:
-
Layout: Layout, Layout_check, Layout_app
-
Setup: Setup
-
Anim: Anim, Anim_check and Anim_app
A process group can be expanded into its constituent processes simply by clicking on the triangle icon preceding it.
-
Process by Assignee: To simplify the data shown to supervisors, it is possible to view processes by approval assignees. Consider the example below:
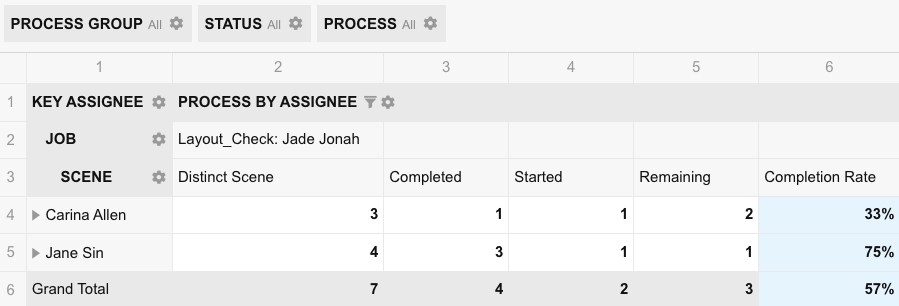
This table shows the data for Carina Allen and Jane Sin, who are both working on tasks to be checked by Jade Jonah. With this report, Jade Jonah can easily track the workload of each member of their team.
Once you generated a workload report and analyzed its data, you can now proceed to make adjustments to the workload by reassigning tasks.
-
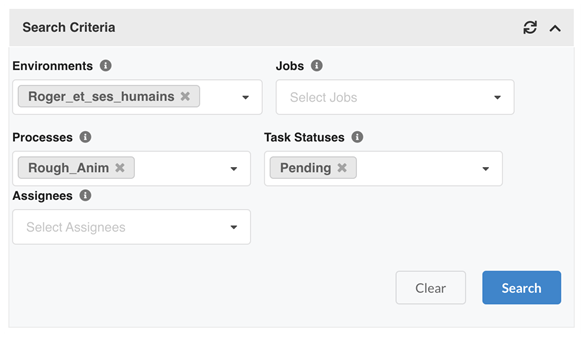
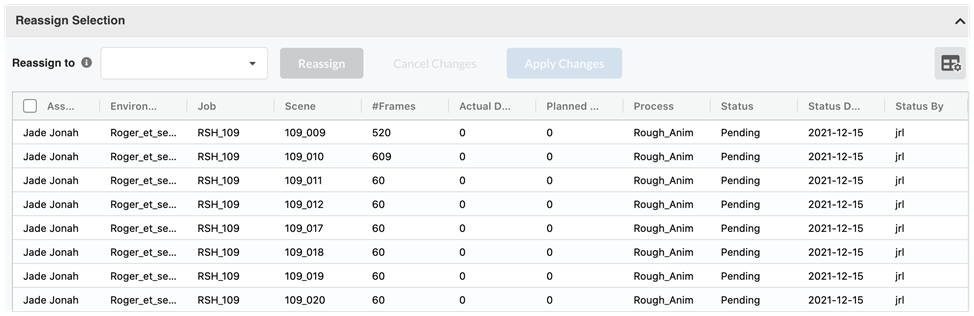
For this example, let’s have a single process and a single status as search criteria. Say “Rough_Anim” and “Pending”
-
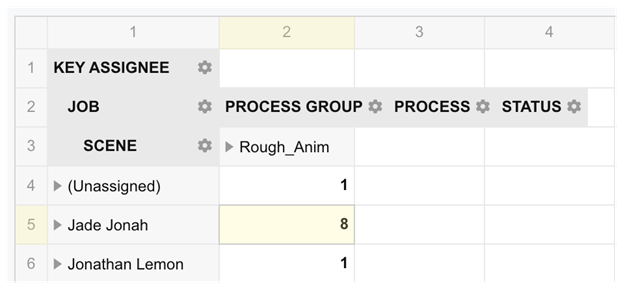
Looking at the Report Data, you can tell that Jade has 8 scenes to do while Jonathan has only 1.
-
Clicking on the 8 scenes of Jade will bring up the details of these scenes in the ‘“Reassign Selection” section below.
-
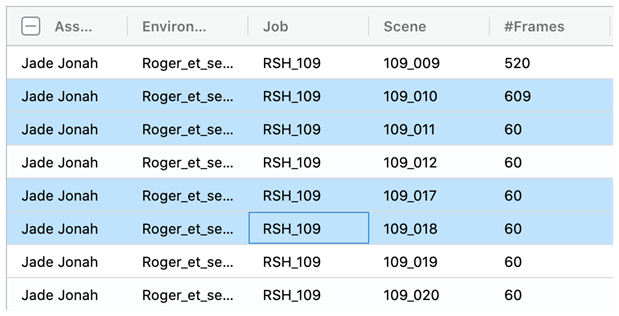
Clicking on the scenes you would like to reassign. Note that you can use Control-click (Command-click on Mac) to select multiple entries.
-
From the drop-down menu, pick the name of the user to whom you would like to reassign these scenes and click the Reassign button.

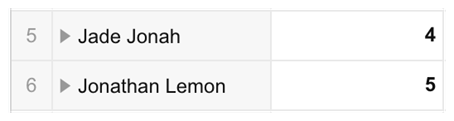
The changes are immediately reflected in the Report data, showing that 5 scenes would now be assigned to Jonathan, if you were to go ahead and commit these changes.
-
You could now continue to reassign various tasks to balance the workload of everyone. Once you are happy with the changes, click on “Apply Changes”.
