Creating Workflows
-
In the main menu, select Settings > Workflows
The Workflows tab opens.
NOTE If the Settings or the Settings > Workflow options are not available, an admin user may have to grant these privileges to a group that you are a member of. This can be done in Security, under Global Rules, by enabling Manage Workflows. -
Click on the Add Workflows button.

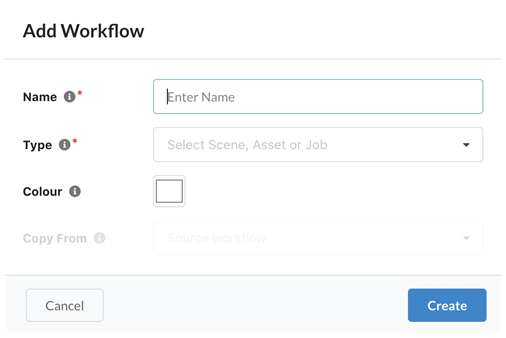
The Add Workflows dialog opens.
-
In the Name field, enter the name of the new workflow.
-
In the Type drop-down menu, select the type of item to which this workflow applies. For workflow of episodes, select Job. For a workflow tracking shots, select Scene. For a workflow of backgrounds, characters or props, select Asset. If you would rather create a Task Statuses workflow, refer yourself to the section How to create a task statuses workflow.
-
In the Colour field, use the colour picker widget to select an identification colour. Note that you can use the colour picker icon to pick a colour from anywhere on your desktop. After your colour selection simply click outside the widget to proceed.
NOTE It can be a good idea to create a workflow based on an existing one. To do so, use the Copy From field (or simply leave it blank to create a workflow from scratch.) -
Click Create to create the workflow.
Next, you will want to add Processes to your workflow. Check out the section on Creating Processes.