Download Documentation
Print
Although you may want to print out part or all or your finished or unfinished animation for reasons such as for a model sheet or storyboarding, a fun project you could make with this feature is a flip book.
To print a flip book or a from your project:
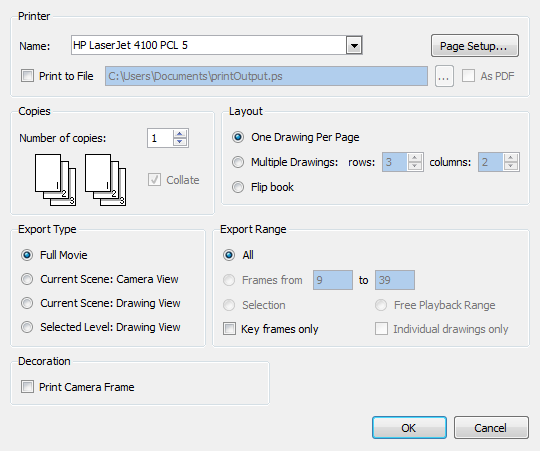
The Printing dialog box opens.
|
2.
|
From the Printer section, look through the Name list to select a printer, which is connected to your computer. |
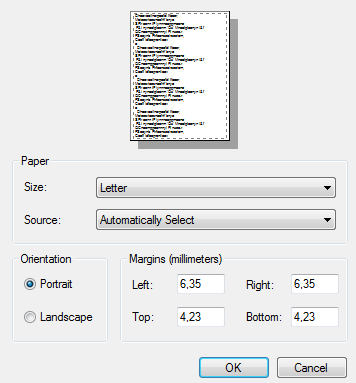
The Page Setup dialog box opens.
|
4.
|
Customize your page setup and click OK. |
|
5.
|
In the Printer section, if you want to print your file digitally and have it saved somewhere on your computer, select the Print to File option and browse to the location where you would like to save this file on your computer. Select the As PDF if you so desire. |
As you want to print a flip book, do not select this section.
|
6.
|
In the Copies section, select the number of copies of each individual page from the drop-down. For example, if you chose the number two, the printer prints two copies of page 1, two copies of page 2, etc. |
|
7.
|
In the Layout section, decide how many frames you would like per page. Selecting the Flip book option automatically places either 6 to 8 frames per page and leaves a margin for binding purposes.
Once the images are printed, you have to cut your images to create your flip book. If you put only one image per page, it is difficult to quickly flip through the drawings as the pages are too big to handle. Smaller sheets are much easier to flip. |
|
8.
|
In the Export Type section, decide on one of the following options: |
|
‣
|
Full Movie: By default prints the entire frame range of your project, including all scenes and all enabled layers. |
|
‣
|
Current Scene: Camera View: Prints all elements, from all enabled layers, for a specific scene, including all transformations visible in the Camera view and allows for the selection of a frame range. |
|
‣
|
Current Scene: Drawing View: Prints all elements on a selected layer visible through the Drawing view, as well as other layers visible with the aid of the Light Table tool. |
|
‣
|
Selected Level: Drawing View: Prints all elements on only one selected layer and offers the option of printing individual drawings only. |
|
9.
|
In the Export Range section, decide on one of the following options: |
|
‣
|
All: Renders the entire project. |
|
‣
|
Frame Range: Allows you to select a specific section of your project to render by frame number. |
|
‣
|
Selector: Renders whichever layer or element you selected before starting the printing process. |
|
‣
|
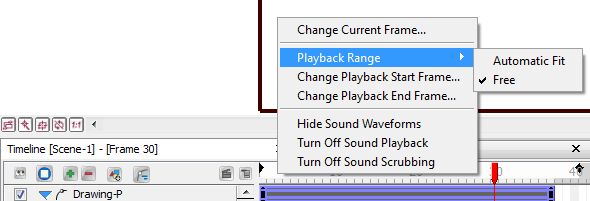
Free Playback Range: In the Timeline view, right-click on the timeline ruler (top) and select Playback Range > Free. |
Two black diamonds appear at the start and finish of your project. Drag these markers to select the range that you desire. Note: This must be done before you open the Export Dialog window.
|
‣
|
|
|
10.
|
In the same section, decide on one, both or none of the following options: |
|
‣
|
Keyframes only: Prints drawings on a frame with a keyframe in the Timeline view. |
|
‣
|
Individual drawings only: Prints the first instance of a drawing. For example, if a drawing on a cell or frame is extended for 10 exposures in either the Xsheet or Timeline view, these extended exposures are not printed. In other words, you receive only one printout of this drawing instead of ten. |
|
11.
|
From the Decoration section, decide whether or not you want to select the Print Camera Frame option. |
You now have a frame-by-frame printed copy of your animation that is ready to be cut and bound into a flip book.