
Download Documentation
Cutting the Character into Pieces
To cut up your character into pieces, you must first decide which parts of the final character will move.
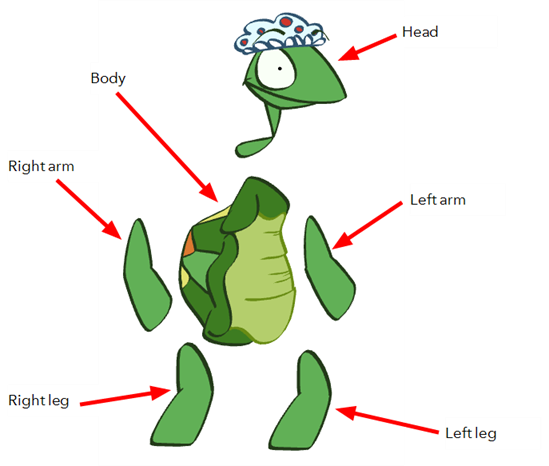
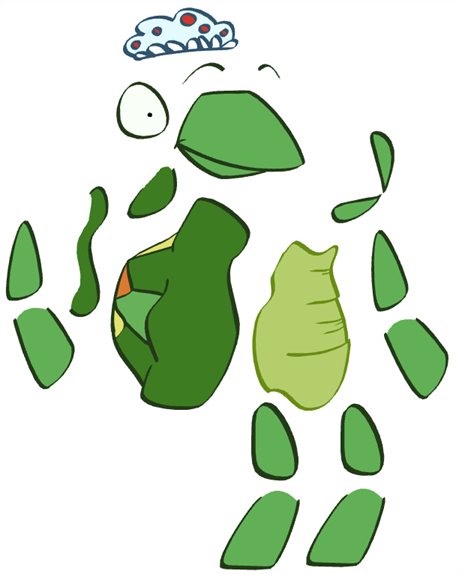
If you are building your first puppet, start with a very simple breakdown. Most of the time, you will want to animate the arms, legs and head. It is not necessary to separate all the facial features from the head or to break down the knees and elbows to get a working puppet. Breaking down the character into six pieces is enough to produce a basic animation.

If you like, you can extend the amount of the puppet's articulation. You can bend the arms and legs, and separate the head into several different pieces to animate the eyebrows and make the eyes blink.
How to Cut the Pieces
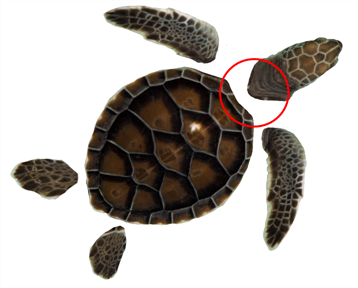
Once you know what you want to animate, it is time to cut the different pieces required for the animation. There are two ways to do so. First, you can use the Cutter and Scissor tools to cut the portion needed and use the drawing tools to complete the missing portion or, if you are not using a photo, you can trace the new pieces using the drawing tools.
Cutting Out Your Pieces
You will now learn about cutting parts of your character and completing any missing areas. If you are using a picture, and because Toon Boom Studio mainly edits vector images, you may want to do this in a bitmap editing software, such as Adobe Photoshop.
You can use the Show Strokes feature to help you clearly see the region you are cutting using the Cutter tool. To display the strokes, select View > Show Strokes or press [K].
To cut your pieces:
|
1.
|
In the Tools toolbar or in the Drawing Tools toolbar, select the Cutter  tool. tool. |
|
2.
|
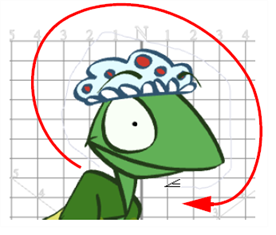
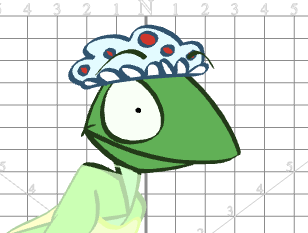
In the Drawing view, trace a selection around the part to cut. |
|
3.
|
In the Tools toolbar or in the Drawing Tools toolbar, select the Drawing Select  tool. tool. |
|
4.
|
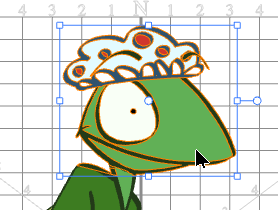
In the Drawing view, select the cut zone. |
|
5.
|
Select Edit > Copy Drawing Object or press [Ctrl] + [C] (Windows) or [⌘] + [C] (Mac OS X). |
|
6.
|
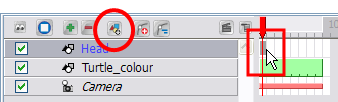
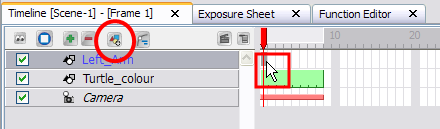
In the Timeline view, click the Add Drawing Element  button and rename the new layer corresponding to the new piece you want to create. button and rename the new layer corresponding to the new piece you want to create. |
|
7.
|
On the right side of the Timeline view, select the new layer's first cell. |
|
8.
|
Click the Drawing view, to activate it. |
|
9.
|
Select Edit > Paste Drawing Object or press [Ctrl] + [V] (Windows) or [⌘] + [V] (Mac OS X). |
|
10.
|
In the Tools toolbar, select a drawing tool to clean and complete your new drawing. The Brush  and Eraser and Eraser  tools are recommended. tools are recommended. |
|
11.
|
In the Onion Skin toolbar (Top toolbar on Mac OS X), click the Light Table  button so you can see your original drawing while you draw. button so you can see your original drawing while you draw. |
|
12.
|
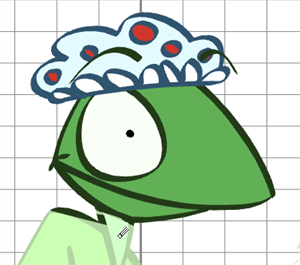
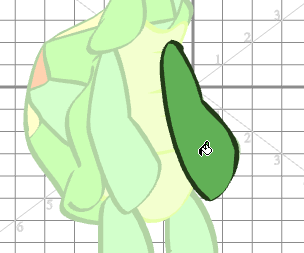
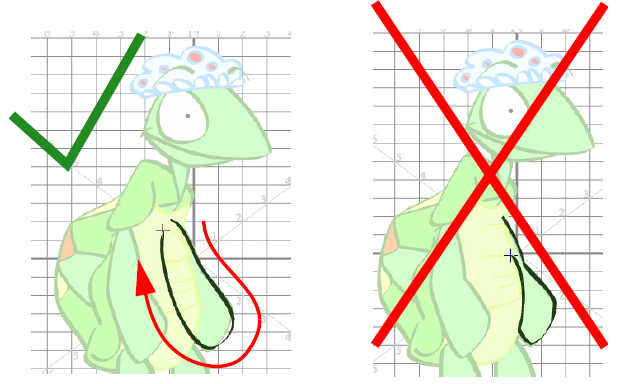
In the Drawing view, clean and complete your new drawing. Make sure to draw a complete shape that overlaps the other body parts. |
|
13.
|
In the Tools toolbar, select the Paint  tool. tool. |
|
14.
|
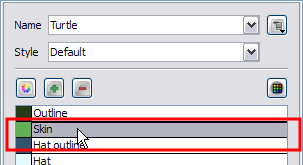
In the Colour Palette view, select the colour needed. |
|
15.
|
In the Drawing view, paint your new drawing. |
|
17.
|
Repeat the same process for each new piece to create. |
Drawing your Pieces
To draw your pieces:
|
1.
|
In the Timeline view, click the Add Drawing Element button and rename the new layer corresponding to the new piece you want to create. |
|
2.
|
On the right side of the Timeline view, select the new layer's first cell. |
|
3.
|
In the Drawing Tools toolbar, select the drawing tool of your choice. The Brush tool is recommended. |
|
4.
|
In the Onion Skin toolbar (Top toolbar on Mac OS X), click the Light Table button to see your original drawing while you draw. |
|
5.
|
In the Drawing view, trace the new piece. Make sure to draw a complete shape overlapping with the other body parts. |
|
6.
|
In the Tools toolbar, select the Paint  tool. tool. |
|
7.
|
In the Colour Palette view, select the colour needed. |
|
8.
|
In the Drawing view, paint your new drawing. |
|
10.
|
Repeat the same process for each new piece to create. |