Download Documentation
Rotoscoping
Maybe you have heard about this process, but do not know how to use it. Perhaps you have an idea of how this technique works, but do not know where to begin. This section will help you get started.
What is Rotoscoping?
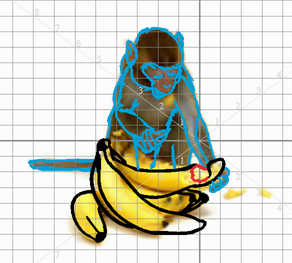
Rotoscoping is an animation technique where the animator traces over each frame of a live-action movie to reproduce a realistic movement. This technique was invented by Max Fleischer in 1915. The movie was projected frame by frame onto a piece of glass that the animator could trace over. The piece of equipment used in this process is called a rotoscope. Today, the rotoscope has been replaced by the computer.
Reasons for Rotoscoping
Some reasons you may chose to use this process:
|
•
|
The motion is very realistic. |
|
•
|
The timing is accurate. |
|
•
|
The characters or other elements retain their proportions and volume. |
|
•
|
It helps you learn how to animate. |
|
•
|
It helps you understand how to break down a movement. |
|
•
|
It teaches you how to animate very subtle motions, like a slight head turn or a slow raise of the hand. |
You can also superimpose your character design and only use the motion but not the actual object, person or animal from the video.
Because rotoscoping is so realistic, it leaves little room for exaggeration, movement, squash and stretch, or a very cartoony look. If you use this technique, make sure it suits your project.
Selecting a Video
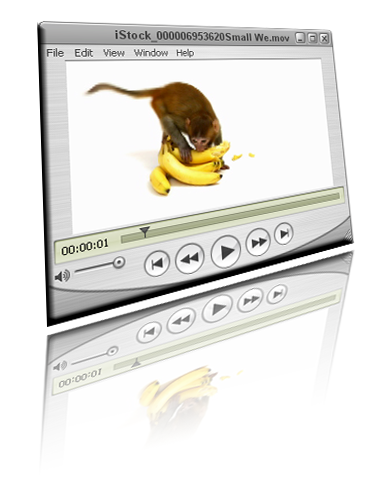
Selecting a video to rotoscope is simple. You can:
|
•
|
Film the actions you need to animate yourself. For example, you could film a dog playing with a ball or a person running, |
|
•
|
Find a free movie clip on the web, or |
|
•
|
Purchase a royalty-free movie clip from a website. |
Your movie format can be any of the following:
If you find a movie clip that is not in any of these formats, you can easily convert it in an editing software.
Your clip does not need to have a very high resolution, however the higher the resolution, the more detail you see. A minimum resolution of 300x200 is recommended.
Importing a Video
When you create your Toon Boom Studio project, you can avoid having too many drawings to trace over by creating the project with a rate of 12 frames per second instead of 24.
To import your video:
|
1.
|
Select File > Import File. |
|
2.
|
In the Open dialog box, browse for your clip and click Open. |
|
3.
|
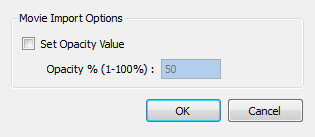
In the Import Options dialog box, do NOT set an opacity value. |
Tracing the Character
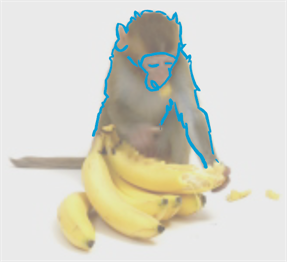
Before you start tracing your movie, set up your brush with a low smoothness and a lively tracing colour. This is so your lines will be more faithful to the video still and you will be able to see your lines clearly.
Tracing

When you trace over your imported movie, concentrate on one element at a time. For example, if there is a boy running with a balloon, trace the boy first and then the balloon. This helps when trying to create separate movements. The boy moves differently than a balloon, even if they are moving at the same speed and in the same direction.If the two objects or characters are interacting, it is best to draw them on the same layer.
Remember, when you trace over the character, try to close your zones for fast and efficient painting later on.
To trace your animation:
|
1.
|
In the Timeline view, add a new layer to trace your animation. |
|
2.
|
If you work in the Drawing view, enable the Light Table  to see the live-action frames. to see the live-action frames. |
|
3.
|
In the Camera/Drawing view, zoom in on your image to see the details better. |
|
4.
|
Trace your first frame. |
|
5.
|
In the Timeline view, select the second cell and trace the second image. |
|
6.
|
If necessary enable Onion Skin  to see your previous drawings. to see your previous drawings. |
|
7.
|
Repeat the process until the animation is entirely traced. |
Fine Tuning the Animation
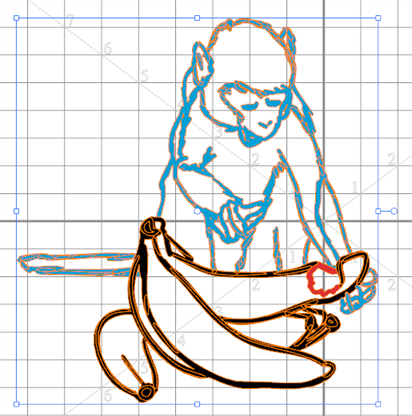
Once your animation is traced, it is a good idea to deselect the live-action clip layer or turn off the Light Table, and then go over your animation to fix the little details, such as open zones and uncompleted lines.
If you want your final project to be lighter once you are done tracing, select your lines and flatten them.
To flatten your drawings:
|
1.
|
In the Drawing Tools toolbar, click the Select  tool. tool. |
|
2.
|
In the Timeline view, select the first frame of the tracing layer. |
|
3.
|
In the Camera/Drawing view, select your entire drawing. |
|
4.
|
Select Tools > Flatten. |
|
5.
|
Repeat this process for all your drawings. |
Painting the Animation
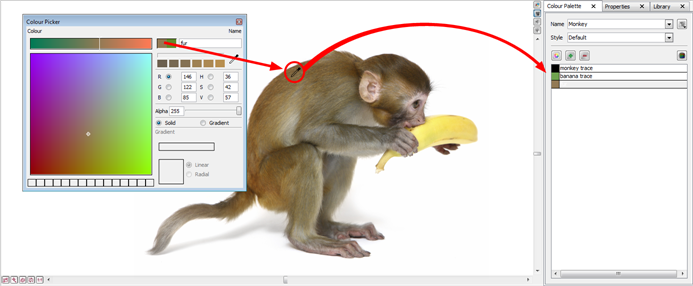
To create your colour palette, use Toon Boom Studio's special dropper to pick colours from your live-action movie and paint your animation in the same colours as the clip.
To create your colour palette:
|
1.
|
In the Colour view, create and rename your new palette. |
|
2.
|
In the Colour list section, add a new colour swatch by clicking the Add Colour  button. button. |
|
3.
|
In the Camera view, display your live action movie. |
|
4.
|
Double-click on the new colour swatch to display the Colour Picker window. |
|
5.
|
In the Colour picker window, click the Eye Dropper button. |
|
6.
|
In the Camera view, pick a colour. |
|
7.
|
Repeat this process until the colour palette is entirely finished. |
Your animation is now ready for painting.


 to see the live-action frames.
 to see your previous drawings.
 tool.
tool.

 button.