
Download Documentation
Animating Traditionally
In Studio, you can easily animate traditionally and work entirely digitally. The process of hand-drawn animation through traditional animation procedures has been divided to lead you easily through the process.
Animating
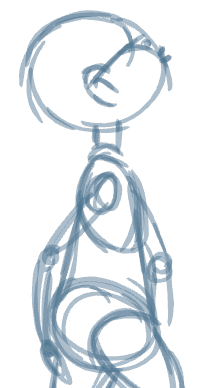
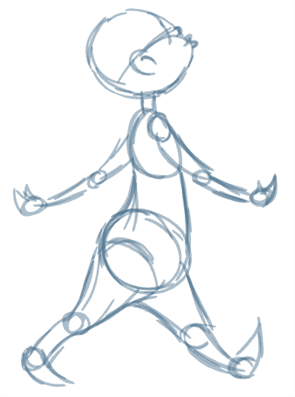
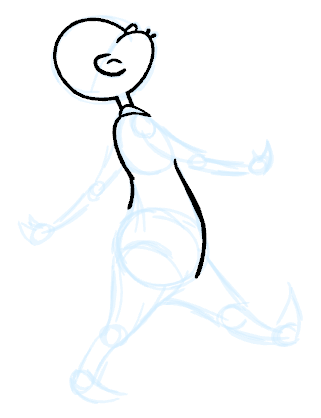
The first step to complete is the rough animation, which is the skeleton of your animation. You would usually start with the main action. For example, to animate a walk-cycle, you will start with the torso moves and the legs. The head, arms, and clothes are added later, during the secondary animation.
For a satisfactory animation, complete the main action before adding all the details. If you start animating the details right away, you lose a lot of time if you have to do corrections, and your animation often looks too rigid.
To animate:
|
1.
|
In the Timeline view, create a new drawing layer and name it Rough. |
|
2.
|
In the Drawing Tools toolbar, select the Brush  tool or press [@]. tool or press [@].
|
|
3.
|
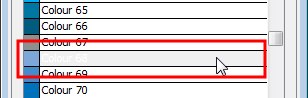
In the Colour view, select the colour you will use to draw. It is a good idea to choose a light colour for your rough animation to help for the following task, the clean up process. |
|
4.
|
In the Timeline or Exposure Sheet view, select the cell where the first drawing will appear.
|
|
5.
|
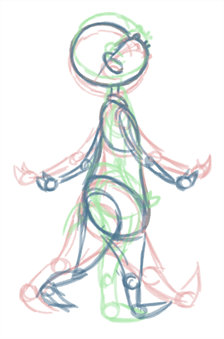
In the Drawing or Camera view, draw the first key drawing.
|
|
6.
|
In the Onion Skin toolbar, click the Enable Onion Skin  button. button.
|
|
7.
|
From the Onion Skin toolbar, click the onion skin's Previous  or Next or Next  drawing buttons and from their drop-downs, select the number of previous and next visible drawings that you think you will need. drawing buttons and from their drop-downs, select the number of previous and next visible drawings that you think you will need. |
|
8.
|
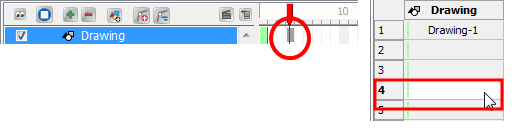
In the Timeline or Exposure Sheet view, select the cell where your next key drawing will appear. |
|
9.
|
In the Camera view, draw your second key drawing. |

|
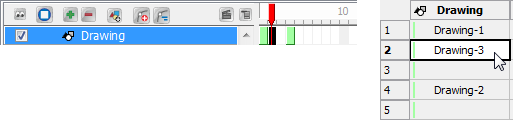
10.
|
In the Exposure Sheet View, select a cell between your two key drawings.
|
|
11.
|
Draw your new drawing.
|
|
12.
|
In the Timeline or Exposure Sheet view, select a new cell and repeat these steps for the new drawings. |
Cleaning Up
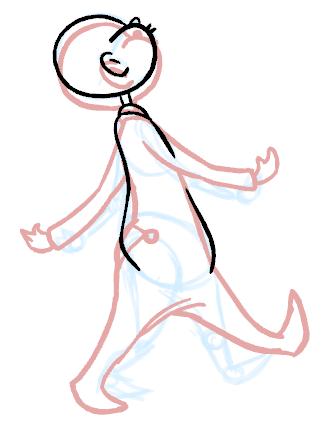
When your rough animation is ready, it is time to clean it up and ink it. The clean-up is also called tracing. It consists of tracing solid and clean lines over the rough animation to get closed zones. This is the final paperless animation step before the ink and paint step.
You need to add a new drawing layer to draw your clean drawings. This is the equivalent of adding a sheet of paper and tracing over the rough using the animation disk.
If you plan on tracing your animation in the Drawing view, you need to turn on the
Light Table 
feature in order to display all the layers of your project.
To trace your animation in a new layer:
|
1.
|
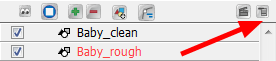
In the Timeline view toolbar, click the Add Drawing Layer  button. button.
|
|
2.
|
Rename your new layer Clean. |
|
3.
|
In the Timeline view, select your rough layer, |
|
4.
|
Click the Menu  button, and select Lock > Lock. This is to prevent any accidental changes. button, and select Lock > Lock. This is to prevent any accidental changes. |
|
5.
|
In the Timeline or Exposure Sheet view, select the cell on the clean layer corresponding to the first key drawing of your rough animation.
|
|
6.
|
In the Drawing Tools toolbar, select a drawing tool. |
|
7.
|
In the Colour view, select the colour to trace your animation. Pick a bold dark colour, such as black to make sure it contrasts well with the light colour of your rough animation. |
|
8.
|
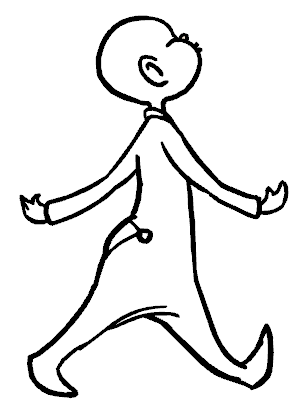
In the Camera view, start tracing the first key drawing. |
|
9.
|
If you have some other layers in the way, you can deselect them temporarily so that only your rough animation and your clean-up layer are displayed. You can do this in two ways, by deselecting these layers in the Timeline to affect what is seen in the Camera view, or by disabling them in the Exposure Sheet view to affect the Drawing view. |
|
10.
|
In the Onion Skin toolbar, select the Enable Onion Skin button and extend the previous and next drawing numbers.
|
|
11.
|
In the Timeline or Exposure Sheet view, select the next cell corresponding to a rough drawing. |
|
12.
|
In the Drawing or Camera view, trace your next drawing. |
|
13.
|
Repeat these steps for the rest of your rough drawings until you have a full set of clean ones.
|
This method allows you to keep the roughs and the cleans intact. You only need to disable the rough layer to prevent it from appearing in the scene.
Power Painting
When you create a traditional digital animation, you need to paint each drawing one at a time. But you can use the Paint All tool to automatically paint closed zones in the same location within an element. To use the Paint All tool, you click a zone in a drawing object. Toon Boom Studio then flips through all of the drawings in the element to see if there is a closed zone in the location you clicked. If there is, it fills the zone with the same colour. This saves you a lot of time when painting your animation.
You can use the onion skin to select a location.
To learn more about painting, colour palettes and Onion Skin, see
Adding ColoursTo power paint drawings in an element:
|
1.
|
Do one of the following to enable the Onion Skin feature: |
|
‣
|
Windows: In the Onion Skin toolbar, click the Show Onion Skin  button. button. |
|
‣
|
Windows and Mac OS X: Select View > Onion Skin > Turn On Onion Skin. |
|
2.
|
You can select the number of previous and next drawings you want to show by clicking on the button from the Onion Skin toolbar or by using the View > Onion Skin menu. |
The previous and next drawings appears in both the Drawing and Camera view.
|
3.
|
From the Colour Palette view, select the swatch you want to use to paint the zone. |
|
4.
|
Select the Paint  tool from the Drawing Tools toolbar or select Tools > Drawing Tools > Paint. tool from the Drawing Tools toolbar or select Tools > Drawing Tools > Paint. |
|
5.
|
Press [Shift] + [Alt] and click a zone that many drawings in the element share.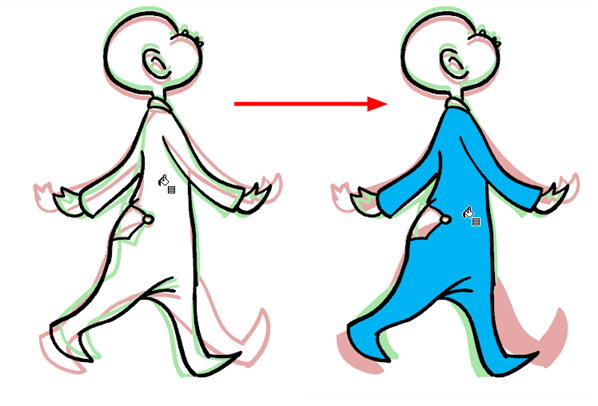 |
Studio evaluates all of the drawings in the element to determine if there is a closed zone beneath where you clicked.
Setting the Timing
Playing Back Your Animation
You can play back your animation in the Camera view using the Playback toolbar.
To play back your animation:
|
1.
|
Be sure you are currently using the Camera view, as this feature is not available in the Drawing view. |
|
2.
|
In the Timeline view, deselect the layers you do not want to show during playback. |
|
3.
|
In the Playback toolbar, click the Loop  button if you want the playback to loop. button if you want the playback to loop. |
|
4.
|
In the Playback toolbar, click the Play  button to start the animation. button to start the animation. |