Download Documentation
Filling Exposure
Studio provides different tools to fill in exposures and values, create cycles, and set increments.
This section is divided as follows:
Typing Exposure
To fill-in your exposure, you can directly type the values in the Exposure Sheet view.
To enter a value in a column's cell, you have to either double-click in the cell or use the Change Label command and type in the numbers or letters.
You can only use alphanumeric values (0-9, a-z, underscore (_) and dash (-)).
The following shortcuts can be helpful when editing the exposure values:
|
•
|
[Return] to move to the next cell. |
|
•
|
[Esc] to exit the typing mode and return to normal mode. |
To type values in the Exposure Sheet view:
|
1.
|
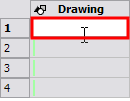
In a column, double-click on one cell or right-click on the selected cell and select Change Label. |
|
2.
|
Type a value in the cell. |

|
3.
|
Press [Return] to move on to the next cell. |

|
4.
|
Press [Esc] to quit the edit mode. |

Extending Exposure
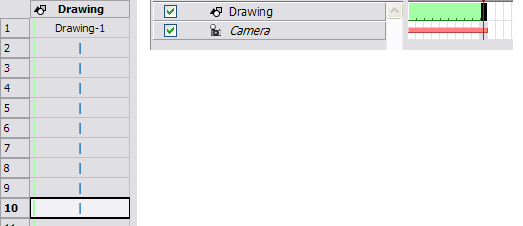
The Extend Exposure feature allows you to select a drawing exposure to make it appear longer in the scene.
To extend a drawing exposure:
|
1.
|
In the Exposure Sheet or Timeline view, select the drawing (cell) to extend. |
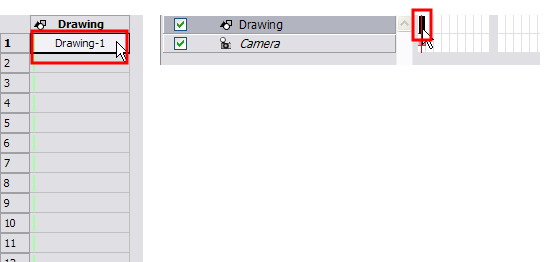
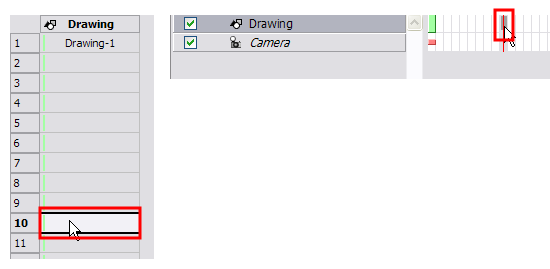
You can also select the last cell of the area where you want the drawing exposure to end, as opposed to selecting the drawing cell directly. The cell must be an empty cell.
|
2.
|
Select Element > Cell > Extend Exposure or press [Ctrl] + [Shift] + [1] (Windows) or [⌘] + [Shift] + [1] (Mac OSX). |
If you selected the drawing cell, the Extend Exposure dialog box opens.
If you selected the last cell where you want the exposure to end, the exposure is automatically extended.

|
3.
|
In the Extend to Frame field, type the frame number you want to extend the cell to. |
Dragging Cells
To readjust your timing, you can drag one or several cells to a new location in both the Timeline and Exposure Sheet view. You can only drag a cell in the same column or layer.
To drag a cell to another location:
|
1.
|
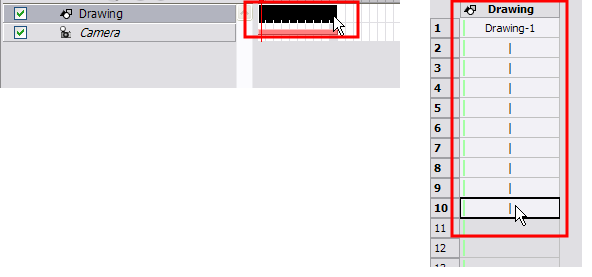
In the Timeline or Exposure Sheet view, select one or several cells to move. |
|
2.
|
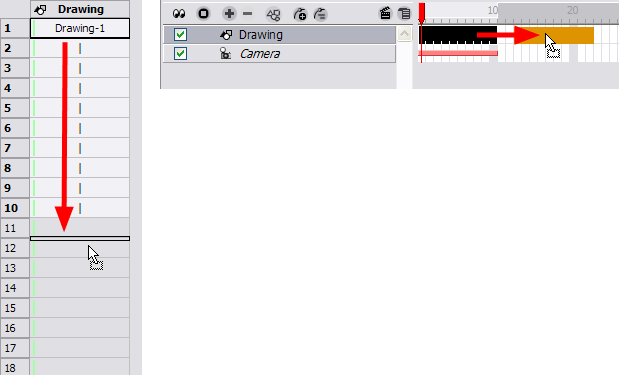
Click on the cell selection and drag it to a new location. |
|
‣
|
If you drop the selection, it overwrites the existing cells. |

|
‣
|
If you hold [Ctrl] (Windows) or [⌘] (Mac OS X) while dropping the selection, the cells are copied and not moved. |

|
‣
|
To change the starting frame of an element, use the Change Start Frame command. |
|
3.
|
Select Element > Change Start Frame. |

|
4.
|
Type the frame number where you want the selected layer to start. |
Increasing and Decreasing Exposure
Once a value is entered in the Timeline or Exposure Sheet view, you can increase and decrease its exposure.
This section is divided as follows:
Add Exposure
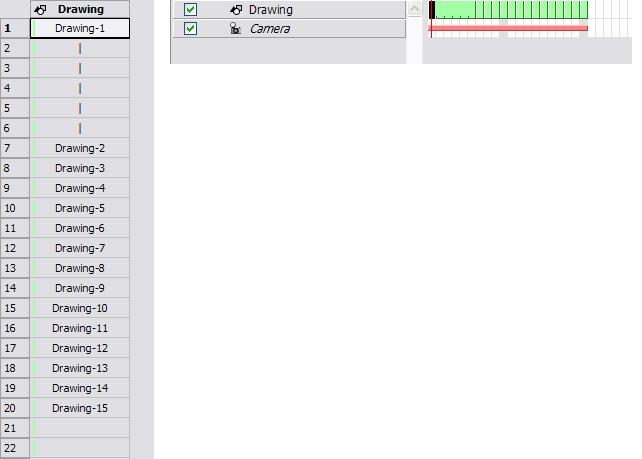
Increasing the exposure adds one more exposures to a selected cell. Repeating this action adds an extra cell every time. This is a quick way of extending a drawing exposure. Increasing an exposure always pushes the existing exposure down.
To add exposure to a drawing:
|
1.
|
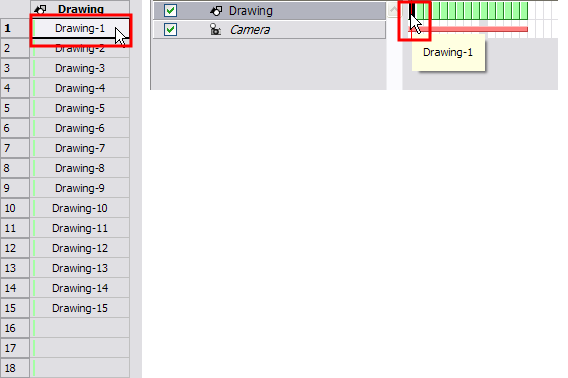
In the Timeline or Exposure Sheet view, select a cell. |
|
2.
|
Select Element > Cell > Add Exposure or right-click the selected cell and select: |
|
‣
|
From the Timeline view, Exposure > Add Exposure. |
|
‣
|
From the Exposure Sheet view, Add Exposure. |
Remove Exposure
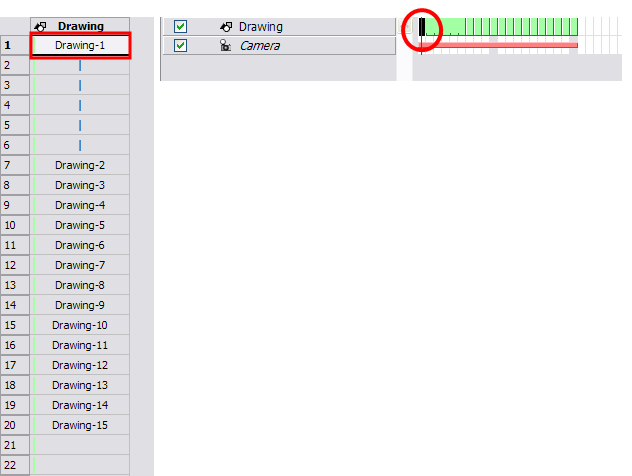
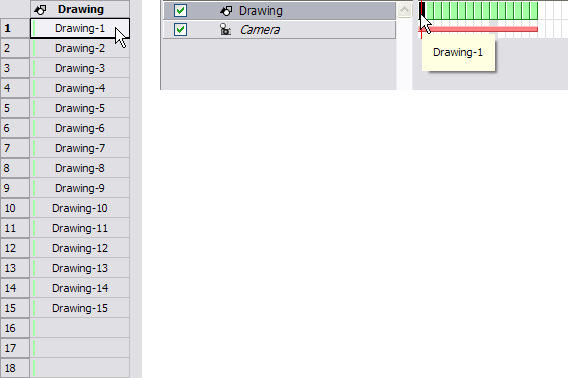
Decreasing the exposure removes one exposure from a selected cell. Repeating this action removes an extra cell every time. This is a quick way to reduce a drawing exposure and remove the exposed drawing.
To decrease the exposure:
|
1.
|
In the Timeline or Exposure Sheet view, select a cell. |
|
2.
|
Select Element > Cell > Remove Exposure or right-click the selected cell and select: |
|
‣
|
From the Timeline view, Exposure > Remove Exposure. |
|
‣
|
From the Exposure Sheet view, Remove Exposure. |
Deleting Exposure
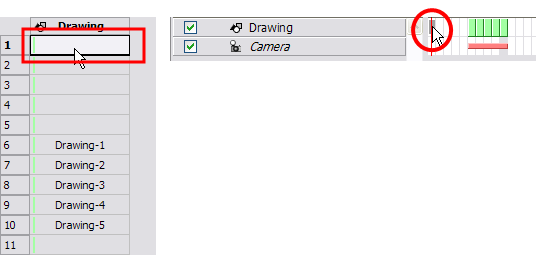
You can delete a drawing's exposure and blank cells in several simple ways. Note that when you delete a drawing's exposure from the Timeline or Exposure Sheet view, you are not deleting the actual drawing file. You can always bring it back by typing its name again in a cell.
Refer to the
Layer Concepts topic to learn more about the drawing concept.
To delete selected exposures:
|
1.
|
In the Timeline or Exposure Sheet view, select all the exposures you want to delete. |
|
2.
|
Press [Del] or right-click and select Delete Cell. |
To delete blank cells:
|
1.
|
In the Timeline or Exposure Sheet view, select a blank cell. |
|
2.
|
Select Element > Cell > Delete Blank Cell or right-click and select Delete Blank Cell or press [Shift] + [E]. |
Inserting Blank Cells
Use the Insert Blank Cell option to place an empty cell between other cells. This pushes down existing exposure.
To insert blank cells:
|
1.
|
In the Exposure Sheet or Timeline view, select the cell where you want to insert a blank cell. |

|
2.
|
Select Element > Cell > Insert Blank Cell or right-clickthe selected cell and select Insert Blank Cell or press [Shift] + [R]. |
The blank cell is inserted.

Setting the Exposure
You can easily increase or decrease the exposure for a selected cell range by using the Set Exposure options.
To use the Set Exposure options:
|
1.
|
In the Timeline or Exposure Sheet view, select the cell range that you want to set the exposure for. |

|
2.
|
In the top menu, select one of the following: |
|
•
|
Element > Cell > Set Exposure to 1
|
|
•
|
Element > Cell > Set Exposure to 2 |
|
•
|
Element > Cell > Set Exposure to 3 |
|
•
|
Element > Cell > Set Exposure
|
You can also select the frames in the Timeline view or in the Exposure Sheet and right-click to select Exposure > Set Desired.
|
‣
|
If you choose the Set Exposure option, the Set Exposure dialog box opens. |

|
‣
|
Type the number of frames you want each of the drawings to be displayed. |
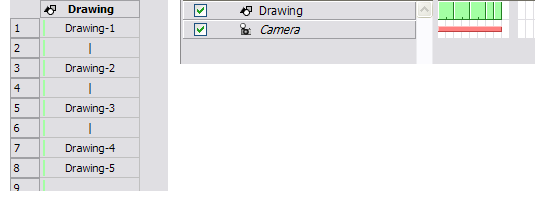
The new timing is displayed.
Filling a Selection with a Sequence
The Insert Cell option is used to create a numbered sequence over a selection.
To fill a selection with a sequence:
|
1.
|
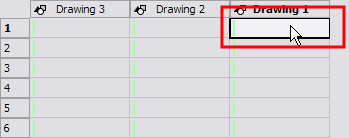
In the Exposure Sheet or Timeline view, select one cell or a cell range. |

|
2.
|
Select Element > Cell > Insert Cell. |
|
‣
|
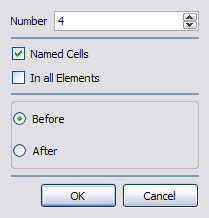
If you selected only one cell, the Insert Cell dialog box opens. |
|
‣
|
If you selected a frame range, the timing sequence appears. |
|
‣
|
If you select multiple cells across different layers (i.e. one cell on each layer), the behavior is that Insert Cell adds an extra row of blank cells before the selected cells. |
|
3.
|
In the Number field, type the number of cells. |
|
4.
|
If you want to insert cells with numbers in it, select the Named Cells option. If you want to insert blank cells, deselect the Named Cells option. |
|
5.
|
If you want to insert these new cells in all the layers, select the In All Elements option. If you want the new cells to be added only in the currently selected layer, deselect the In All Elements option.
|
Selecting In All Elements disables the Named Cells option and the cells added to all the elements are blank.
|
6.
|
If you want the new cells to be inserted before the currently selected cell, select the Before option. If you want the new cells to be inserted after the currently selected cell, select the After option. |

Creating Cycles
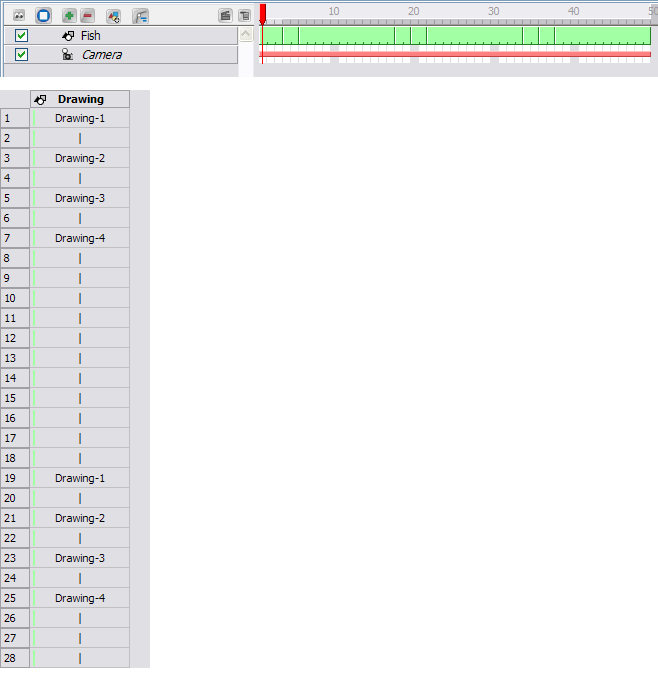
Once you have entered a series of drawings and exposures, you can create cycles out of them in several ways.
You can loop your drawings using the following commands:
The Create Cycle command is used to do simple cycles on your selected drawings. The Create Advanced Cycle command is used to create more complex cycles including reversed cycle.
For example, a bouncing ball cycle where the sequence of drawings goes backwards and forwards during the cycle (1-2-3-4-3-2-1).
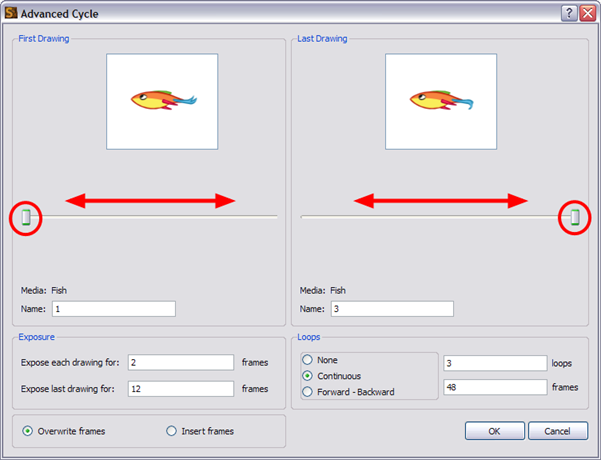
You can use the Advanced Cycle dialog box to automate the process of creating complex cycles.
When you cycle your selection, you are not duplicating the drawings. If you have a drawing named "1" in your cycle, when you modify that drawing, it is updated in all the cycles at once.
To use the Create Cycle command:
|
1.
|
In the Timeline or Exposure Sheet view, select the cell range to cycle. |

|
2.
|
Select Element > Cell > Create Cycle or right-click and select Create Cycle. |
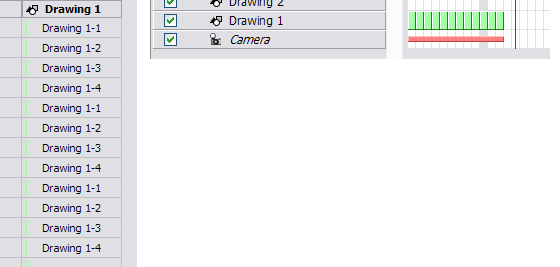
The Create Cycle dialog box opens.

|
3.
|
Enter the number of cycles you want, including the current selection. |
To use the Create Advanced Cycle command:
|
1.
|
Select the element where you want to create the cycle. |
|
2.
|
Select Element > Cell > Create Advanced Cycle. |
The Advanced Cycle dialog box opens.
|
3.
|
In the First Drawing and Last Drawing sections, select the drawings you want in the first and last position of the cycle. You can type the drawing name in the Name fields or use the slider to select the drawings. |
|
4.
|
In the Exposure section, set the number of cells you want each drawing to be exposed for during the cycle. You can set a different exposure for the last drawing in the cycle to stay on-screen by typing the number of cells you want it to be exposed in the Exposed Last Drawing For field. |
|
5.
|
In the Loops section, select the number of times you want the cycle to repeat. |
|
‣
|
None: If don't want the cycle to repeat. |
|
‣
|
Continuous: If you want the cycle to restart with the first drawing on each loop. For example, if you created 2 continuous loops of drawings 1-2-3, the resulting loop would be: 1-2-3-1-2-3. |
|
‣
|
Forward-Backward: If you want the loop to contain the specified drawings in continuous order (first to last) followed by a backward order (last to first). In the Forward-Backward loop the last frame is only displayed once. Every consecutive loop starts with the second frame so that the first frame is not repeated. For example, if you created 2 forward-backward loops with drawings 1-2-3, the resulting loop would be: 1-2-3-2-1-2-3-2-1. |
|
‣
|
Loops: Type the number of times you want the cycle to repeat. |
|
‣
|
Frames: Type the number of frames. By default this field is set to the number of number of frames. |
|
6.
|
Select how you want to insert the cycle. |
|
‣
|
Insert Frames: Adds the cycle in the current location. |
|
‣
|
Overwrite Frames: Deletes frames that overlap the cycle. |
