
Download Documentation
More Drawing Tools
Toon Boom Studio provides some other useful drawing tools:
Shape Tools
In Toon Boom Studio, you can use the shape tools to draw with circles, squares, or lines.
To draw with a shape tool:
|
1.
|
In the Timeline view, select the frame you want to draw in. |
|
2.
|
In the Drawing Tools toolbar, select a Shape tool: |
|
‣
|
 Ellipse tool: You can also select Tools > Drawing Tools > Ellipse or press [2] to cycle through the tools. Ellipse tool: You can also select Tools > Drawing Tools > Ellipse or press [2] to cycle through the tools. |
|
‣
|
 Rectangle tool: You can also select Tools > Drawing Tools > Rectangle or press [2] to cycle through the tools. Rectangle tool: You can also select Tools > Drawing Tools > Rectangle or press [2] to cycle through the tools. |
|
‣
|
 Line tool: You can also select Tools > Drawing Tools > Line or press [2] to cycle through the tools. Line tool: You can also select Tools > Drawing Tools > Line or press [2] to cycle through the tools. |
|
3.
|
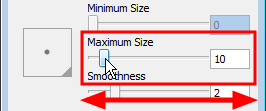
In the Pen view, set the size of your shape's line using the Maximum slider. |
|
4.
|
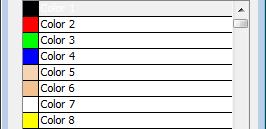
Change the colour of the shape's line using the colour swatches in the Colour view. |
|
5.
|
In the Drawing or Camera view, click and drag to draw your shape. |

|
‣
|
Hold down [Shift] to lock the rectangle or ellipse ratio to 1:1to create a square or circle. |
|
‣
|
Hold down [Alt] to draw the rectangle or ellipse from its centre. |
|
‣
|
Hold down [Shift] to snap the line at 15 degree increments. |
|
‣
|
Hold down [Alt] to connect the starting point of the line you are drawing to the ending point of the previous one using the Line tool. |
Related Topics
 Polyline Tool
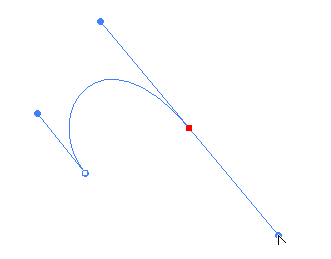
The Polyline tool lets you draw shapes, and like the Pencil and Shape tools, it is a central vector type of line. To form a shape, click to add points. Repeat until the shape is formed. To make curves, click and without releasing the mouse, drag to pull the handle in the desired direction before adding the next point.
To use the Polyline tool:
|
1.
|
In the Timeline view, select the frame in which you want to draw a polyline shape. |
|
2.
|
Do one of the following: |
|
‣
|
In Drawing Tools toolbar, select the Polyline  tool. tool. |
|
‣
|
Select Tools > Drawing Tools > Polyline. |
|
‣
|
Press [2] to cycle through the tools. |
|
3.
|
In the Pen view, set the size of the polyline using the Maximum slider. |

|
4.
|
You can change the colour of the polyline using the colour swatches in the Colour view. |

|
5.
|
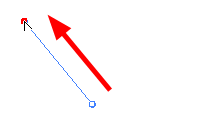
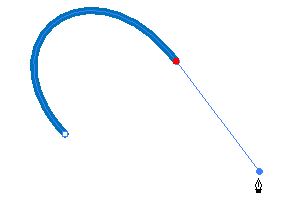
In the Drawing or Camera view, click and drag to create a starting point and a Bezier handle to shape your line. |
|
‣
|
Press [Alt] to pull only one handle, instead of two. |
|
‣
|
Press [Shift] to lock the handles to 45°, 90°, or 180°. |
|
6.
|
Click again in a new area and drag to create a second point and Bezier handle. |
|
7.
|
Repeat the previous step until the shape is completed. |
|
8.
|
To close a shape so that there are no gaps: |
|
‣
|
Place your pointer over a point and click.
An "o" appears when you add a point that will close a shape. |

|
‣
|
Place your pointer over any location on the shape you are drawing and click.
A plus sign (+) appears when your pointer is over a spot you can use to close the shape. |

|
9.
|
To remove a control point on the line, press [Shift] and click on the point.
A dash (-) appears when your pointer is over a point to delete. |

Contour Editor Tool
The Contour Editor tool lets you correct line shapes and modify part of a colour zone. If a line is too thin or has a gap in it, you can modify and correct it with this tool. This tool can also be used to create elaborate shapes from a simple one.
The Contour Editor tool displays the vector points around a shape and the central vector point in a pencil line. Pulling or Pushing on these points adjusts a brush line's thickness or a central vector shape.
To use the Contour Editor tool:
|
1.
|
Do one of the following: |
|
‣
|
In the Drawing Tools toolbar, select the Contour Editor  tool. tool. |
|
‣
|
Select Tools > Drawing Tools > Contour Editor. |
|
‣
|
Press [1] to cycle through the tools. |
|
2.
|
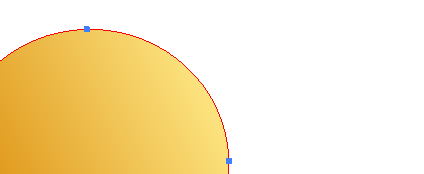
In the Drawing or Camera view, click on the shape's line or on a pencil line to edit it. |
|
3.
|
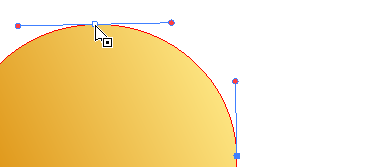
Select one point or several points by clicking on them or circling around them. |
|
4.
|
To modify the shape, you can: |
|
‣
|
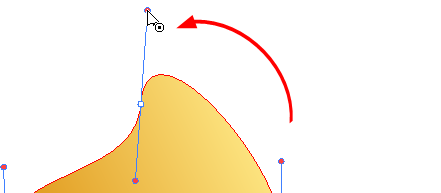
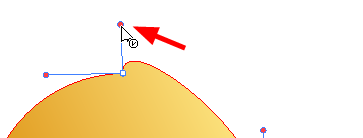
Pull on the Bezier handle. Both point's handles will move as one. |
|
‣
|
Hold down [Alt] (Windows) or [⌘] (Mac OS X) and pull on one of the Bezier handles. The point's handles will move independently from the other one. |
|
‣
|
Move the selected points to a new area. |

|
‣
|
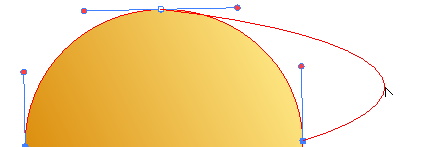
Pull directly on the line between two points. No selection is necessary. |
|
‣
|
Hold down [Ctrl] (Windows) or [Alt] (Mac OS X) and click on the line to add a new control point. |

|
‣
|
Select a control point and press [Del] to delete it. |

Snap to Contour
When using the Contour Editor tool, you can snap the selected control point to the vector line.
To snap a control point to the vector line:
|
1.
|
In the Drawing Tools toolbar, select the Contour Editor tool. |
|
2.
|
Select Tools > Snap to Contour. |
|
3.
|
Select a control point and as you move it, it is attracted to the contour lines. Releasing the point on the line snaps it to it. |

Perspective Tool
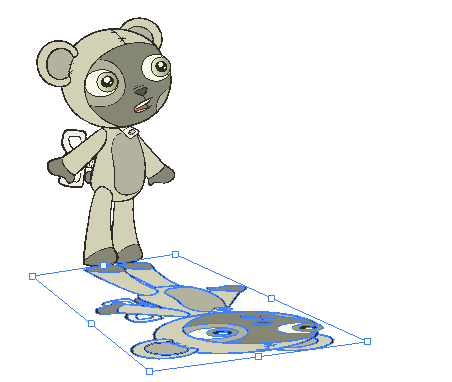
The Perspective tool lets you deform a selection and alter its perspective.
To deform a drawing object:
|
1.
|
Do one of the following: |
|
‣
|
In the Drawing Tools toolbar, select the Perspective  tool. tool. |
|
‣
|
Select Tools > Drawing Tools > Perspective |
|
‣
|
Press [1] to cycle through the tools. |
|
2.
|
In the Drawing or Camera view, select the drawing objects you want to deform. |
|
3.
|
Click and drag the bounding box's anchored points to deform it. |
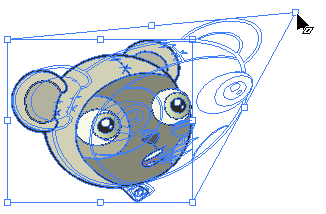
You can temporarily switch to the Perspective tool by holding
[Ctrl] (Windows) or [Alt] (Mac OS X) while using the Select tool—see
Selecting Drawing Objects .
Cutter Tool
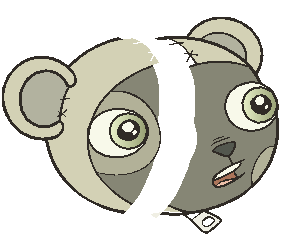
The Cutter tool lets you cut a part of your drawing and separate it from the rest. A vector stroke is created that lets you split the shape. You can show the vector strokes which make up your drawing and visualize the vector line drawn by the Cutter tool as you draw it.
To use the Cutter tool:
|
1.
|
Do one of the following: |
|
‣
|
In the Drawing Tools toolbar, select the Cutter  tool. tool. |
|
‣
|
Select Tools > Drawing Tools > Cutter. |
|
‣
|
Press [4] to cycle through the tools. |
|
2.
|
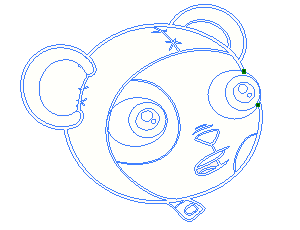
Select View > Show Strokes or press [K] to display the vector lines composing your drawing. |
|
3.
|
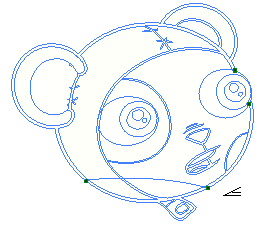
In the Drawing or Camera view, draw the separation line on your drawing. |
|
4.
|
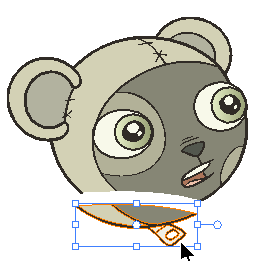
Once you split the drawing, you can use the Select  tool to select the separated part and reposition or transform it—see Selecting Drawing Objects . tool to select the separated part and reposition or transform it—see Selecting Drawing Objects . |
Scissor Tool
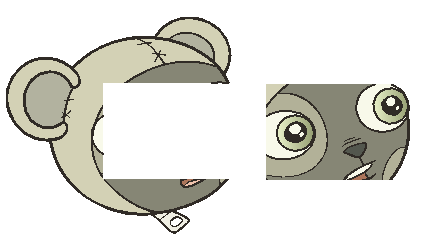
The Scissor tool lets you cut a selection inside a drawing object, and reposition or transform it right-away without switching tools.
To cut parts from a drawing using the Scissor tool:
|
1.
|
Do one of the following: |
|
‣
|
In the Drawing Tools toolbar, select the Scissor  tool. tool. |
|
‣
|
Select Tools > Drawing Tools > Scissor. |
|
‣
|
Press [4] to cycle through the tools. |
|
2.
|
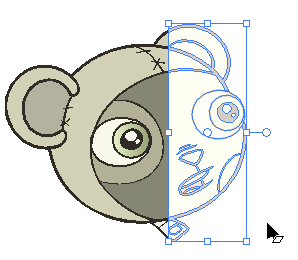
In the Drawing or Camera view, click and drag to create a square selection to cut inside your drawing. You can hold [Alt] (Windows) or [⌘] (Mac OS X) to make a lasso selection. |
|
3.
|
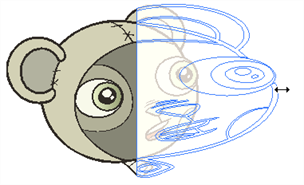
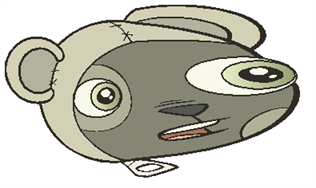
Use the Scissor tool to move, scale, rotate, or translate the drawing piece. If you deselect the cut piece or the Scissor tool, the cut area will disappear and the object will remain whole. |
 Ellipse tool: You can also select Tools > Drawing Tools > Ellipse or press [2] to cycle through the tools.
  Rectangle tool: You can also select Tools > Drawing Tools > Rectangle or press [2] to cycle through the tools.
 Line tool: You can also select Tools > Drawing Tools > Line or press [2] to cycle through the tools.


 Polyline Tool
 tool.
tool. 


 tool to reshape the line—see Contour Editor Tool.
 tool.
tool. 


 tool.
tool. 

 tool.
tool. 

 tool to select the separated part and reposition or transform it—see Selecting Drawing Objects .

 tool.
tool. 

