In Toon Boom Studio, there are several different views and toolbars. In this section, you will learn about the main ones that are used frequently. All others are described in context in other chapters.
In this topic, you will learn about the followings:
| • | Camera View |
| • | Timeline View |
| • | Drawing Tools Toolbar |
| • | Animation Tools Toolbar |
| • | Timeline View Toolbar |
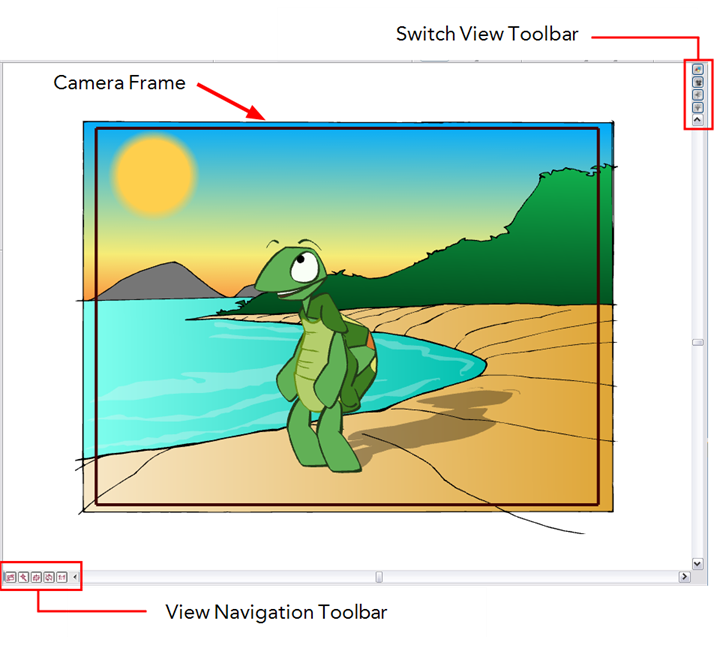
The Camera view is the main view you use to create your artwork and animate it. In the Camera view, you find the camera frame in which you position elements to be part of your final movie. Anything outside the camera frame does not appear in your final export.
In the Camera view, you also find two toolbars:
| • | View Navigation Toolbar |
| • | Switch View Toolbar |
In the View Navigation Toolbar, you will find five buttons allowing you to zoom, pan and rotate the Camera view.
| Icon | Tool Name | Description |
Shortcut |

|
Switch between Two Views | Switches between the two last zoom levels you used. For example, if you zoom in on a drawing and then zoom out to a global view, clicking this button switches between the close up and the global zoom levels. | [B] |

|
Reset Zoom and Pan | Resets any zoom, rotation and pan action you did while navigating in the Camera view working area. The camera frame will be re-centred in the Camera view. Note that it does not reset any positioning you may have done on your drawings and images. | [Shift] + [V] |

|
Recentre the Active View | Centres the camera frame in the Camera view. Any rotation or zoom action will remain the same. | [Shift] + [Space] |

|
Reset the Rotation of the Window | Resets any rotation you did on the Camera view working area. The pan and zoom levels will remain the same. Note that it does not reset any positioning you may have done on your drawings and images. | [Shift] + [C] |

|
Reset the Zoom Level of the Window |
Resets any zoom action you did on the Camera view working area. The pan and rotation will remain the same. Note that it does not reset any positioning you may have done on your drawings and images. | [Shift] + [Z] |
In the Switch View toolbar, there are four buttons allowing you to toggle between the following views:
| • |
 Drawing View Drawing View |
| • |
 Camera View Camera View |
| • |
 Side View Side View |
| • |
 Top View Top View |
This toolbar is useful when switching between these views to save room in your workspace. You can also have these views separately by selecting them in the Window menu.
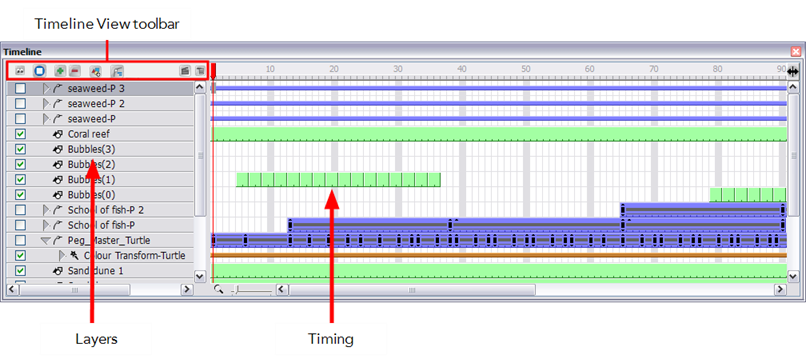
The Timeline view is the main view used to create layers, set your timing and create simple effects.
The Timeline view is divided in three sections:
| • | Timeline View Toolbar |
| • | Layers Section |
| • | Timing Section |
The Timeline View toolbar is composed of eight different buttons allowing you to add, enable and disable layers as well as switching between the different scenes of a same project.
| Icon | Name of tool | Description |

|
Show/Hide All | Switches between showing and hiding all layers in the Timeline view. |

|
Solo Mode | Lets you see only the currently selected layer, as well as the layer that was selected when you enabled the Solo Mode. This lets you use it as a reference without having to disable all the other layers. |

|
Add New Elements | Adds a new element (layer) to the timeline. When you click this button, the New Element dialog box opens and lets you choose which type of element you want, how many, and how you want to name it |

|
Delete Element |
Deletes the selected layers in the timeline. Note: If you delete a layer with other layers connected to it, all the layers will be deleted at the same time. Also, if you only have one layer in the timeline, you will not be able to delete it. The Toon Boom Studio Timeline view must always have at least one drawing layer in it. |

|
Add Drawing Element |
Adds a drawing layer in the Timeline view. You can then double-click the new drawing layer to rename it. |

|
Add Parent Peg |
Adds a peg layer in the Timeline view and connects it to any selected layer. You can then double-click the new peg layer to rename it. |

|
Scene Menu | Cycles through the different scenes in your project. |

|
Timeline View Menu | Displays a menu of commands related only to the Timeline view. |

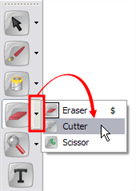
The Drawing Tools toolbar contains all of the different tools you need to draw and design your artwork. Some extra commands are located in the top Tools menu.
Some of the buttons in the toolbar have a black drop-down arrow, this lets you open a menu with extra drawing tools.

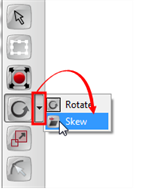
The Animation Tools toolbar contains all of the different tools you need to position and animate your layers.
Some of the buttons in the toolbar have a black drop-down arrow, this lets you open a menu with extra Animation tools.
You can play back animation and sound by using the Interactive Playback toolbar or the Play menu (in top menu).
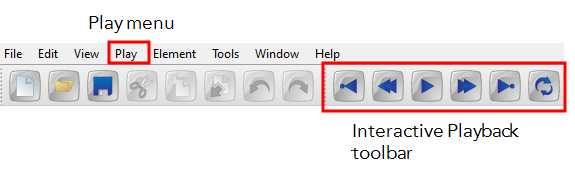
| Icon | Tool Name | Description | Play menu | Shortcut |
  |
Play/Stop | Plays or stops playback | Play > Play or Play > Stop | [P] |

|
Loop | Repeats playback indefinitely | Play > Loop | |

|
Previous Frame | Go to the previous frame | Play > Previous Frame | [A] |

|
Next Frame | Go to the next frame | Play > Next Frame | [S] |

|
First Frame | Go to the first frame | Play > First Frame | |

|
Last Frame | Go to the last frame | Play > Last Frame |
Select any of the following from the top menu Play heading:
| • | Frame Rate: Lets you choose the playback speed of your animation. By default, the option is set to use the same playback speed you set in your Animation Properties when you created the project. In the drop-down menu, you can change it to 1, 2, 12, 24 or 30 frame per second. |
| • | Force Frame Rate: Forces Toon Boom Studio to play the right playback speed. If a scene is too heavy to be played back in real time, Toon Boom Studio drops images rather than playing back all images at a slower pace. |
| • | Playback Range: Specifies the range of frames to be played back. By default, the option is set to Automatic Fit allowing you to play the full scene length. If you set the option to Free, black markers appear in the Timeline view. You can drag these markers to the first and last frames you want to be played back. |

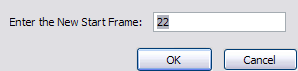
You can also select Play > Playback Range > Change the Playback Start Frame to type the number of the first frame of the playback range.
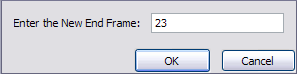
You can also select Play > Playback Range > Change the Playback End Frame to type the number of the last frame of the playback range.
| • | Preview Movie: Exports a QuickTime movie of the entire animation project including all its scenes. You can press [Ctrl] + [Shift] + [Enter] (Windows) or [⌘] + [Shift] + [Enter] (Mac OS X). |
| • | Preview Scene: Exports a QuickTime movie of your current scene, ignoring the other scenes in the project. You can press [Ctrl] + [Enter] (Windows) or [⌘] + [Enter] (Mac OS X). |
| • | Preview Exposure Sheet: Exports a QuickTime movie of the drawings in the exposure sheet of the current scene only. This type of render ignores all the motion path and scene planning done in the Camera view. You can press [Ctrl] + [Alt] + [Enter] (Windows) or [⌘] + [Alt] + [Enter] (Mac OS X). |
| • | Preview Exposure Sheet Selection: Exports a QuickTime movie of the selected drawings in the exposure sheet of the current scene only. This type of render ignores all the motion path and scene setup done in the Camera view. You can press [Shift] + [Enter]. |
| • | Turn Off/On Sound Playback: Enables or disables the sound while playing back the scene. |
| • | Turn Off/On Sound Scrubbing: Enables or disables the sound scrubbing effect while changing frames in the Timeline view. The sound scrubbing option is mainly used to do lip-sync decoding. |
| • | Quick Preview: Exports a Flash SWF movie of your current scene ignoring the other scenes in the project. You can press [Enter]. |